Are you thinking about taking your online school or tutoring practice to the next level? Creating your own app might be the key! In our digital era, a dedicated app can not only transform your teaching methods and enhance student learning but also significantly boost your business. With an app, you can reach more students, offer a more engaging learning experience, and set your services apart from the competition. But don’t worry, it’s not as complicated as it sounds. In this article, we’ll walk you through the basics of how to create an app tailored to your educational needs. No need to be a tech expert – we make it easy for everyone.
Benefits of Creating Your Own App
- Boost your brand: Stand out from the crowd. It makes your school look professional and dedicated.
- Customize the learning experience: An app enables you to customize lessons to meet each student’s unique needs, a feature that standard social media can’t provide. It neatly organizes courses and ensures safety, thereby enhancing the overall teaching and learning experience.
- Secure and private: Protect your students’ data. An app offers better privacy and security controls than social platforms.
- All-in-one learning space: Bring everything together. Courses, notes, and discussions are all in one organized place.
- Stay connected with notifications: Never miss a beat. Reminders for classes and assignments keep everyone on track.
- Build a learning community: Create a sense of belonging. Your app can be a special place for students and teachers to connect.
Step-by-Step Guide: Creating Your Educational App
Welcome to our easy guide for creating your educational app. We’ll start with basic steps like picking a name and colors, and then explain more about the app’s features. Don’t worry, we’ll make it simple and clear every step of the way!
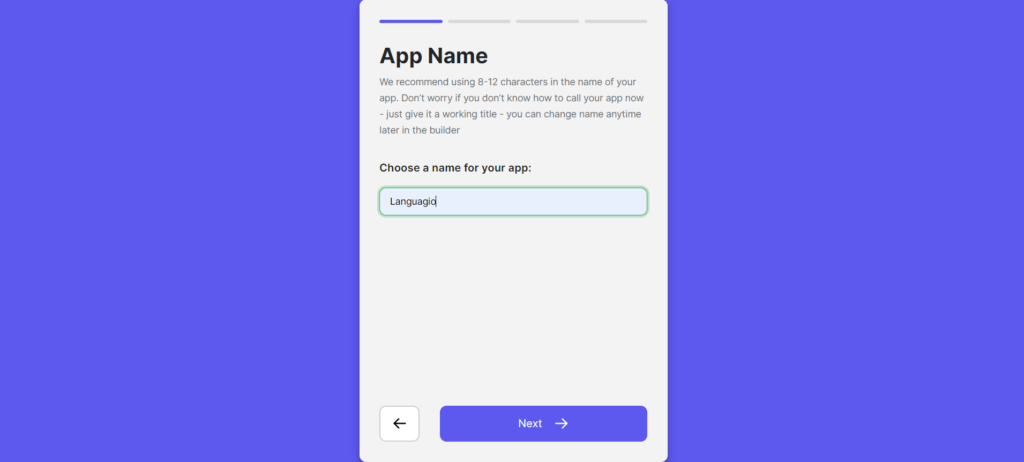
Step 1: Choosing the perfect name. The journey to creating your educational app begins with a crucial step: selecting the right name. Choose a name that resonates with your school’s identity and appeals to your target audience. As you move through each stage of the creation process, helpful tooltips will provide concise and informative guidance, ensuring you’re well-supported every step of the way.
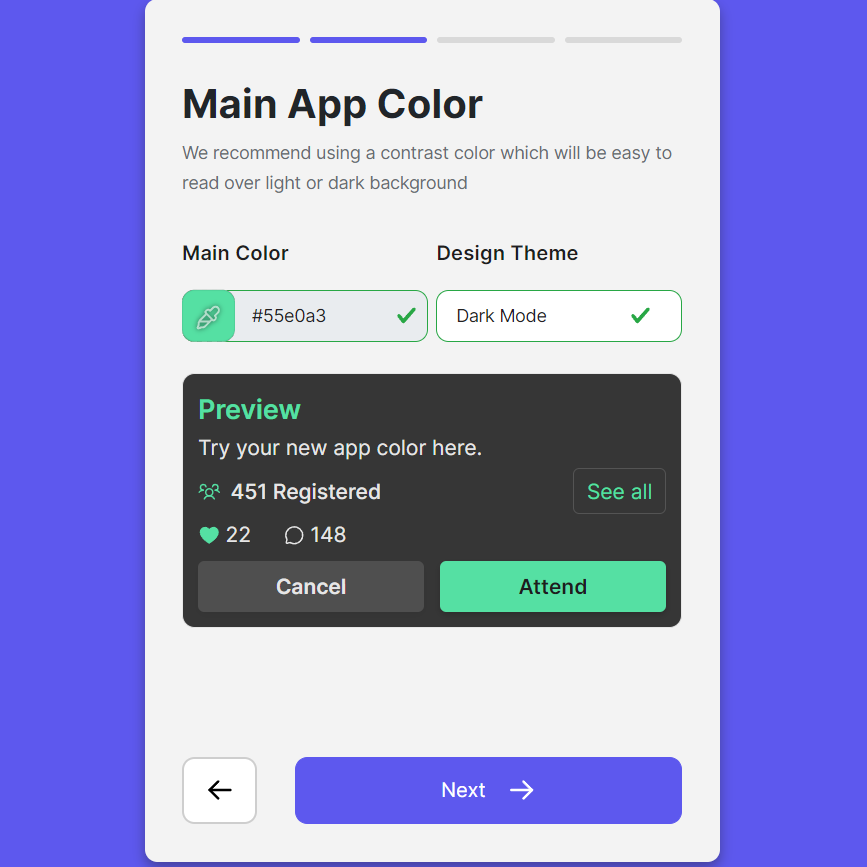
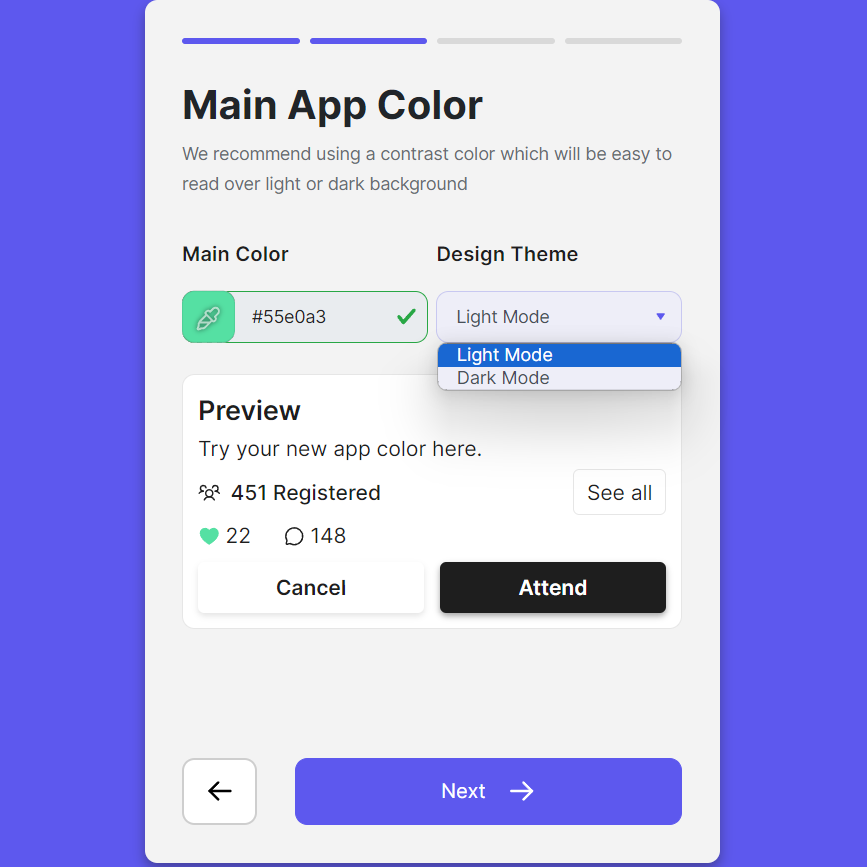
Step 2: Selecting colors and theme: Next up, choose the main color for your app. This color will be the highlight of your app’s look, setting the mood and feel. Also, pick between a light or dark theme. Both have their unique appeal, and you can easily preview them to see which one fits your app best.
Step 3: Upload your logo or choose an emoji. Now, let’s add a logo to your app. If you have one, great! Just upload it. But if you don’t, no worries. We have a collection of emojis you can use instead. These emojis can serve as a temporary logo until you get your own.
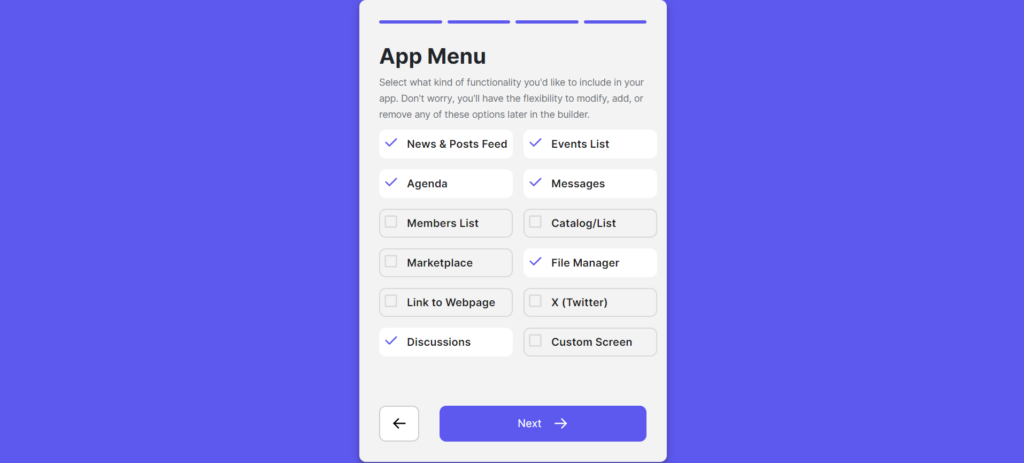
Step 4: Selecting your menu items. Next, let’s pick the features you want in your app. Choose from options like discussions, events, and more. Don’t worry about getting it perfect right now. The great thing is, you can always come back and change these later. Whether you want to add new features or remove ones you don’t need, managing your menu items is flexible.
Congratulations! The basic setup of your app is now ready. But that’s just the beginning. To help you make the most of your app, you’ll receive short, clear tips on how to use and manage it effectively. We’ll guide you on adjusting menu items, adding demo content before you have real material, and navigating the app builder. Each tip is designed to be straightforward and easy to follow, ensuring you can confidently enhance and personalize your app as you go.
Key Functionalities for Your School or Tutoring App
- News Feed: Stay updated with the latest announcements and updates.
- Agenda: Organize and view class schedules, deadlines, and important dates.
- Events: Ideal for workshops, speaking clubs, or special class sessions.
- Messages: Facilitate direct communication between teachers and students or among students themselves.
- Discussions: Encourage interaction and collaborative learning.
- File Manager: A central place to store and access educational resources like notes, reading materials, and assignments. This ensures that students have easy and consistent access to the materials they need, whenever they need them.
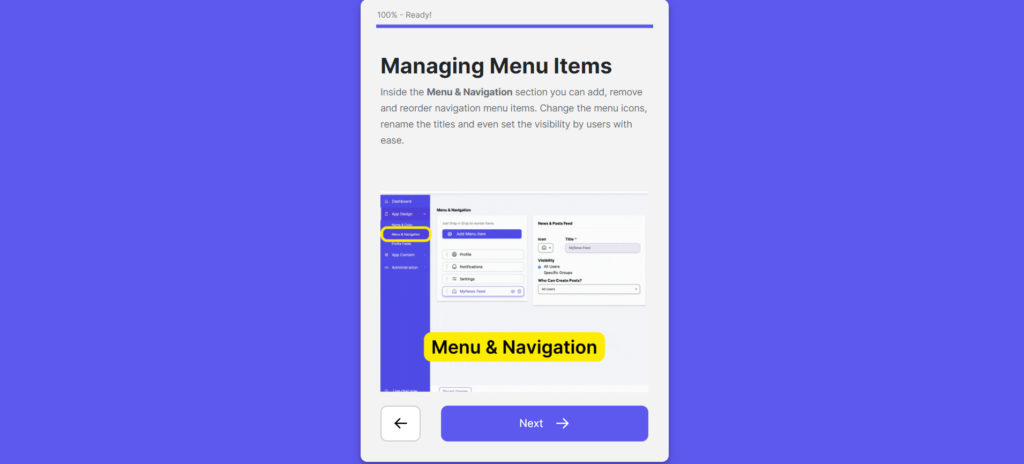
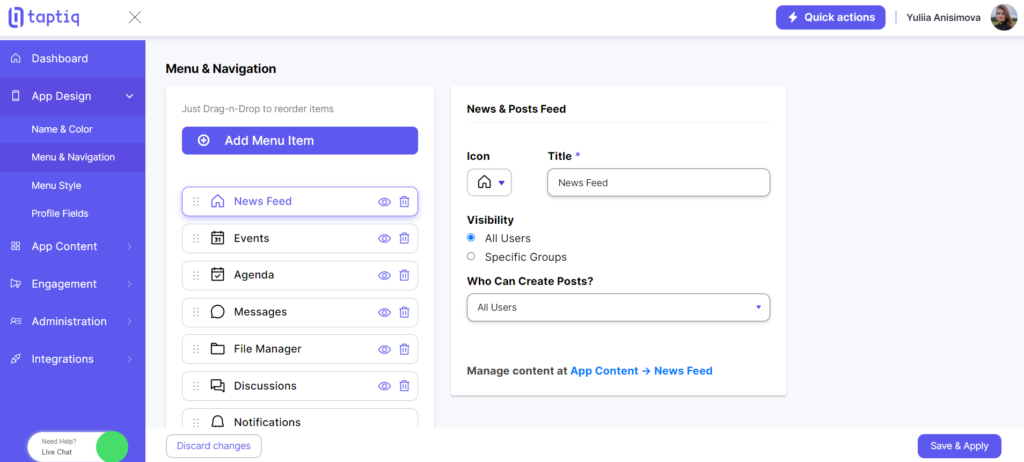
Before we explore each feature in detail, let’s talk about how you can manage your app’s menu. To do this, simply navigate to ‘App Design’ and then ‘Menu & Navigation’ in your app builder. Here, you can easily add new features, remove ones you no longer need, or even change the titles of existing menu items.
News Feed
A news feed is essential for keeping both students and teachers informed about recent happenings and important information.
Creating a New Post in the News Feed
- Go to ‘App Content’ in the sidebar and select ‘News Feed’ from the list.
- You’ll see a list of all the posts that have been created so far.
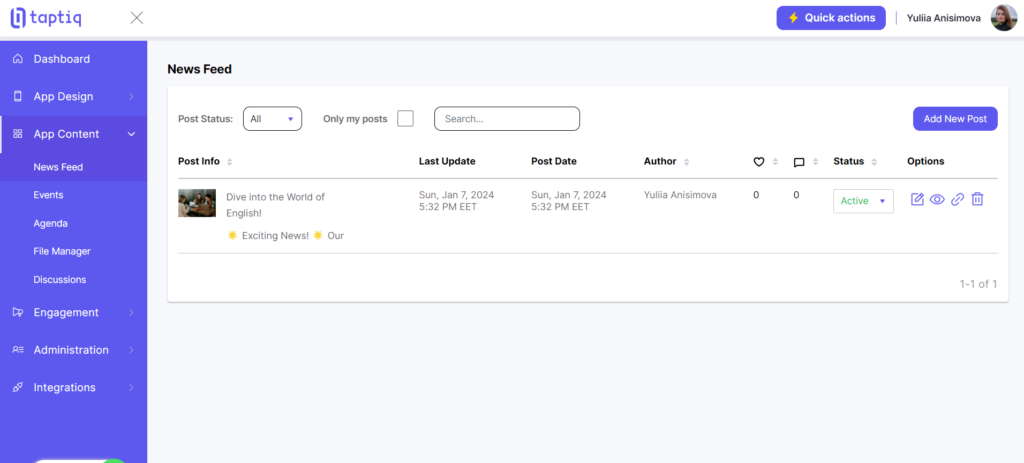
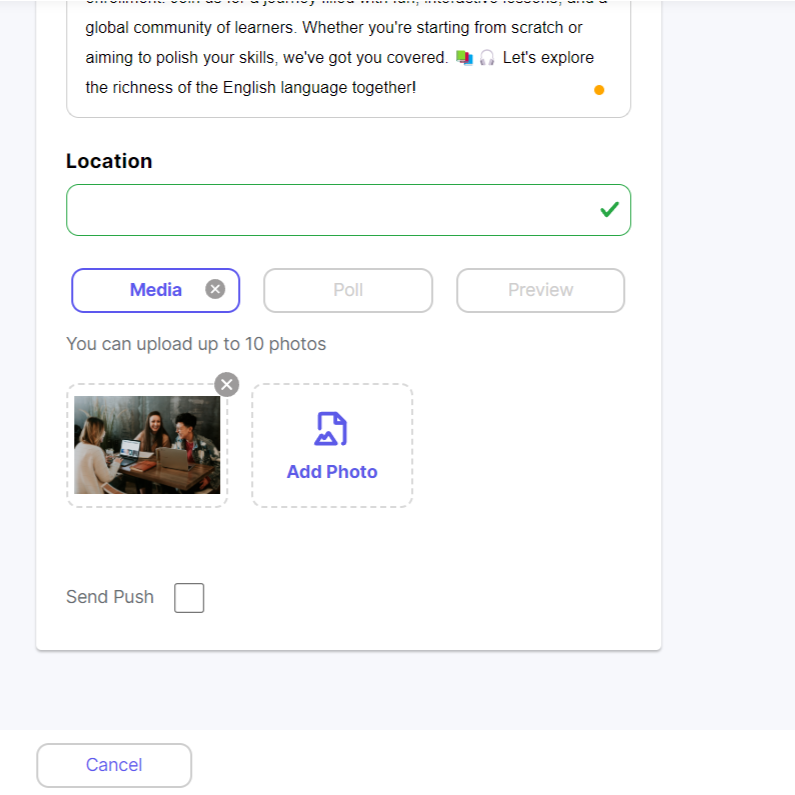
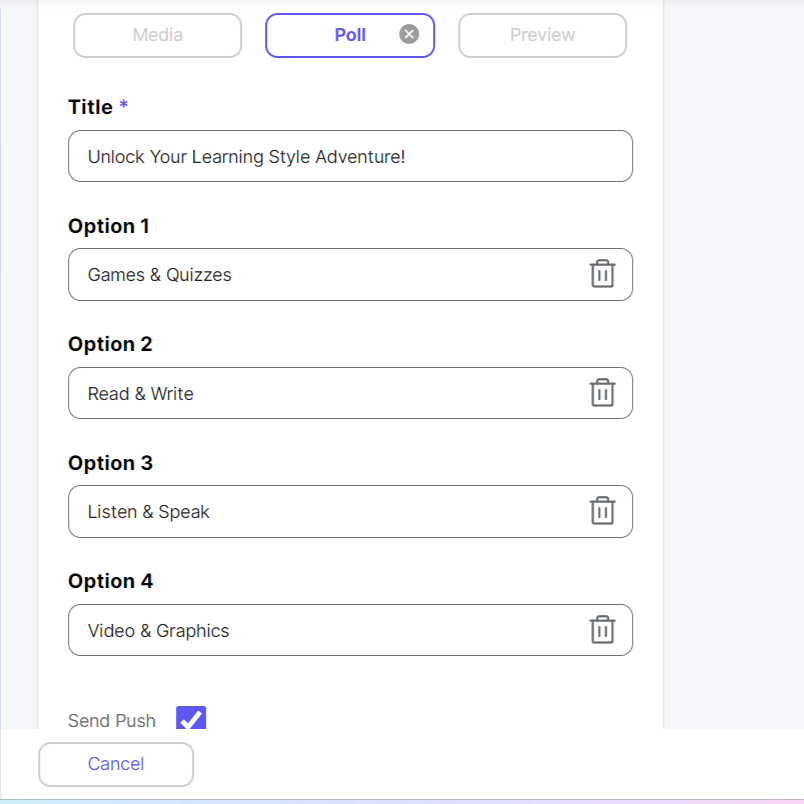
- Click on ‘Add New Post‘ to open the page for creating new content. Here, you can write your post. Feel free to add an image or create a poll to engage your audience. Remember, if you’re adding a poll, the options should be 25 characters maximum.
After you make a new post for the News Feed, you can easily tell your users about it. Just choose the ‘Send Push’ option before publishing. Let’s look at how to do this.
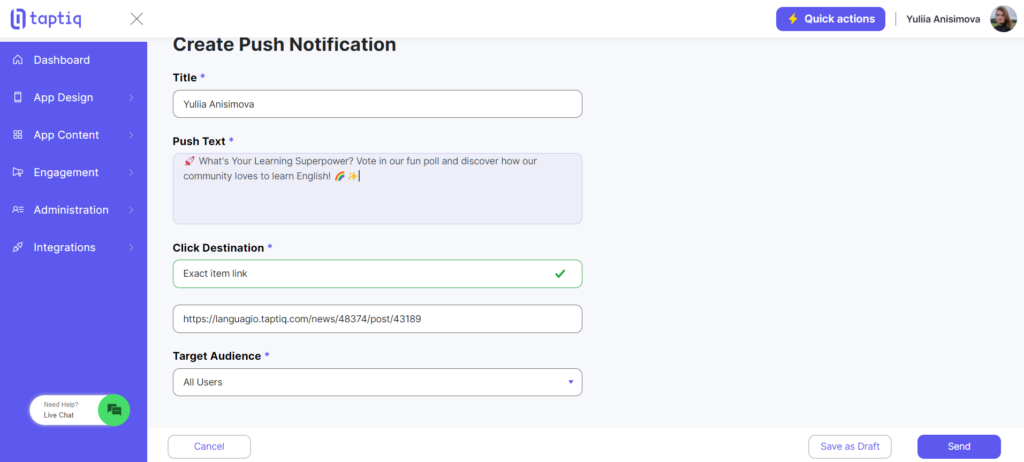
- Option to send notification: As you’re about to publish your post, check the ‘Send Push‘ box to start notifying your users.

- Customize your notification: You’ll then go to a page to craft your notification message, where you can add a title and the content of the alert.
- Selecting target audience: Decide who should receive this notification by using the ‘Target Audience’ feature.
- Provide a redirect link: Optionally, include a link in your notification to direct users to a specific page.
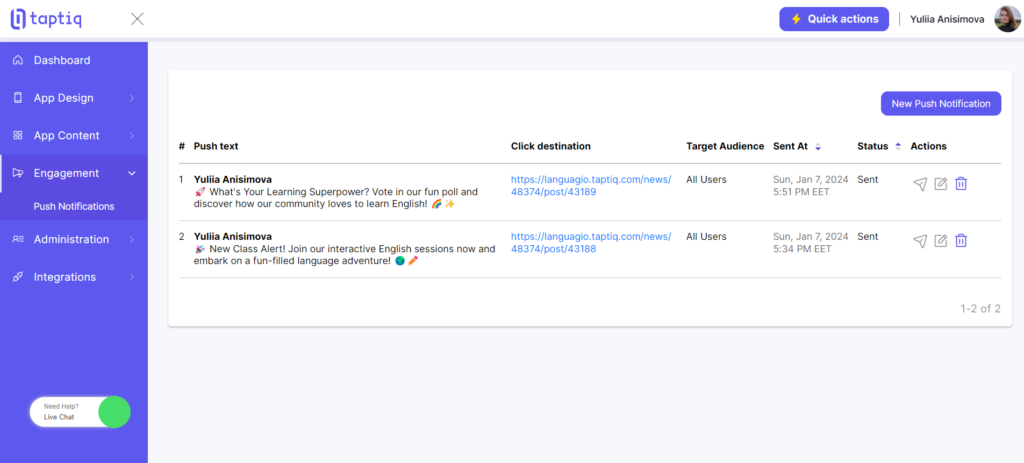
- Managing notifications: For an overview of all your notifications or to create new ones, head over to ‘Engagement’ and then select ‘Push Notifications’ in the app builder.
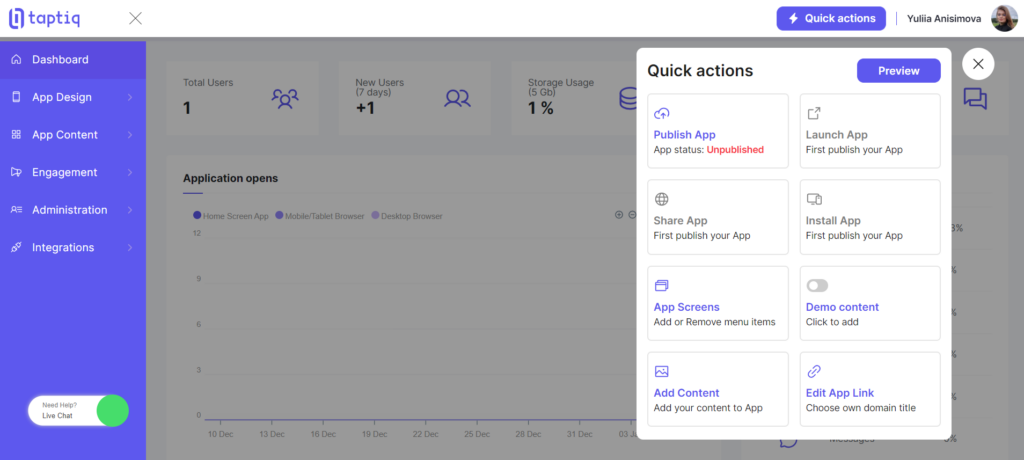
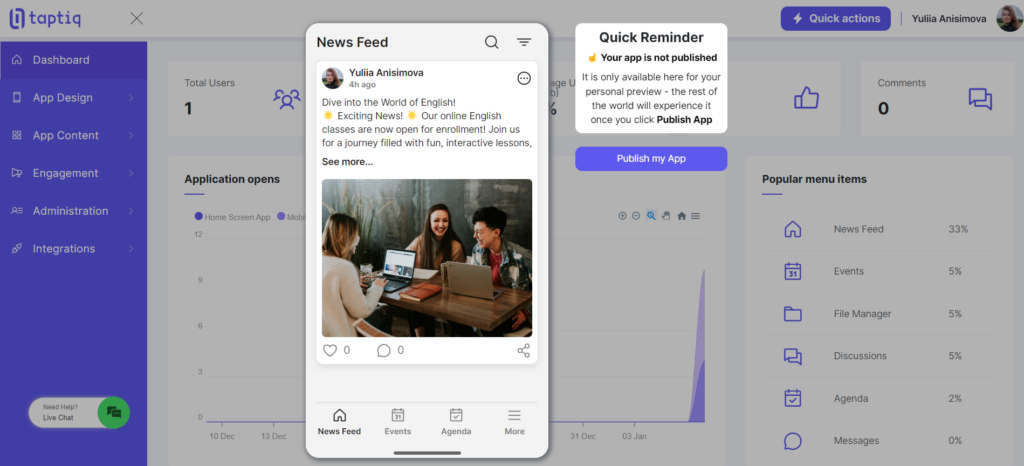
Want to see how your app looks so far? It’s easy! Just click on ‘Quick actions’ in the top menu. Then, press the ‘Preview’ button. This lets you see your app in action, anytime you need.
Agenda
A clear, easy-to-access agenda helps students manage their time and stay on top of their commitments.
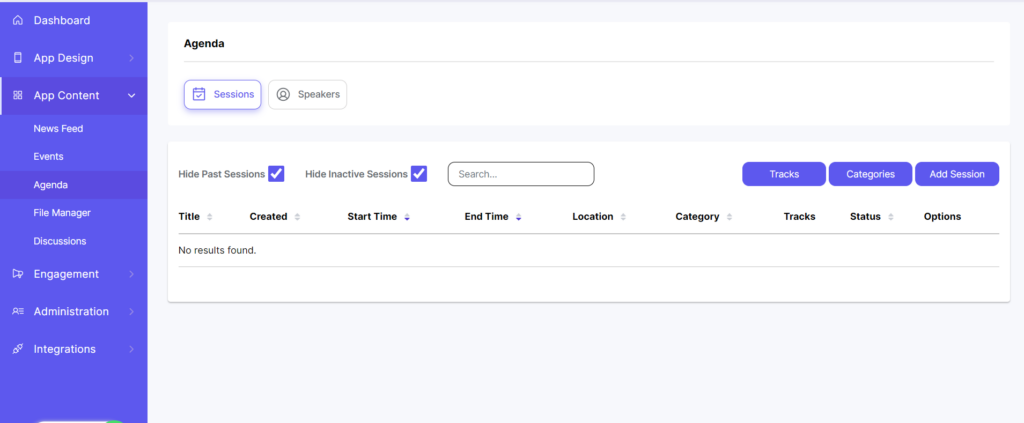
As we look at the Agenda interface, you’ll see ‘Tracks’ and ‘Categories.’ These help organize your app, but they’re different. Let’s quickly go over how tracks and categories vary and why both are important for your app.
Tracks:
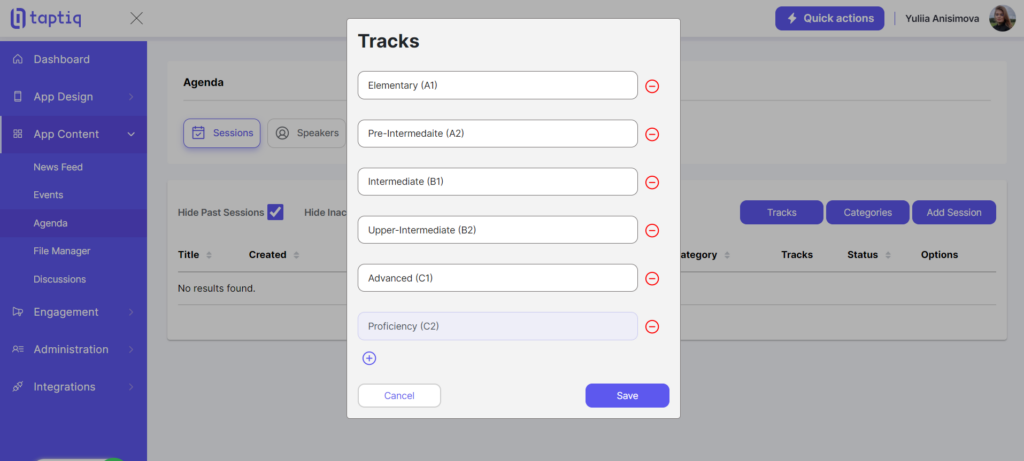
- Definition: Tracks are usually defined as specific learning paths or programs that are designed with a particular goal or audience in mind.
- Examples: Tracks might include proficiency levels (A1, B2, etc.), age groups (children, teenagers, adults), or specific focuses (Business English, Exam Preparation).
- Purpose: The main purpose of tracks is to guide students through a structured learning journey tailored to their needs or goals.
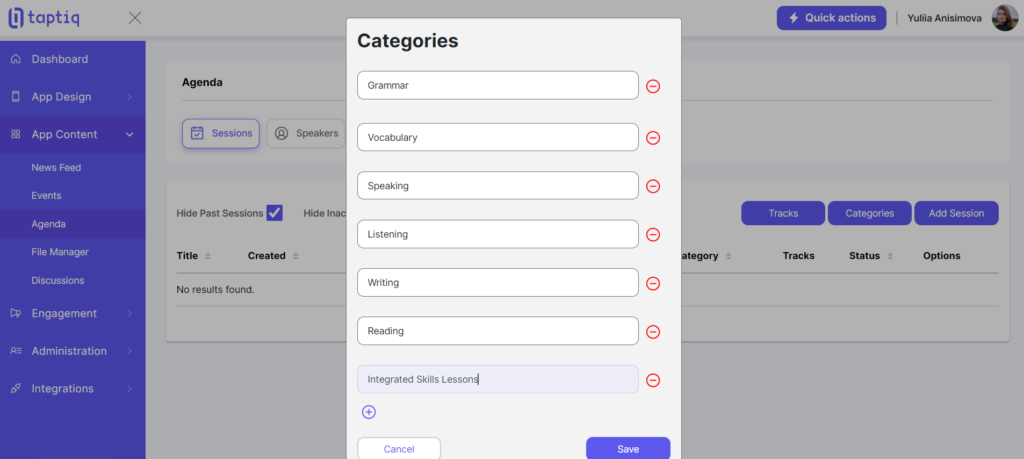
Categories:
- Definition: Categories are broader classifications of content within the app. They help organize the material or resources based on type or subject matter.
- Examples: Categories can include Grammar, Vocabulary, Listening Exercises, Speaking Practice, Reading Comprehension, Cultural Insights, etc.
- Purpose: Categories are used for organizing and segmenting content to make it easily accessible and navigable. They help students quickly find specific types of learning resources.
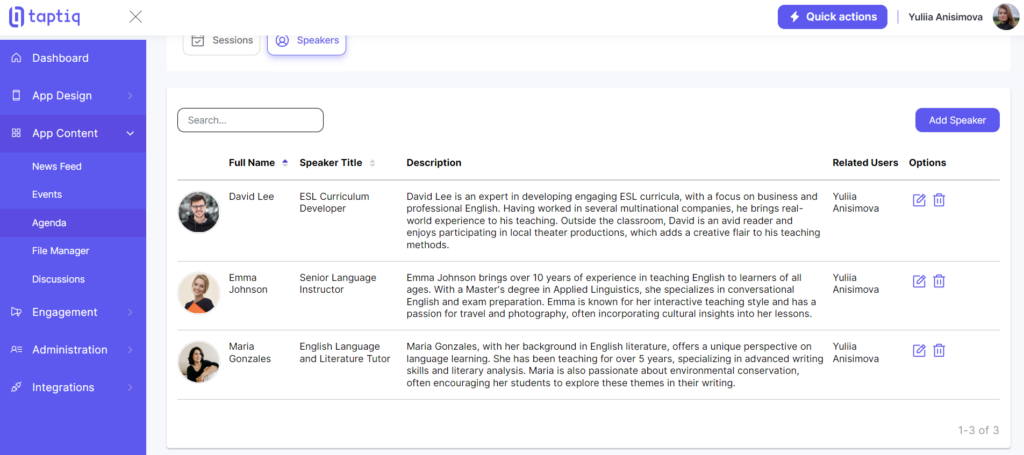
Now that we’ve covered the difference between tracks and categories, let’s move on to another important aspect of your app: setting up teacher profiles. In our Agenda, we use the ‘Speakers’ feature for this purpose. Let’s see how you can add and manage teacher profiles, enhancing the organization and personalization of your educational app.
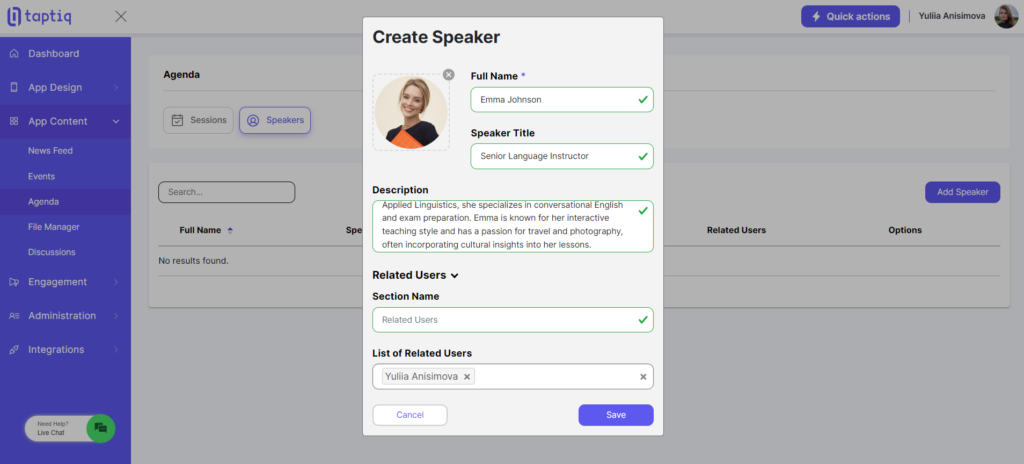
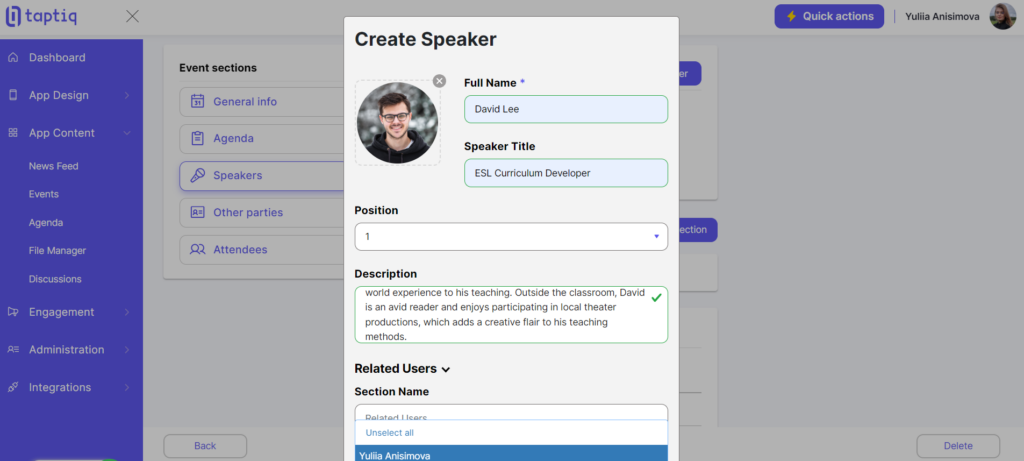
- Click on the ‘Add Speaker’ button within the ‘Speakers’ section of your Agenda.
- A form will appear where you should enter the teacher’s details (name, title, description).
- If you wish to assign specific students to this teacher, use the ‘List of Related Users’ option. This helps in creating a more focused and efficient learning environment.
After we have our teachers set up, let’s create a lesson. This is done in the ‘Sessions’ section. Follow these steps:
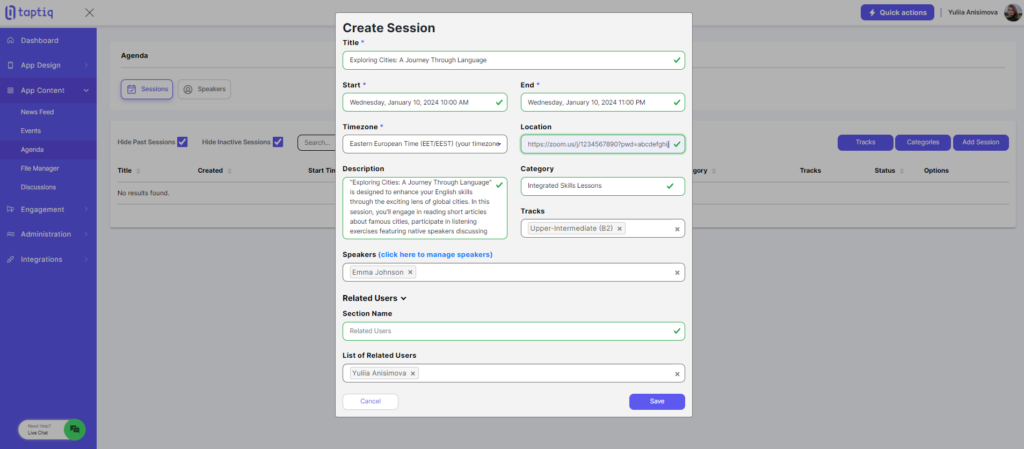
- Navigate to ‘Session’ in your app’s menu. Click on ‘Add Session’ to begin creating a new lesson.
- A form will appear for you to enter information about the lesson (title, description, date and time). In the ‘Location’ field, you can paste a link, such as a Zoom conference link, where students can join the online lesson.
- Under ‘Tracks’, select the English level (e.g., Beginner, Intermediate, Advanced) that this lesson is intended for.
- In ‘Categories’, pick the type of lesson you’re conducting (e.g., Grammar, Vocabulary, Integrated Skills).
- Use the ‘Related Users’ section to mention students for whom this lesson is recommended or to assign specific students to this session.
- Once all details are entered, review everything, then save and publish your session.
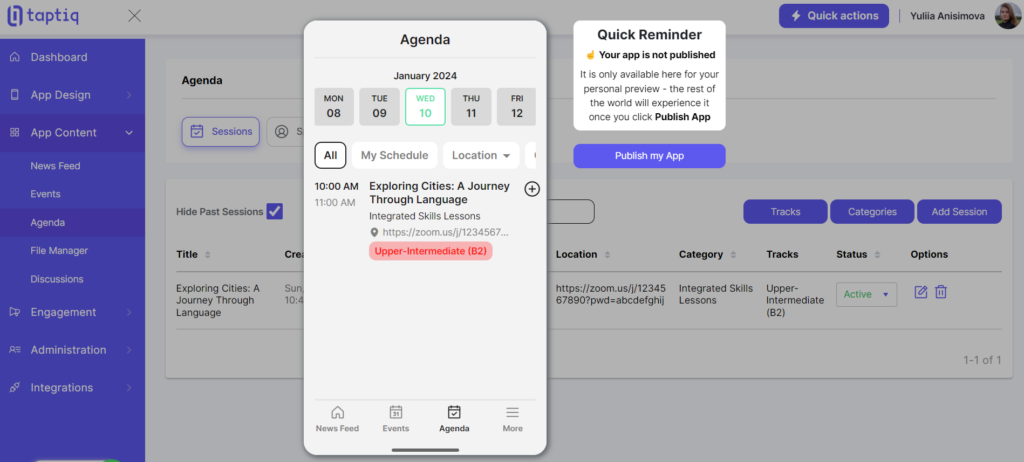
With your lesson now set up, it’s time for students to access it. They can find the lesson in the Agenda section of your app. From there, they can easily view the details and add it to their schedule.
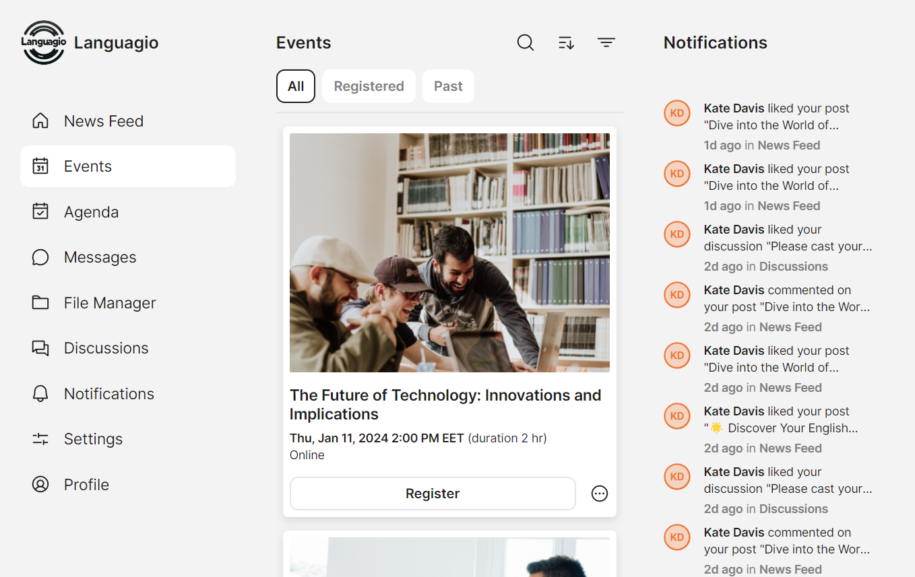
Events
This feature allows you to create and manage event details, making it easy for students to participate in extra-curricular activities. Here’s how to create an event in your app:
- Navigate to ‘App Content’ in your app builder.
- Click on ‘Events’ to access the event management area.
- To create a new event, simply press the ‘Add New Event’ button.
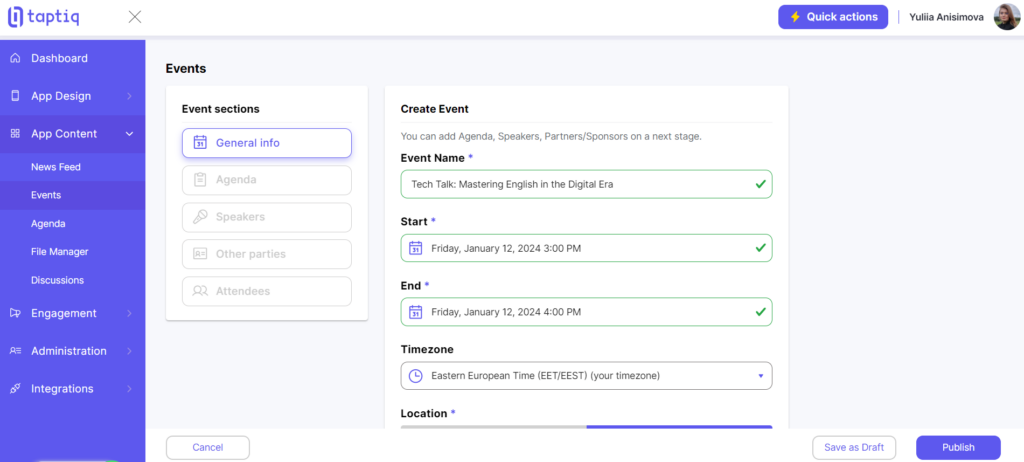
- In the event creation form, fill in the following details:
- Event Title: Give your event a descriptive title.
- Start Date and Time: Specify when the event begins.
- End Date and Time: Set the event’s end time.
- Location or Link: Depending on whether it’s an in-person or online event, provide the address or link accordingly.
- Select the type of registration you want for the event:
- Internal: Users can register directly within the app.
- External: Users need to follow an external registration link to sign up for the event.
- Disabled: No registration option.
- If needed, you can customize the registration button’s title and the registered state title (visible after registration).
- Enhance the event listing by uploading an image and adding additional buttons if necessary.
- In the ‘List of Related Users‘, specify the users who are eligible to register for this event.
- If you want to notify users about the event, check the ‘Send Push’ option to send them a notification.
After creating an event in your app, you have the flexibility to edit and manage it at any time. Here’s how to do it:
- Go to ‘App Content’ and find the ‘Events’ section.
- You’ll see a list of all your events. Click on the name of the event you want to edit.
- Inside the event page, you can edit various details, such as the event title, date, time, location, and registration options.
- If you want to feature a speaker for the event, you can add their information here.
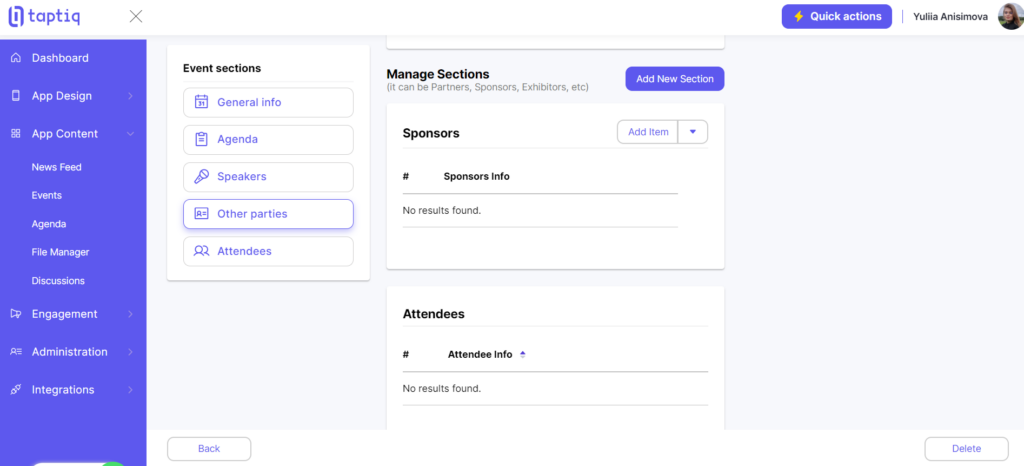
- Under ‘Other Parties’ -> ‘Manage Sections,’ you have the option to create custom sections, such as ‘Sponsors’ or ‘Partners,’ and add relevant information.
Now that you’ve become familiar with creating events, let’s explore another crucial feature: ‘Messages’.
Messages
This tool facilitates seamless communication among you, your teachers, and your students. Let’s delve into how it operates!
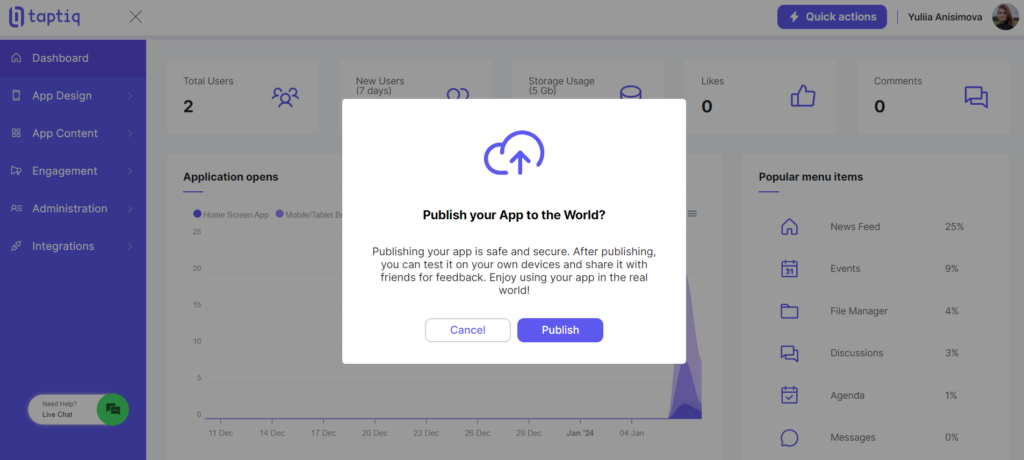
To illustrate how the messaging feature functions within the app, I’ll first need to publish it. This means the app will become accessible to various users who can join. Here’s how you can do it:
- Click the ‘Quick Actions’ button in the top menu.
- Choose the ‘Publish App’ option.
- Hit the ‘Publish’ button, and you’re all set.
Now, you can easily share the app’s link or QR code with your intended users.
If you press the ‘Launch my App’ button, it will open the app in a new tab, allowing you to explore it further.
To compose a message, follow these steps:
- Navigate to ‘Messages’ in the menu.
- Click the add sign (+) located in the top menu.
- Here, you can search for a specific user or select from the list of users to start your conversation.
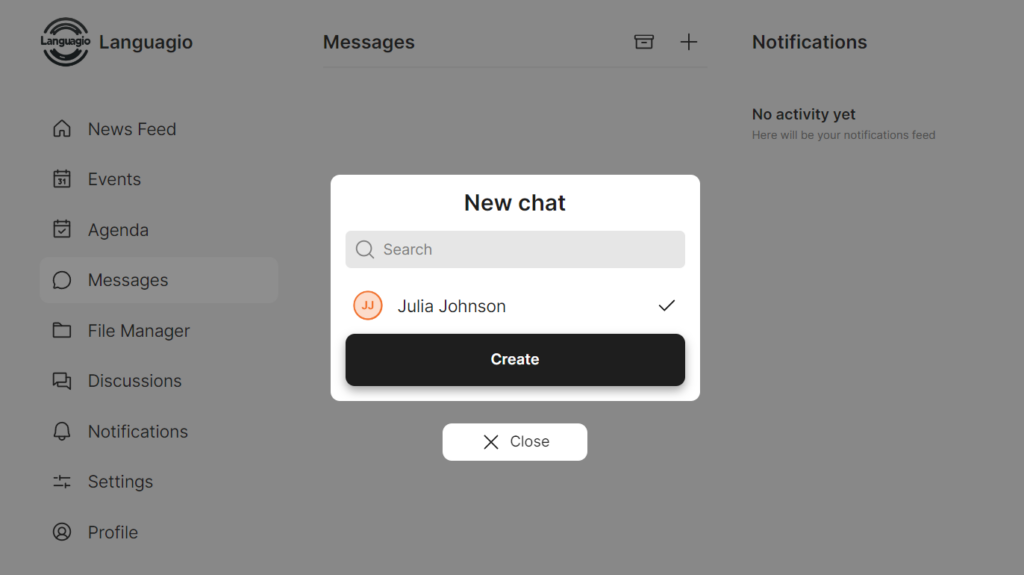
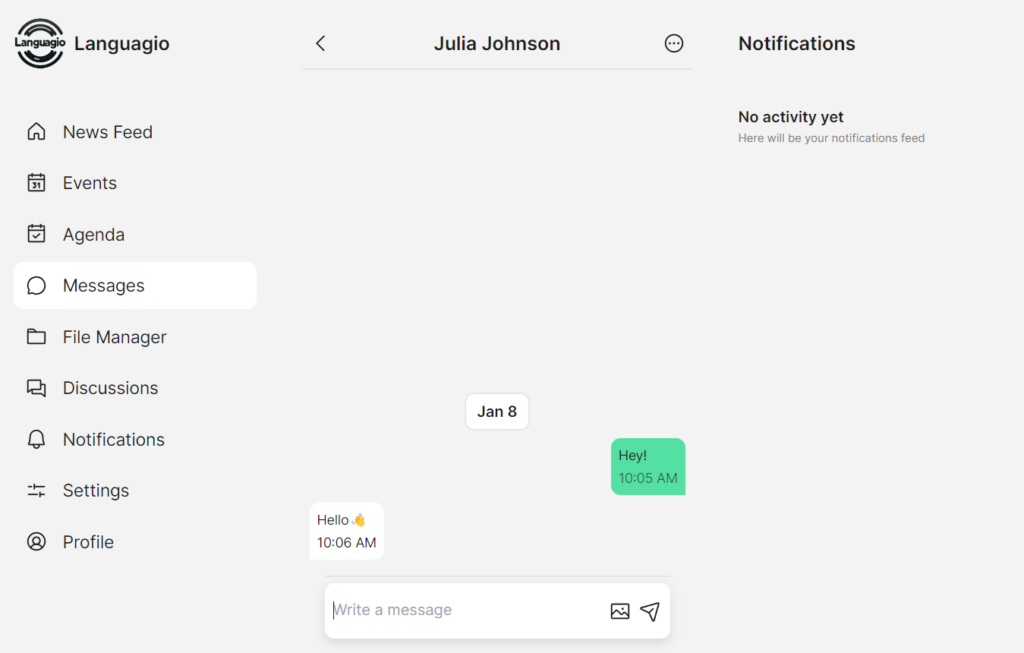
Once you’ve selected the user, simply press ‘Create.’ This will open a dialogue where you can type and send your message freely.
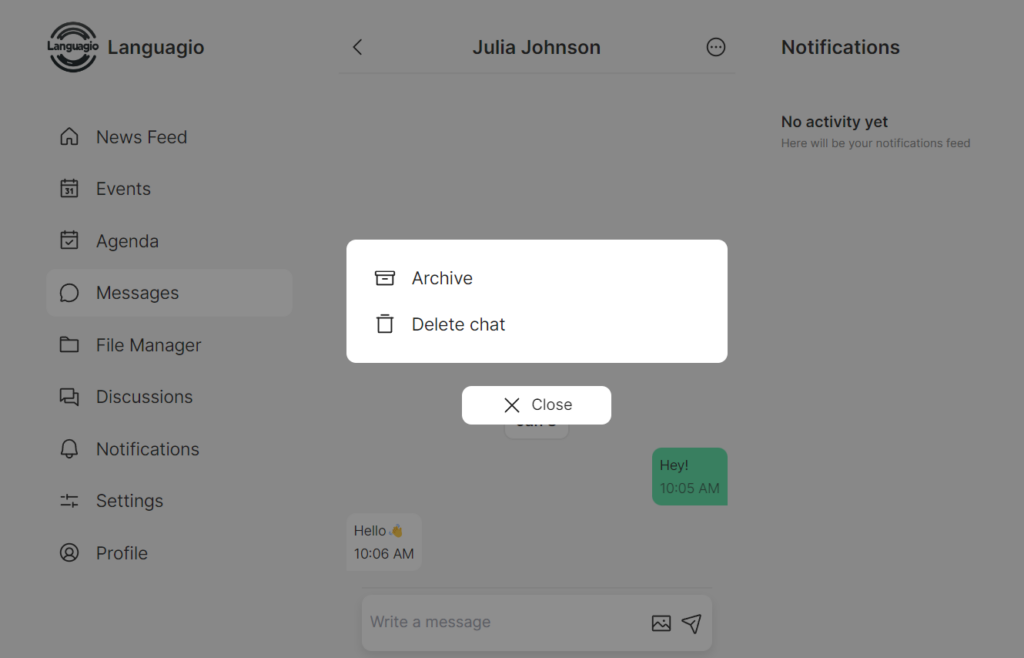
In addition to composing messages, you can also manage your chats. If you want to delete or archive a chat, simply follow these steps:
- Open the chat you wish to manage.
- Click on the three dots (…) located at the top.
- Choose the option you need, whether it’s deleting the chat or archiving it for future reference.
Discussions
A discussion forum allows for group conversations, debates, and shared learning experiences, enriching the educational environment. To initiate discussions within your app, follow these steps:
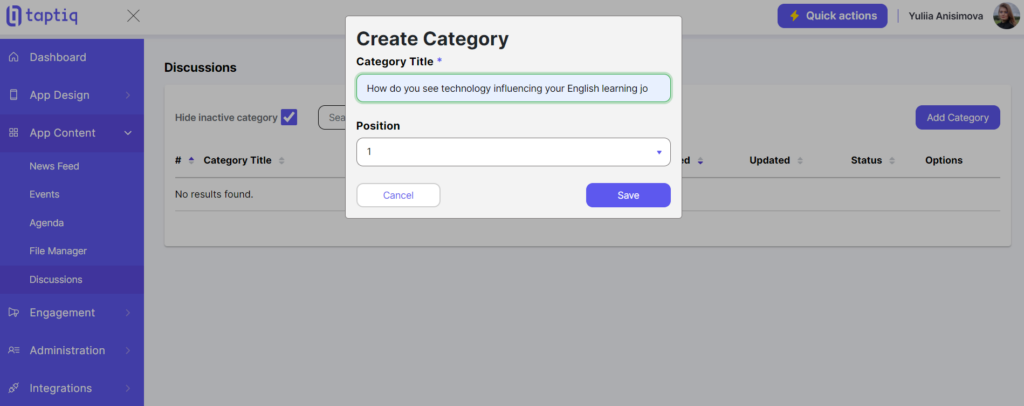
- Navigate to ‘App Content’ -> ‘Discussions’.
- To create a new category, click ‘Add Category’ and type in the name of your discussion topic.
💡Quick Useful Tip: Ensuring Open Discussions for All Users
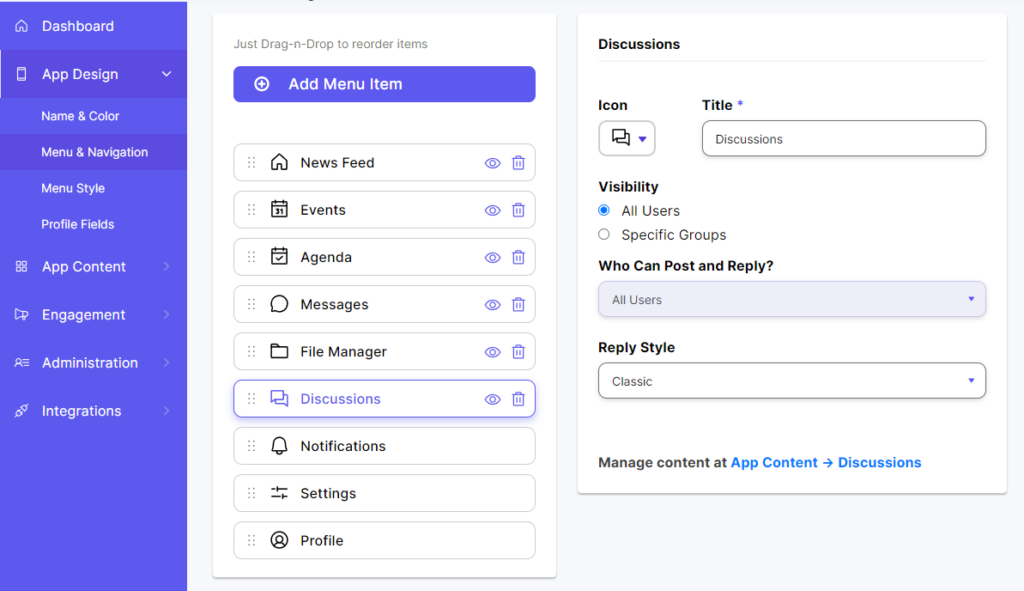
- Navigate to ‘App Design‘. This is where you change how your app functions and its appearance.
- Look for ‘Menu & Navigation‘. Here, you manage what’s in your app’s menu.
- Select ‘Discussions‘. This is your area to modify settings. You can change icons, titles, and who gets to see them. But the key setting here is ‘Who Can Post and Reply’.
- Look at ‘Who Can Post and Reply’ and make sure it’s set to ‘All Users’. Even if it already shows ‘All Users’, hit ‘Save & Apply’. Default settings might not be activated, and this could stop users from joining in the discussions.
Now that we’ve made sure everyone can join the discussions, let’s return to our main steps. It’s time to open your app and keep improving its features.
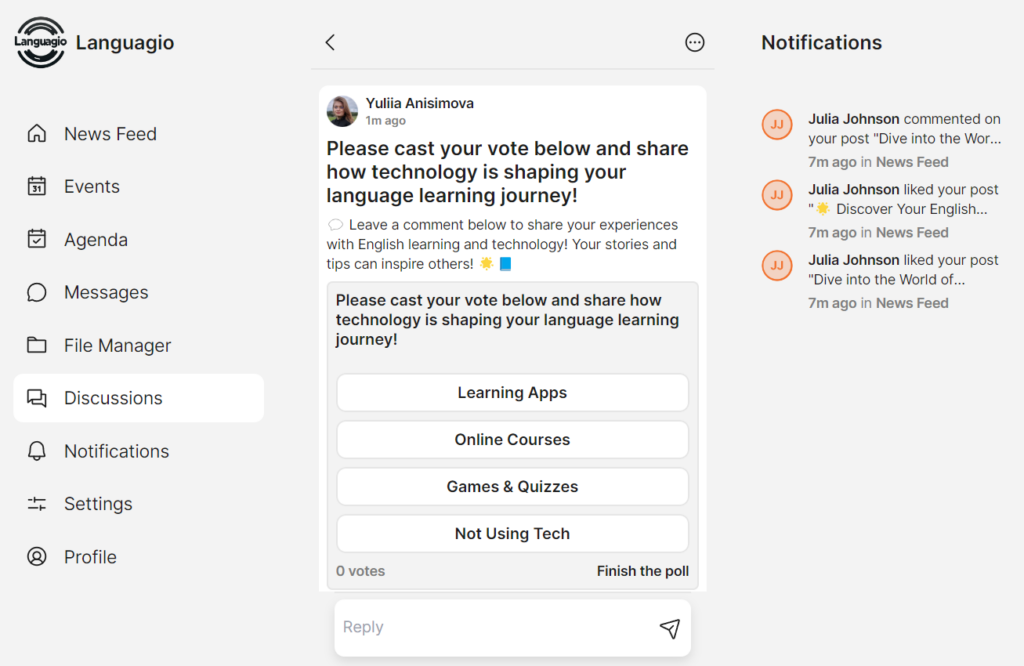
- After setting up the category, go to your app and access ‘Discussions’ in the menu.
- Press the ‘Start Discussion’ button.

- Add the content you want to be discussed, which may include text, polls, or images.
- When you’re ready, click ‘Create’ to launch the discussion.
Managing discussions is a breeze. Simply follow these steps:
- Access the discussion you want to manage.
- Click on the (…) menu.
- Here, you can choose to edit, pin, or remove the discussion as needed.

Now that we’ve covered discussions, it’s time to dive into the last but not least feature of our app: ‘File Manager’.
File Manager
This tool plays a crucial role in organizing and storing essential resources for easy access by your students. Within the File Manager, you’ll find a range of functions to help you organize your educational resources:
- Add URLs with titles for quick access.
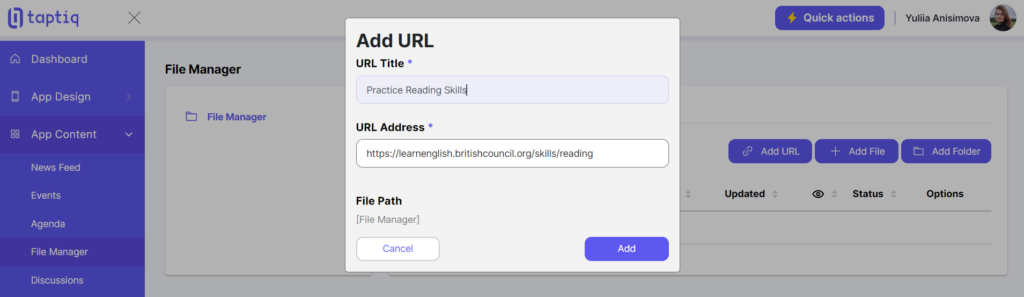
- Upload files directly to your app.
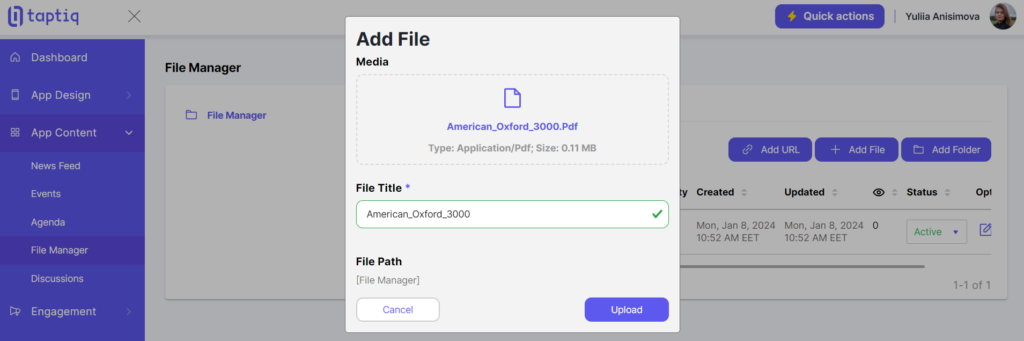
- Create folders to categorize your materials. You can specify which students have access to each folder, making it easy to personalize content for different groups.
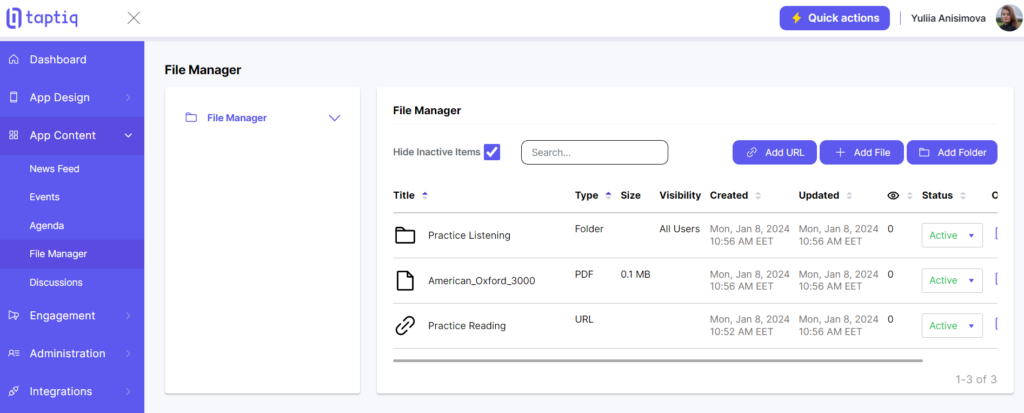
- Expand your folders by adding links, files, and more to keep your resources neatly organized and accessible.

And there you have it! We’ve covered all the features of our app, and together, we’ve created a powerful tool for online schools and tutoring practices.
The Journey Begins: Let’s Transform Education Together!
Congratulations, you’ve taken the first step toward transforming your online school or tutoring practice! Our educational app is ready to serve your teaching and learning needs, offering a world of possibilities.
But this journey is just beginning, and we’re excited to have you on board. Your creativity, dedication, and feedback will make our app even better. We encourage you to explore, experiment, and, most importantly, share your experiences with us.
Have questions, ideas, or thoughts to share? We’d love to hear from you! Thank you for choosing us as your partner on this exciting journey. Let’s make learning an unforgettable experience!
Unleash Your Creativity Now!