Fan apps are essential tools that bring fans closer to their favorite clubs and open new doors for community building. Users enjoy an enhanced experience, and app owners can convert fan club members into loyal customers and promote any products or exclusive content to boost income. App development might seem challenging, but Taptiq offers an easy way. There’s no need for coding skills or a developer team. With Taptiq, creating apps becomes effortless, opening up new opportunities for fostering connections between fans and generating more sponsorship possibilities.
Top 5 Reasons to Create an App For Your Fan Club
- Better Communication: A fan club app can improve communication among members. They can share their thoughts in discussions or comments, leave feedback, and send direct messages. It grows a strong sense of belonging and loyalty within the community.
- Boost Sales: Creating an online marketplace is easy with Taptiq, allowing you to promote exclusive deals and merchandise. You can use push notifications to alert users about special offers, limited-edition items, or exclusive content, encouraging more frequent purchases and engagement.
- New Sponsor Opportunities: Your app can attract sponsors by offering them a new way to connect with their target audience. Instead of just ads, sponsors can be part of special content or activities fans care about.
- Community Building: An app serves as a digital gathering place for fans, enabling them to connect, share opinions, and bond over common interests. The sense of community creates an engaging atmosphere that enhances their overall experience.
- Everything in One Place: By keeping news, updates, photos, videos, and more, your app becomes a valuable resource for members. Having it all in one spot means that users always have the latest info right at their fingertips, no matter where they are.
Building Your Fan Club App
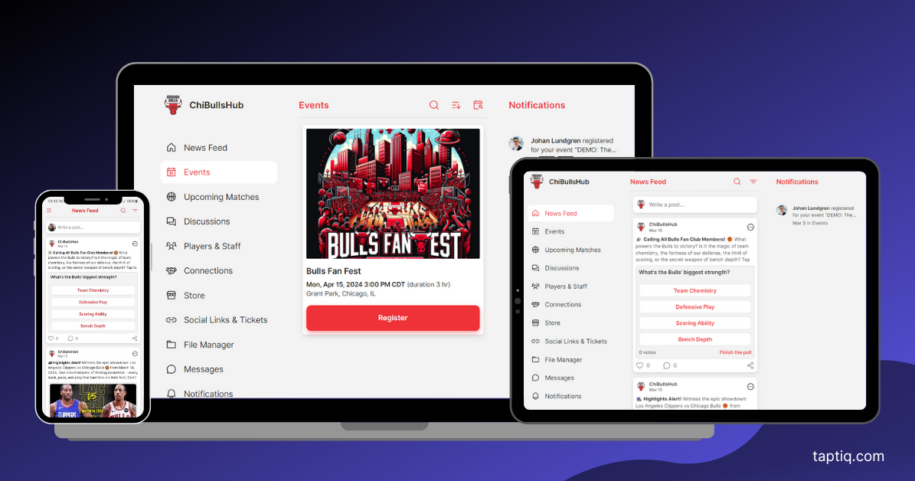
Now that we understand the value an app can bring to a fan club, it’s time to start building it. Imagine our app designed for a Chicago Bulls fan club, creating a spirited community space for fans. It’s crucial to mention that this app is not affiliated with or endorsed by the Chicago Bulls or the NBA. It’s a hypothetical scenario to inspire creativity and demonstrate the app’s potential. The table below shows the functionality we’ve chosen, but remember, you can always customize your app to fit your needs.
Essential Features
| Feature | Name in App | Purpose and Benefits |
|---|---|---|
| News Feed | News Feed | Post updates, last match results, media, or polls to keep fans engaged with the latest news. |
| Events | Events | List and organize activities such as game-watch parties, fan club meetings, competitions, and charity events. This feature is a key to building community and keeping members engaged. |
| Agenda | Upcoming Matches | Share information about upcoming matches, including locations and where to watch, keeping fans informed and excited about future games. |
| Discussions | Discussions | Create discussion topics where users can share their thoughts, leave feedback, ask for help, etc. It helps to promote community interaction and support. |
| Catalog | Players & Staff | Enhance fan connection to the team by providing information about players, staff, and their social media links. |
| Members List | Connections | Offer the opportunity for app users to connect through messaging and adding favorite users. |
| Marketplace | Store | Offer club-branded products and provide special offers or limited-time discounts to app users. It encourages more frequent visits and purchases. |
| Custom Screen | Social Links & Tickets | Add links to all official team accounts. Include social media, ticket sellers, and platforms for watching games to provide easy access for fans. |
| File Manager | File Manager | Store and organize photos, videos, schedules, etc., making it easy for users to find the necessary content. |
Additionally, certain menu items will always be present to improve user experience:
- Notifications: To inform users about new updates, messages, or events.
- Settings: Including options to share the app, delete the account, log out, and enable/disable notifications.
- Profile: Where users can manage their personal information, profile picture, and other settings.
News Feed
The first feature we’ll explore is the News Feed. It stands as the heartbeat of our app, offering a dynamic space where fans can stay up-to-date with the latest news, game updates, and behind-the-scenes content related to their favorite team. It’s not just about pushing information; it’s about creating a lively, engaging platform that fosters a sense of community and connection among fans. By keeping members informed and involved, the News Feed ensures that the fan club app is not just a tool, but an important part of the fan’s daily routine. Remember, a well-informed fan base is an engaged and passionate one.
General Settings
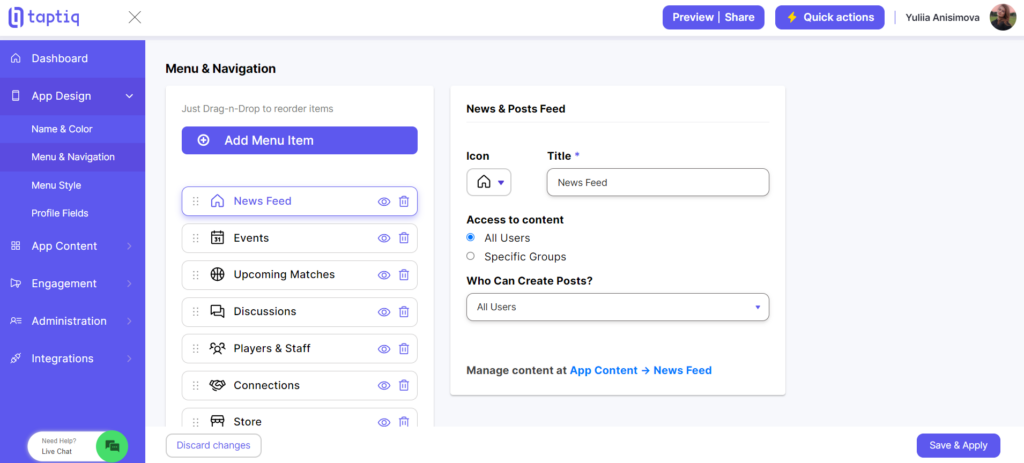
If we go to the App Design -> Menu & Navigation (where we set up the app’s entire menu) -> News Feed, we find options to:
- Change the title and name of this menu item. In this tutorial, we’re sticking with the default.
- Decide who can view the content. You can choose between All Users or Specific Groups. If picking Specific Groups, you need to select the relevant groups.
- Select who can create a post. The choices are All Users, App Owner Only, or Users from Group. Suppose you want to specify a group, choose which one from the list.
💡 Quick Tip About Groups
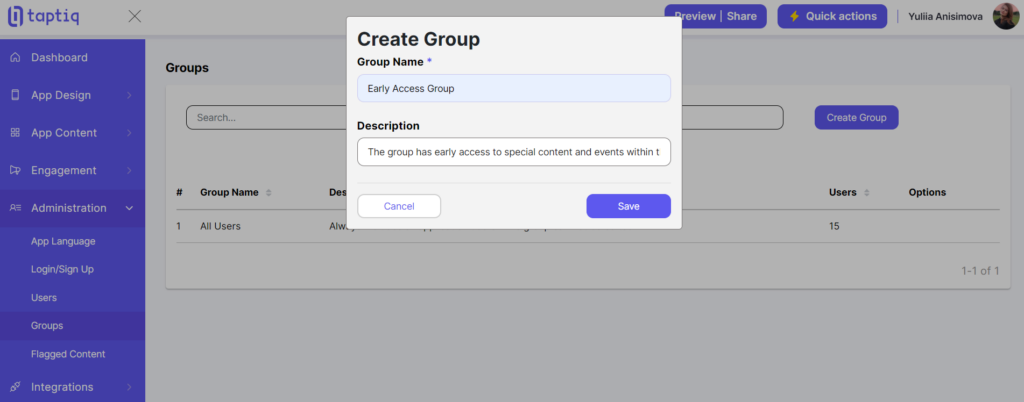
To create user groups go to Administration -> Groups. This is where you manage all user groups within your app:
- Click on the Create Group button to start.
- Add the title and description.
- Once you’ve filled in the details, hit Save to create a new group.
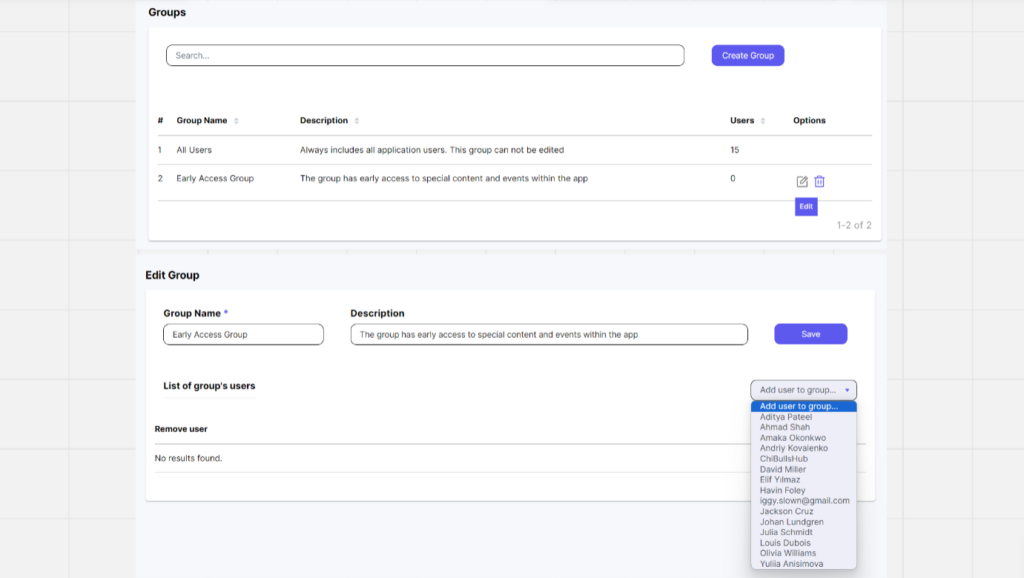
Adding Users to the Group:
- Find the group you’ve just created and click edit to modify it.
- You’ll see a list of users in the Add user to group section. There you can select the users you want to add to the group.
- After selecting the necessary users, click Save to apply the changes.
Creating Posts
Now, let’s get back to the News Feed. Next, we’re diving into how to create and manage content for this menu item.
To create a new post for the news feed follow these steps:
- Navigate to App Content -> News Feed, then press Add New Post.
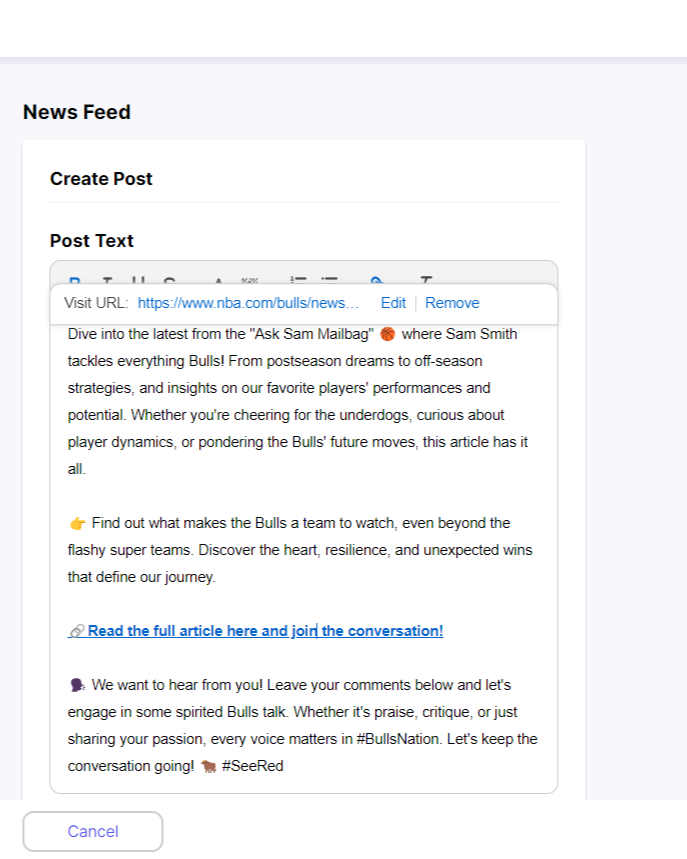
- Write your post text. Make it stand out by using options to highlight, bold, or list important points.
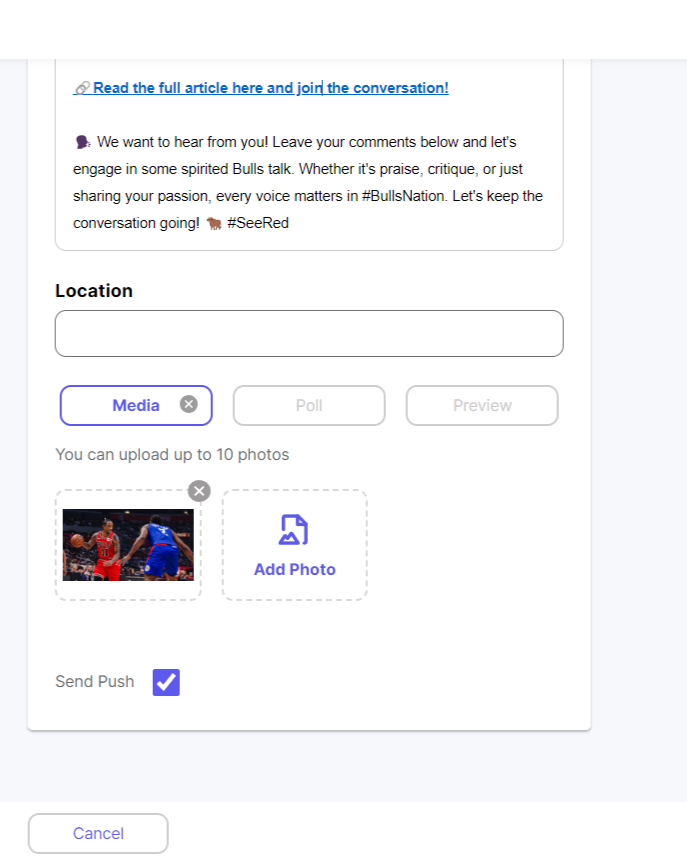
- You can add a location to your post to give more context to your readers.
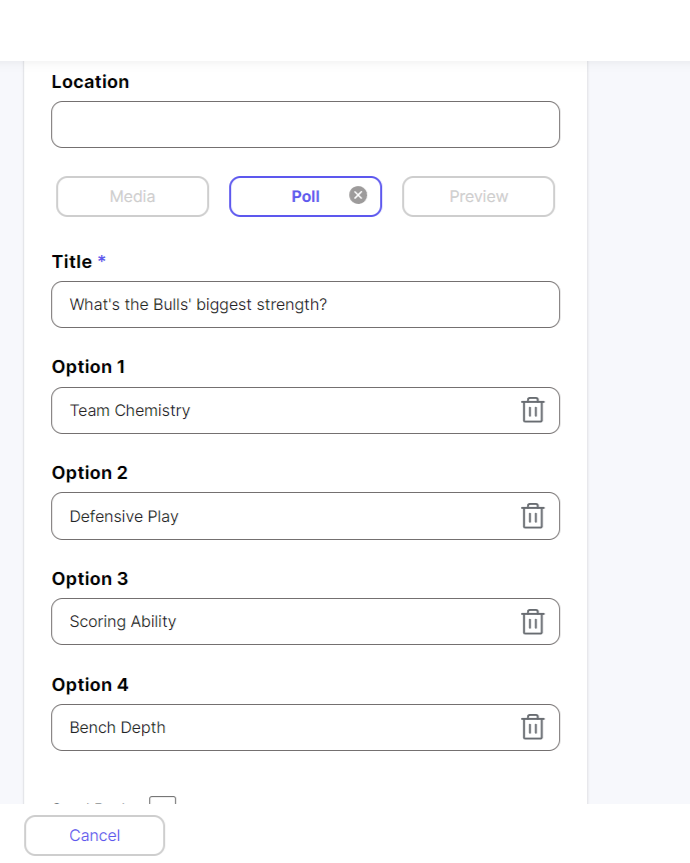
- Add images or a poll to interact with your audience.
- If you want to alert users about a new post immediately, ensure to tick the Send Push option. After you publish the post or save it as a draft you can create a push notification.
Want to make your post more engaging? Here’s how you can add more interaction to your content:
- Images: You can add up to ten images. This visual touch makes your content more appealing.
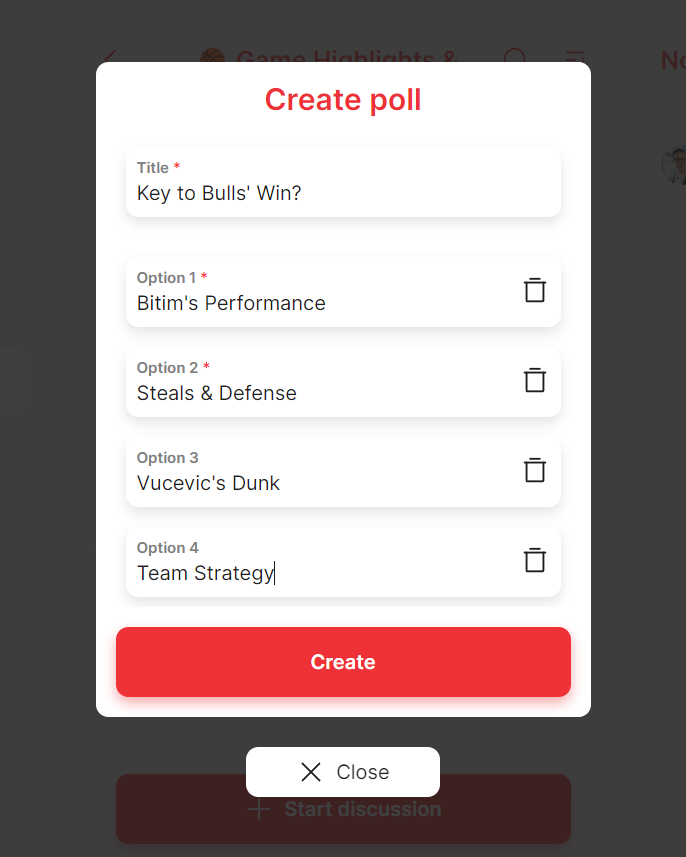
- Poll: Stimulate interaction with a poll. Remember, each option is limited to 25 symbols to ensure they’re easy to read.
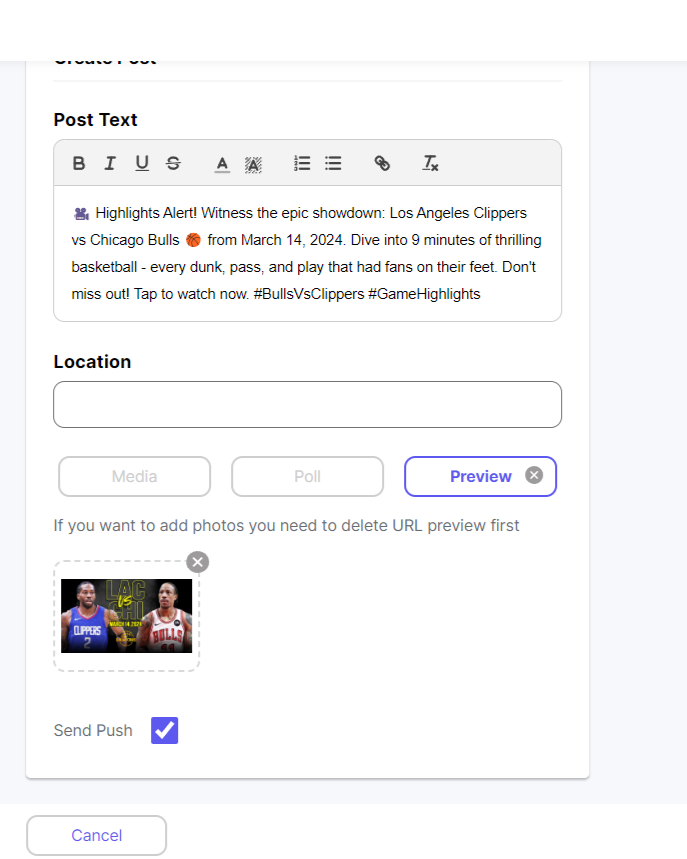
- Link Preview: Provide a snapshot of the content behind the link, including a short description and an image. Preview offers readers insight into why the link is worth exploring. To add a preview, paste the link into your post, highlight it, and click the link symbol in the formatting toolbar. The preview will be added automatically. If you don’t need the link in the text, you can remove it while keeping the preview.
💡 Quick Tip About Push Notifications
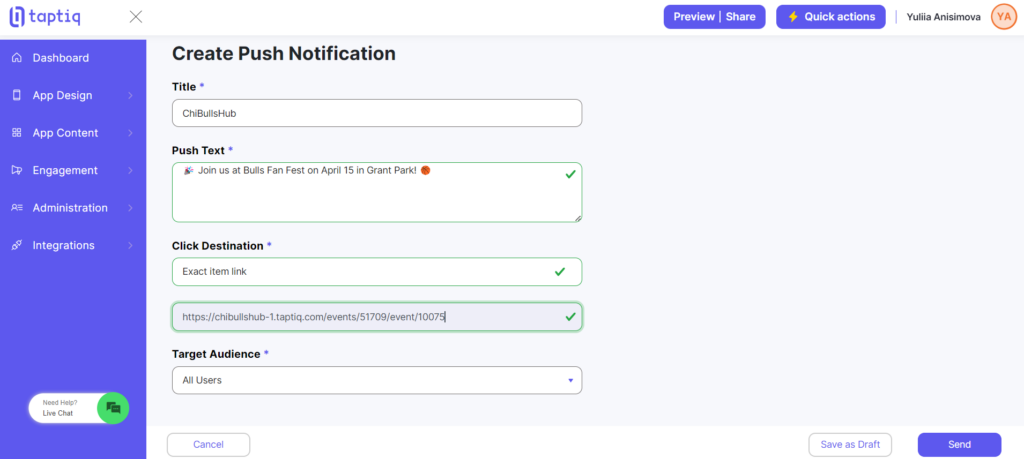
To send a notification, you can tick Send Push when adding new content. You’ll then move to a page to add the text and other details. For more control, navigate to Engagement -> Push Notifications to create or manage your notifications. When setting up your push notification, here’s what you need to include:
- Title: Your notification’s main headline.
- Push Text: The message you want to share.
- Click Destination: This tells where your users go after they click the notification. You can select Menu Item (takes users to a certain part of your app) or Exact Item and Link (takes users right to a specific piece of content). If you tick Send Push after creating a post or event, the link will be added automatically. For manual notifications via Engagement -> Push Notifications, paste the link yourself.
- Target Audience: This is about picking who gets to see your notification to ensure it reaches the right users.
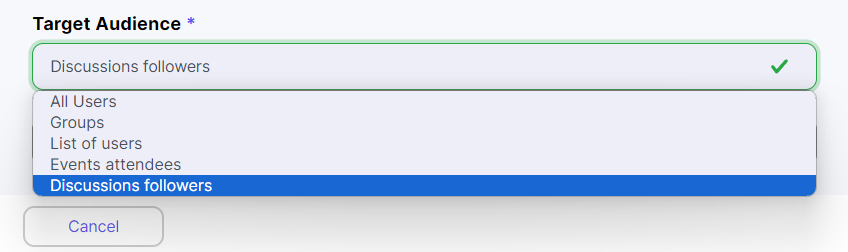
Choosing the right audience for push notifications gets your message to those most interested. Here’s how each option is useful:
- All Users: This sends the notification to everyone using the app.
- Groups: Target users in specific groups you’ve set up. Perfect for sending customized messages to people with particular interests, making their experience more personal.
- List of Users: Unlike Groups, this lets you choose individual users from any group, giving you more flexibility to mix different users.
- Event Audience: Perfect for sending updates or reminders to users who plan to attend an event, keeping them informed and engaged.
- Discussions Followers: Targets users who follow specific discussions within your app. You’ll need to select which discussion followers to notify.
For push notifications, you have two options: send it immediately or save it as a draft. If you send it right away, you won’t be able to edit it later, only delete it. Saving as a draft lets you make changes before sending the notification, giving you flexibility to get it right.
We’ve covered how to make the most of the News Feed. Now, let’s move on to creating Events to keep your app lively and engaging.
Events
Events offer fans the chance to connect and share their passion, keeping the community engaged and active.
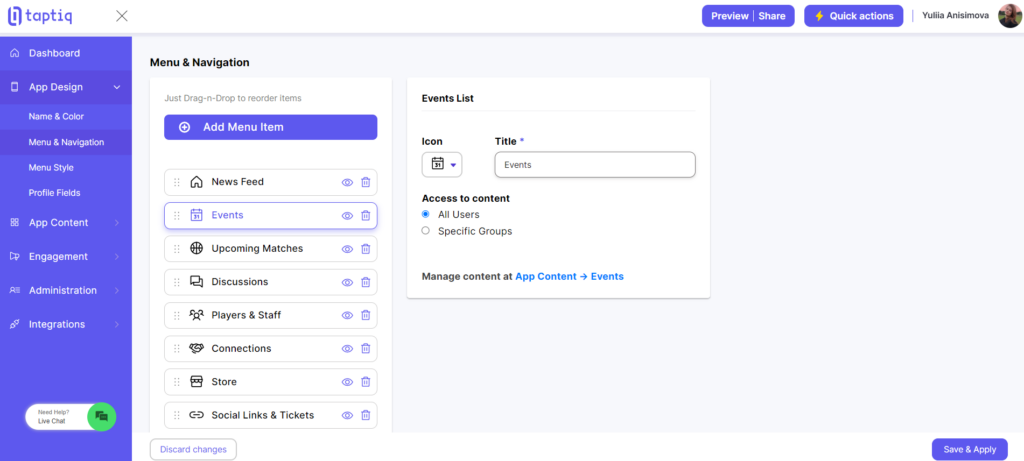
General Settings
Before we start adding content to our Events, let’s set up the basics:
- Icon and Title: Pick a special icon and title to fit your fan club’s vibe.
- Access to Content: Choose who gets to see and join your events. Options are open to All Users or Specific Groups. Limiting access to events for specific groups lets you offer special activities just for them, making events feel more personal.
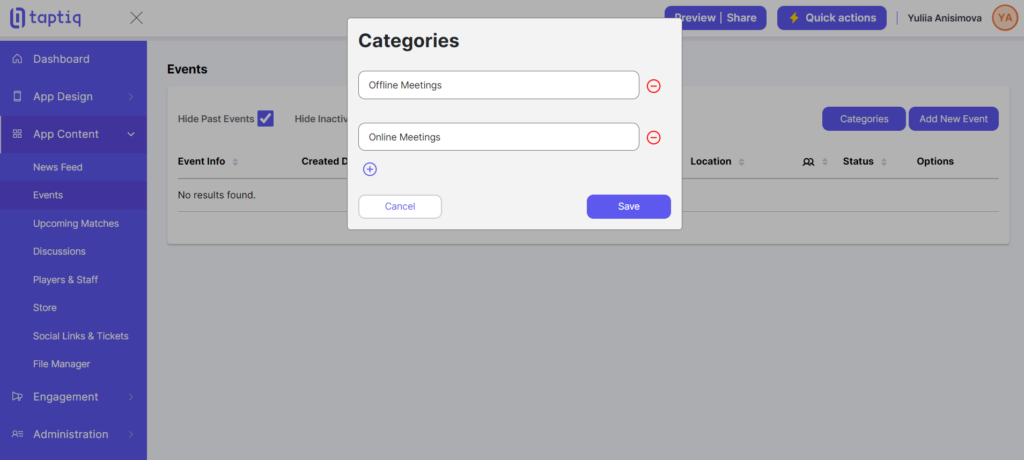
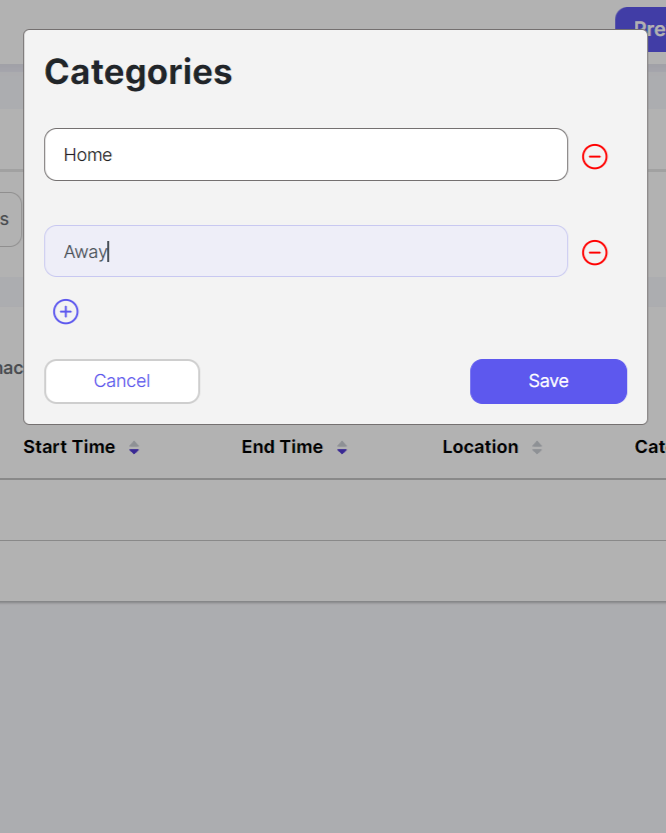
Categories
You can use categories to organize events and make it simpler for members to navigate through the app and engage with the content they care most about. It improves the user experience and increases participation. Simply click on the Categories button to start. Enter the names of the categories. Once you’re done, hit Save.
Creating Events
Start creating your event by clicking the Add New Event button. First, you’ll need to enter some general information:
- Input your event name.
- Dates and Timezone: Choose the start and end dates and set the timezone.
- Location: For offline events, give the address. For online events, include a link.
- Pick the right category for your event.
- Type of Registration: Internal (register through the app), external (a link to another resource where users can register), and disabled.
- Event Image: Upload the cover image.
- Registration Button and State Title: Customize the text for your registration button and the status message.
- Additional Button: Add the title, choose the icon, and give the link to another page, file, etc., if you want to provide more information.
- Event Description: Write a detailed description of your event.
- Related Users: Specify any users related to the event, like organizers.
- Send Push Notification: Use this feature to create and send a notification about the event to your app users.
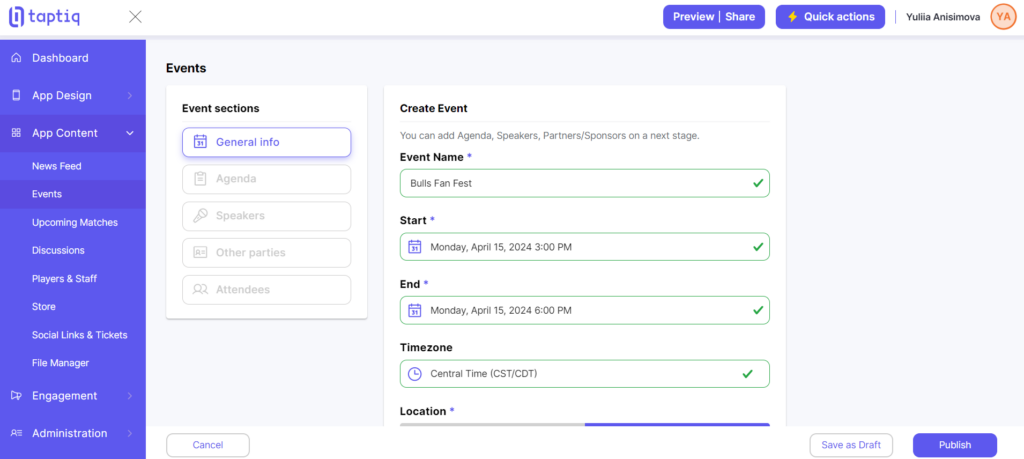
After entering the general information for your event, you have two options: save it as a draft or publish it. If you publish the event, it will be immediately visible to users. You can add more details, such as speakers and agenda, later by editing the event. However, if you save it as a draft, you can include all the extra information right away and only then publish it.
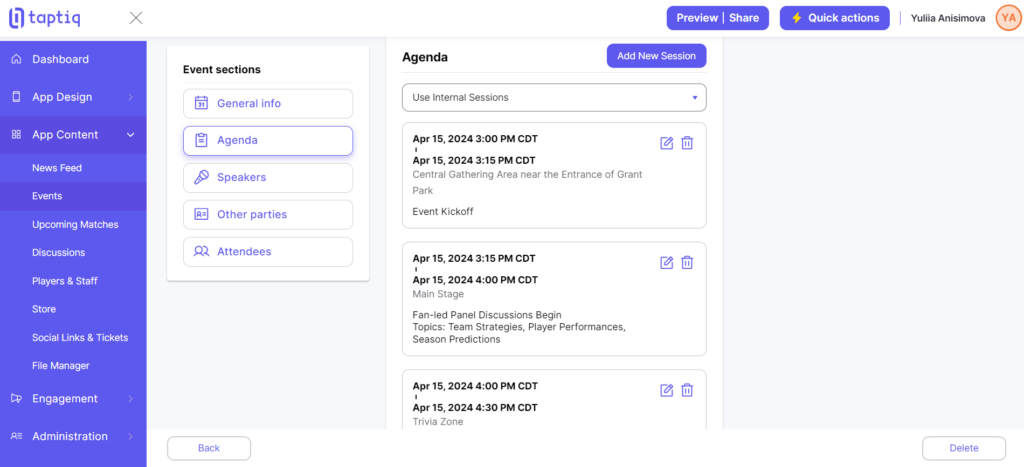
Event Agenda
After filling in the general information, you can add the agenda. There are two options available:
- Use Internal Sessions: Add sessions directly to your event.
- Use Menu Module: Create an agenda as a menu item and connect it to your event. This option is ideal for categorizing sessions or using tracks for better organization.
Speakers
Here’s what you’ll need to include for the Speakers section of your event:
- Upload Image: Add a photo of the speaker.
- Full Name: Enter the speaker’s full name.
- Speaker Title: Provide the title or role of the speaker.
- Position: It helps you arrange the speakers in the desired order.
- Description: Offer a brief bio or description of the speaker, highlighting their expertise.
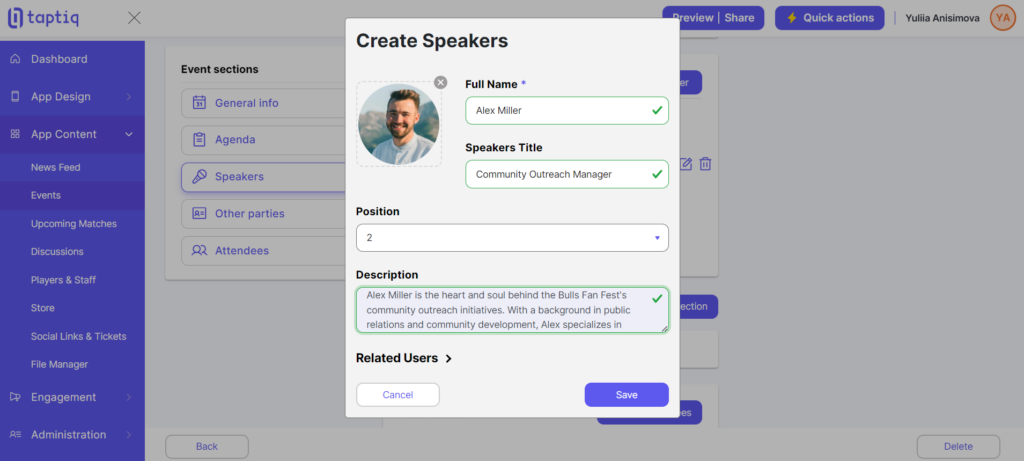
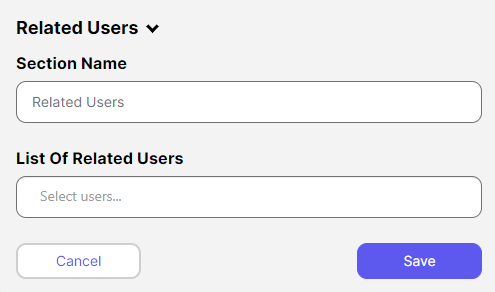
Additionally, you can include Related Users in this section:
- Customize the section title to better reflect its purpose.
- Select related users from a list.
Adding Related Users can be useful for highlighting co-speakers, or other key participants. It helps attendees understand the roles and improves the event’s networking potential.
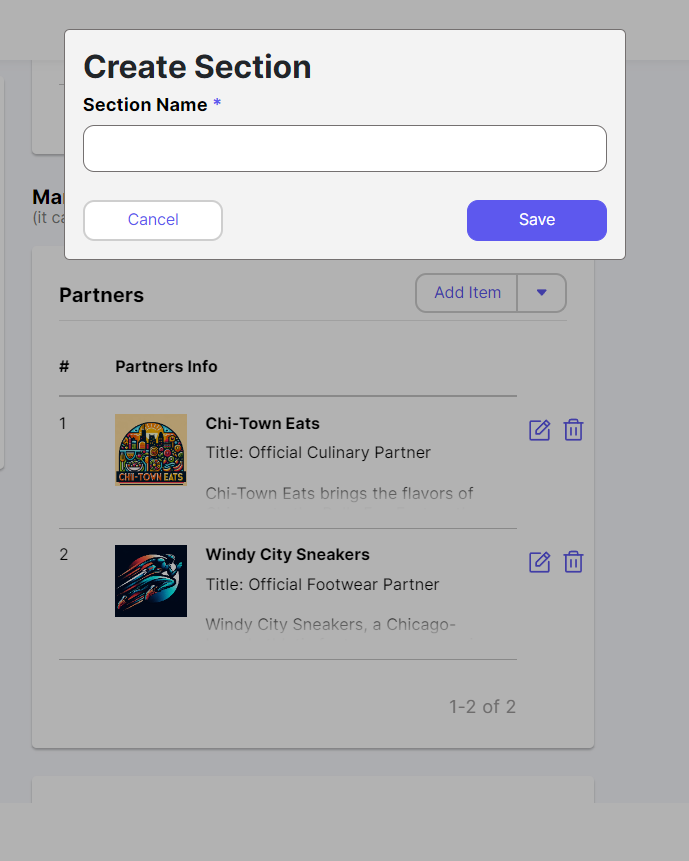
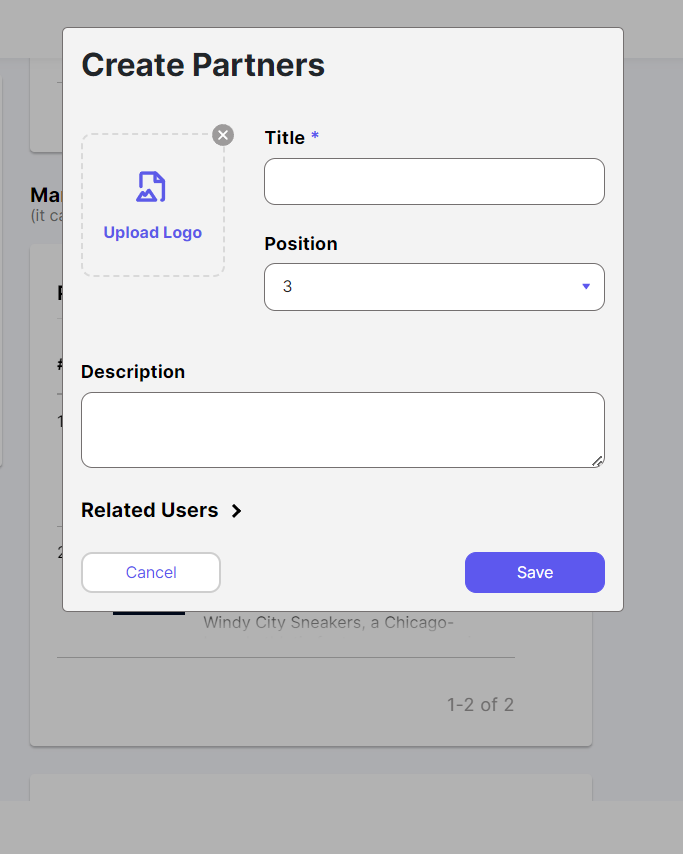
Other Parties
You can use Other Parties to feature sponsors or partners of your event. Click Add New Section and name it to start. Within the section, you can add various items. For each of them, you need to upload the image, which can be the company’s logo, and provide a title, position, and description. Also, you can select related users.
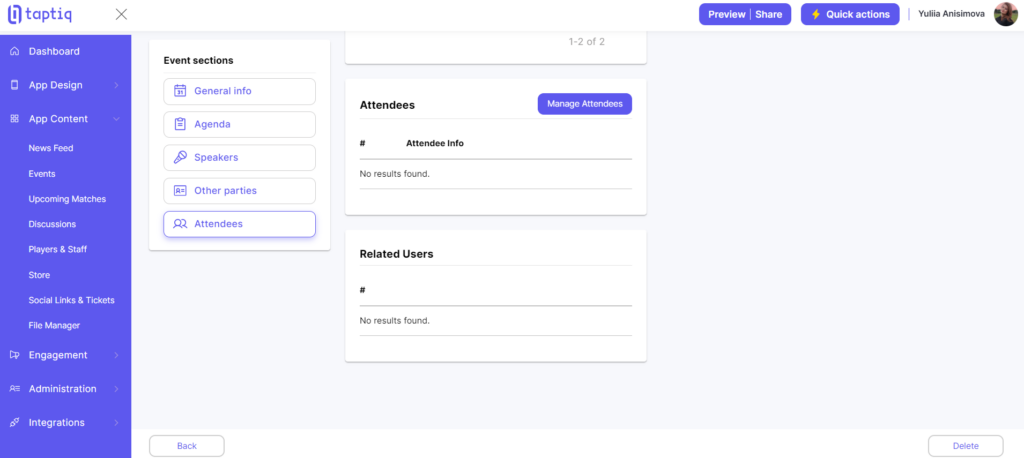
Attendees
The Attendees section allows you to add participants directly while setting up your event. This feature can be useful for managing your guest list upfront, ensuring you have a clear view of who’s attending. To add participants click the Manage Attendees button and select users from the list.
Managing Events
Easily manage your events:
- Change Status: Switch an event’s status to active, inactive, or draft to reflect its current stage.
- Clone: Make a copy of an event. It’s perfect for similar future events or to use as a base template.
- View: View and edit event details.
- Copy Link: Quickly get the link to your event for easy sharing.
- Delete: Remove any event that’s no longer needed.

Upcoming Matches (Agenda)
The Upcoming Matches section is not just about keeping fans informed. Displaying future games encourages discussions and connections among fans. This interaction creates a warm community atmosphere, where members share predictions, arrange to watch games together, and engage in post-match talks.
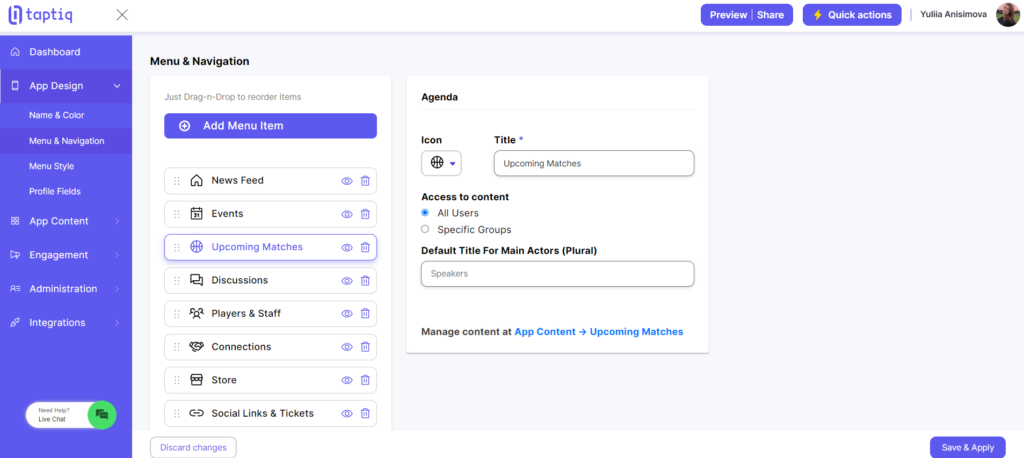
General Settings
Within App Design -> Menu & Navigation -> Upcoming Matches, you can change the title and icon or manage access to the content, like for the other menu items. Additionally, you have the option to set a Default Title For Main Actors (Plural) — for example, Speakers. It lets you label the key participants to clarify their roles in your sessions (e.g. experts in a discussion panel).
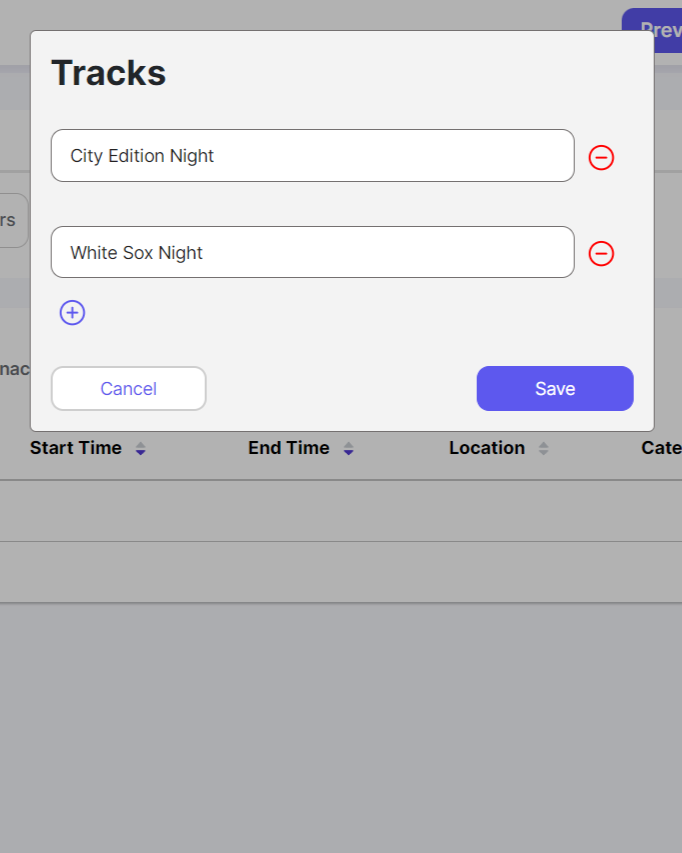
Tracks and Categories
In our app builder, there’s an option to organize sessions in the agenda using tracks and categories. Here’s how it works:
- Categories are used to classify sessions based on content type or format. In the fan club app, they might help fans quickly find the type of game they’re interested in.
- Tracks are used to group sessions by topic or theme.
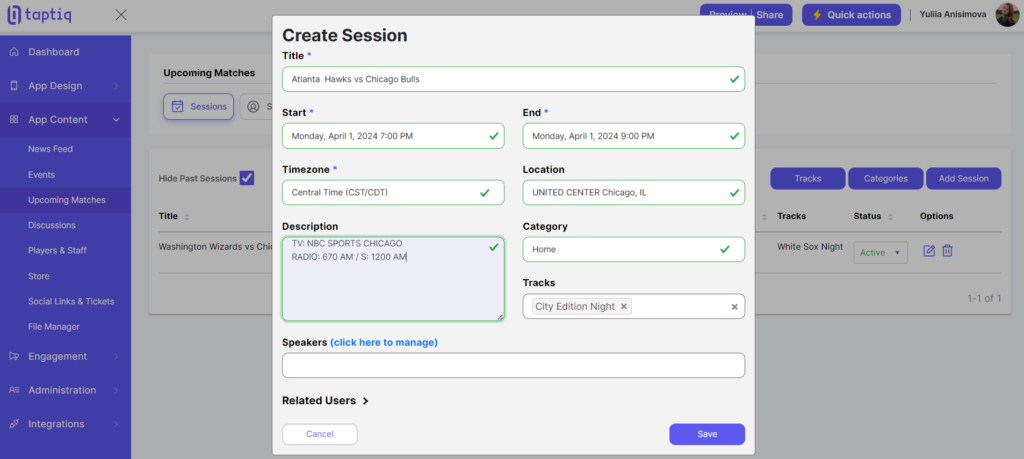
Creating Sessions
To create a session in our app builder, follow these simple steps:
- Click the Add Session button to start.
- Enter a title for your session.
- Dates and Times: Pick the start and end dates and times, and don’t forget to set the timezone.
- Location: Specify where the session takes place.
- Category and Tracks: Select a category and tracks for your session. Remember, you need to have these set up beforehand.
- Description: Provide a detailed description of what the session will involve.
- Speakers: While you have the option to add speakers (which should be created in advance), we’ll skip this in our tutorial. The process is similar to adding speakers for events.
- Related Users Section: You can also include a section for related users and select them from a list. This is great for highlighting who else is involved in the session.
Managing sessions in our app is easy. You can change a session’s status, edit, or remove it. Since session management is so straightforward, we won’t spend more time on it here. Instead, let’s move forward to another exciting feature: Discussions. In the next part, you’ll learn how to create spaces for lively chats that keep your community vibrant and engaged.
Discussions
Discussions enable fans to connect over shared interests and passions. They create a space for lively chats, debates, and sharing insights about games, players, and team strategies. Here’s how they add value to your app:
- Engagement: Discussions keep the community active by encouraging users to participate regularly.
- Community Building: They foster a sense of belonging among fans, creating a supportive network of like-minded people.
- Feedback and Ideas: Users share valuable insights that can help you improve your app.
General Settings
Before creating categories for discussions, let’s first set up some settings to ensure this part works correctly. Go to App Design -> Menu & Navigation -> Discussions, and check some key settings:
- Who Can Post and Reply? Decide who’s allowed to participate in discussions. Options include All Users, App Owner Only, and Users from Group.
- Reply Style: You can choose how replies look Classic or Compact.

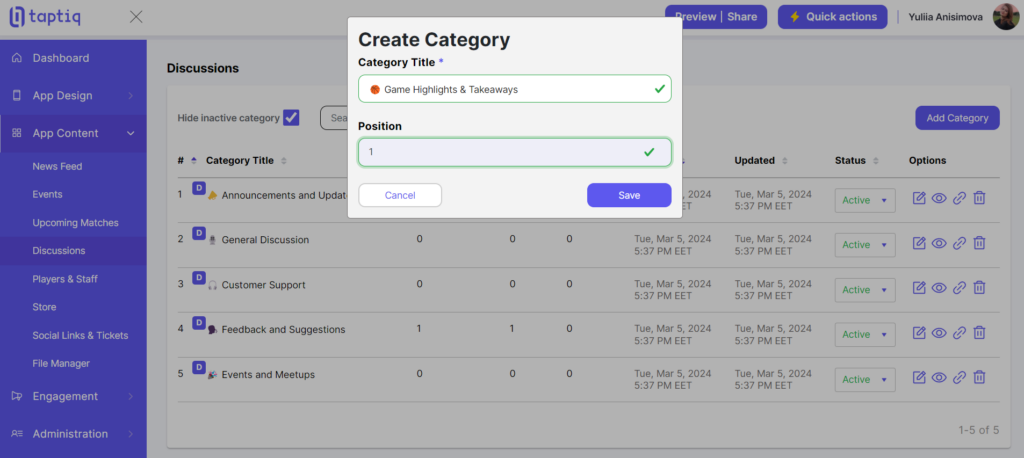
Creating Category
Here’s a quick guide on how to start organizing discussions in your app:
- Click Add Category to begin setting up a new discussion category.
- Title: Enter a name for your category that reflects the discussion topics.
- Position: Choose where this category appears in the list. The position helps in prioritizing discussions, making sure the most relevant or active topics are easy to find.
By setting up categories, you make it easier for fans to find conversations that interest them, enhancing their overall experience in your app.
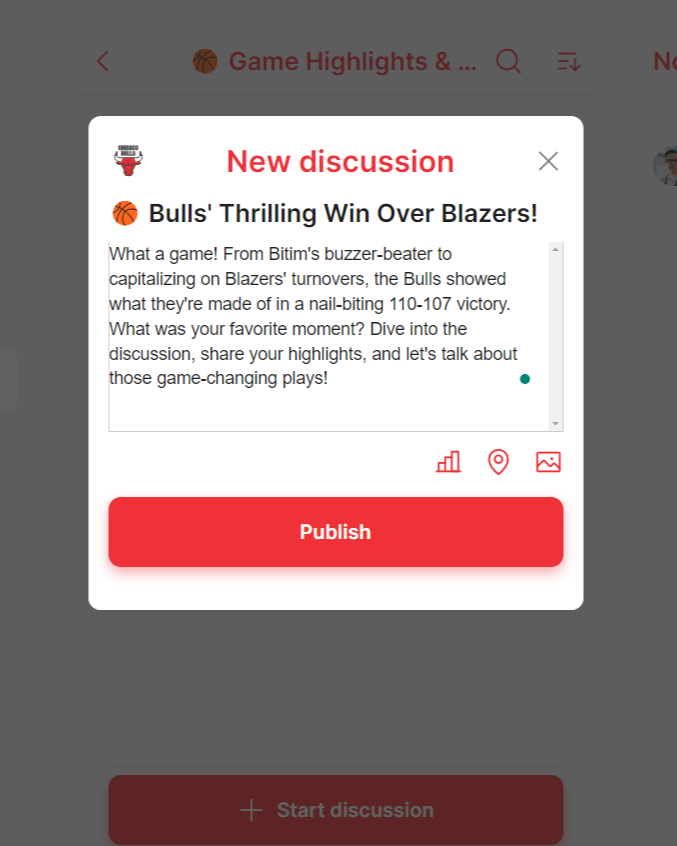
Start New Discussion
We can start the discussion within the app:
- Select the Right Category: Pick the category that best fits the topic you want to discuss. This helps keep conversations organized.
- Title and Text: Give your discussion a clear title and add your text. This is where you share your thoughts, questions, or information with the community.
- Enhance Your Discussion (Optional): Make your discussion more engaging by including a poll for opinions, adding a location for place-specific talks, or uploading up to 10 images.
Players & Staff (Catalog)
Adding details about players, managers, and staff in your fan club app is a great way to boost fan connection. Fans love getting to know more about the people behind their favorite team. The catalog is perfect for this. It lets you create detailed profiles, sharing both professional and personal insights. The catalog can be used in many different ways to match your needs. You can also list opportunities such as meet-and-greets, private tours of the team’s facilities, or VIP game-day experiences. Including a price helps fans understand the value and exclusivity of these experiences.
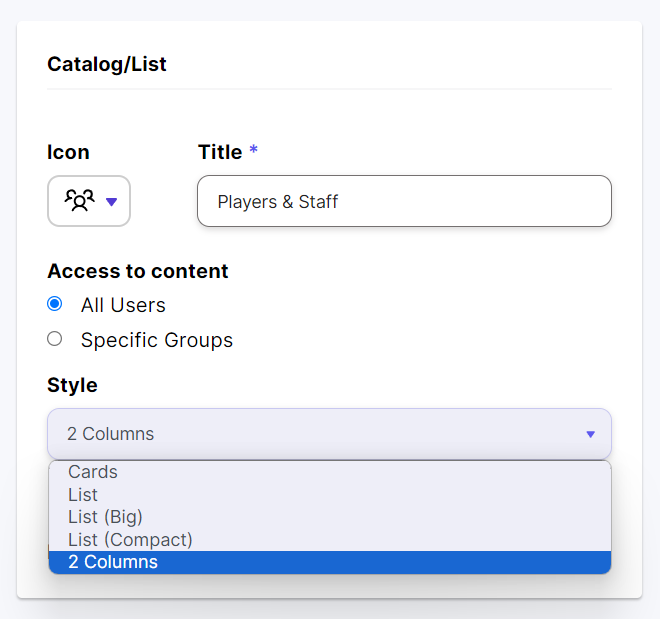
General Settings
You can customize the catalog in your fan club app by adjusting the standard settings such as the icon, title, and access to content, and changing the layout to suit your design and needs. There are several layout options to choose from:
- Cards: Features items with the largest images, great for catching the eye.
- List: Displays items in a vertical line with small pictures, offering a clear, quick view.
- List (Big): Similar to the List layout but features bigger images for more visual emphasis.
- List (Compact): A tighter list without pictures, focusing on the text.
- 2 Columns: Items are shown in two columns, combining text with medium-sized images for a balanced look.
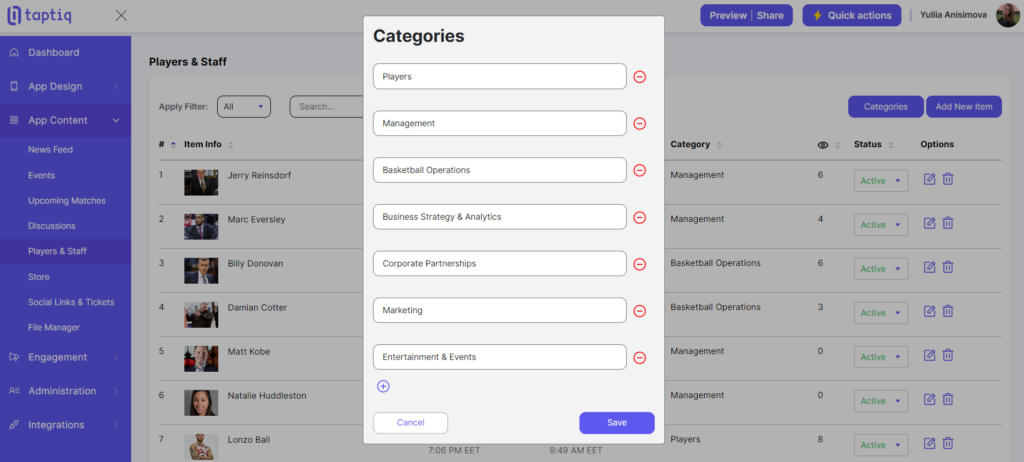
Categories
To make it easier for users to find what they are looking for, we recommend to create categories within the catalog. Organizing the content this way makes the app more user-friendly and intuitive. To set up categories in your catalog, click the Categories button, type in the titles for your categories, and then hit Save.
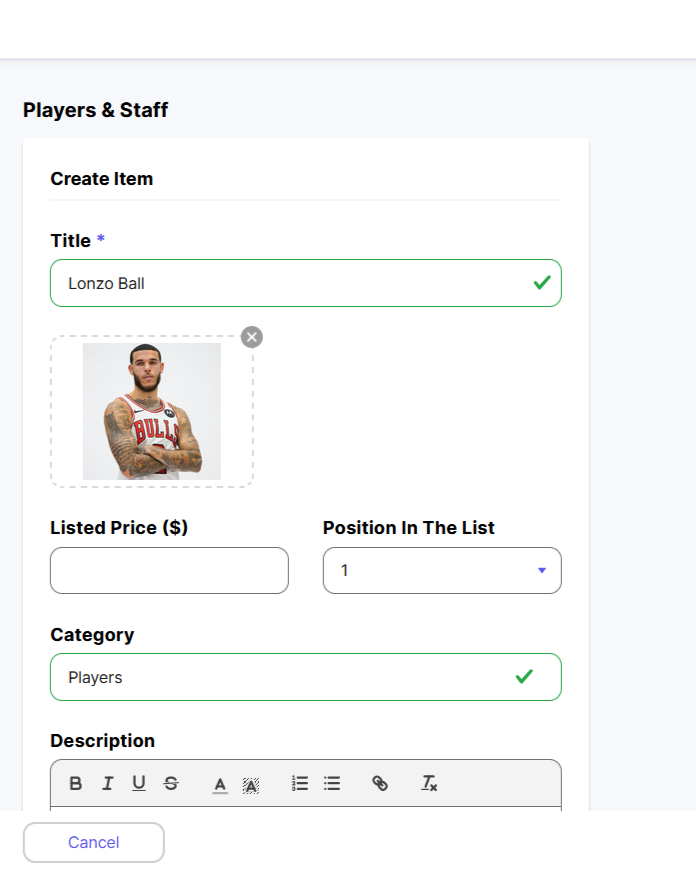
Creating Catalog Item
Here’s a quick guide on how to create catalog items:
- Title: Name your item.
- Image: Upload a relevant picture.
- Listed Price: This option is available but won’t be used in our tutorial.
- Position in the List: Place your item where it fits best.
- Choose Category: Pick the right category from your list. This makes it easier for users to find what they’re looking for.
- Description: Write a description and format it to highlight key points.
- Location: Add a location if it’s relevant.
- Create Tags: Tags act as searchable keywords, making it easier for users to find related items.
- Create Contact Button: We’ll detail this feature later, but it’s a way for users to reach out directly.
- Related Users: Include people connected to the item by adding a title for this section and selecting users from a list.
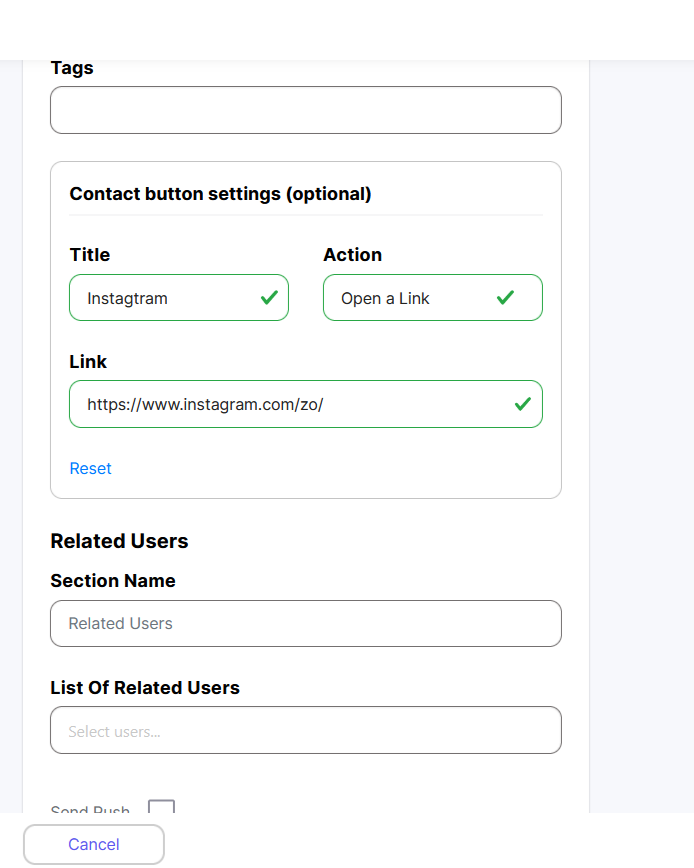
The contact button in your catalog items offers a direct way for fans to connect. Here’s what it can do:
- Email a Seller: If you want to communicate with a seller via email, enter their email address.
- Open a Link: To direct users to a webpage, provide the necessary link.
- Message User: Select the relevant user from your list to message them directly.
This flexibility allows fans to easily reach out for more information or engage with sellers and other users directly, enhancing the interactive aspect of your app. In this tutorial, we use this button to add a link for social media.

Store (Marketplace)
Adding a marketplace to your fan club app doesn’t just create a new source of income – it unlocks even more valuable opportunities to engage your community. With a built-in store, your app becomes the go-to destination where members can:
- Access exclusive community merchandise.
- Stay engaged with new, limited product releases.
- Find and buy unique items for their collections.
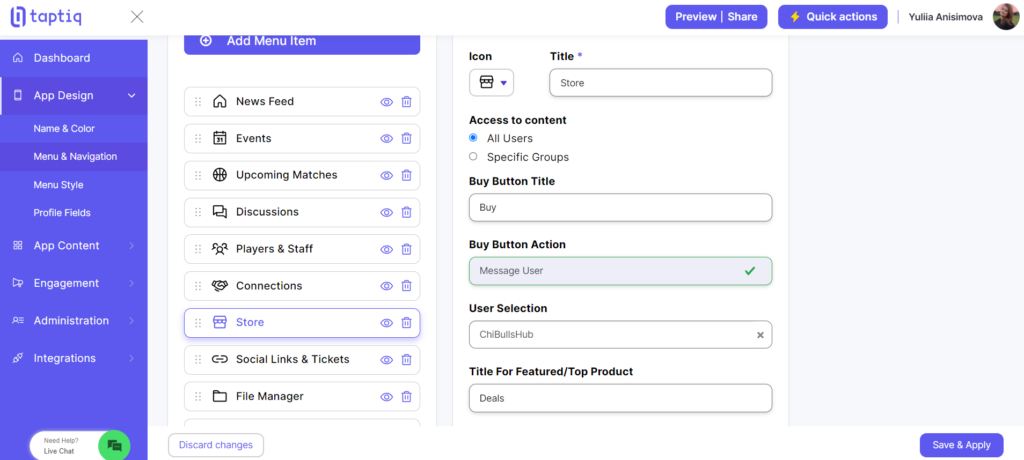
General Settings
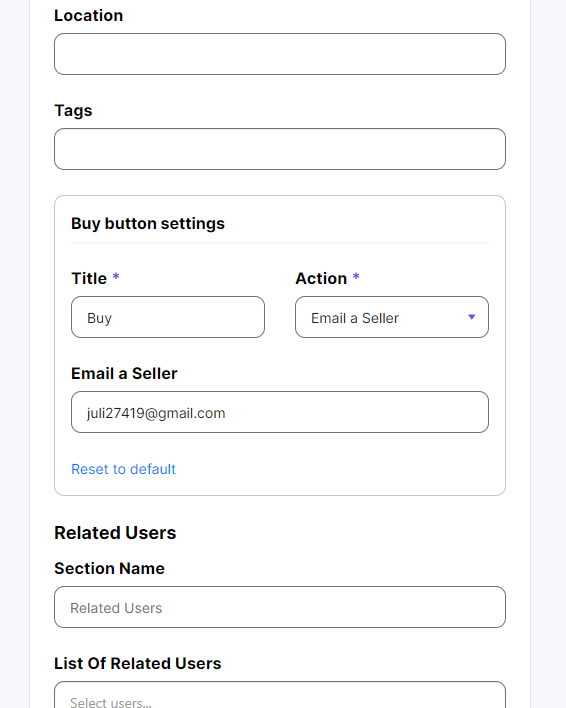
To get started with your fan club’s marketplace, go to App Design -> Menu & Navigation -> Store. Here you can customize some key settings:
- Change the title that appears on your Buy button.
- Set what happens when users click the button: Email a Seller (provide an email address), Open a Link (paste a website URL), or Message User (select someone to receive messages).
- Change the title displayed for your Featured/Top Products section.
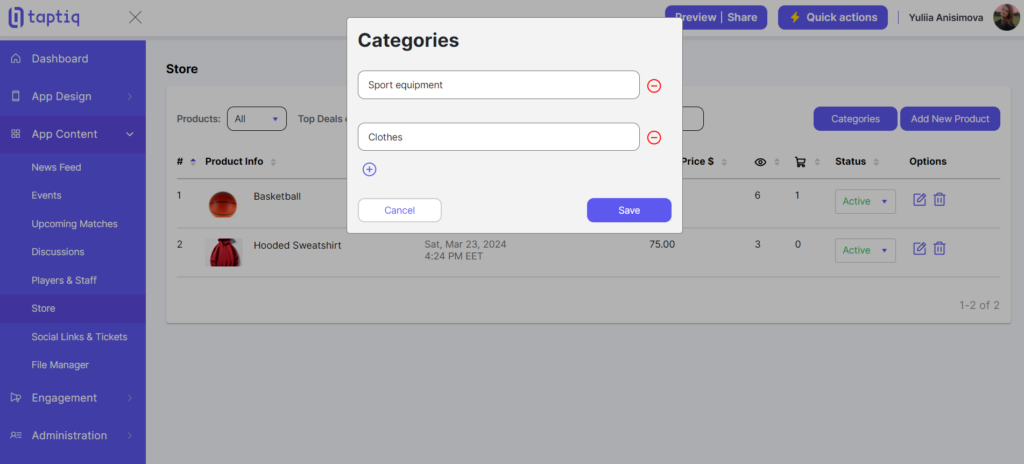
Categories
Categories help organize your products and make it easier for fans to find what they want. They improve the overall shopping experience within your app’s marketplace.
To set up categories in your fan club marketplace:
- Click the Categories button.
- Type in titles for your different categories.
- When you’ve entered all categories, press Save.
Here are some examples of categories:
- Jerseys
- T-Shirts
- Caps
- Autographs
- Limited Editions
Adding New Product
Here’s how to add a new product to the marketplace:
- Press the Add New Product button.
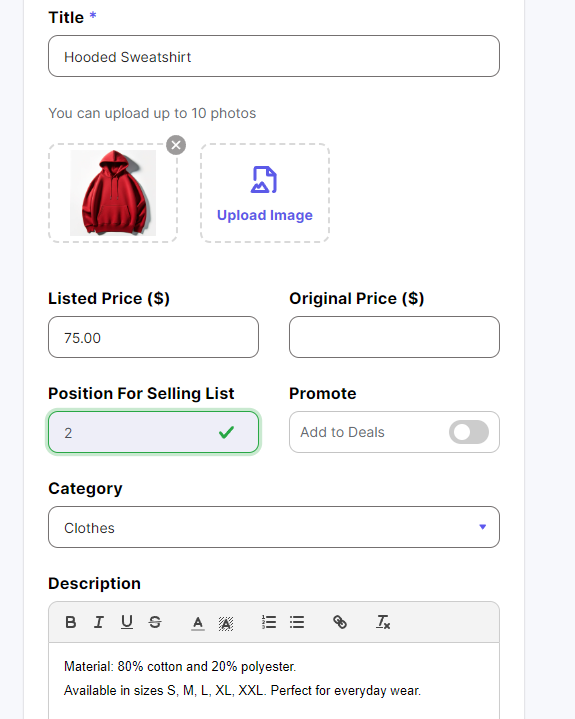
- Add a title for your product.
- Upload an image to show the item.
- Set the prices. The Listed Price is the current selling price that people will pay. If the item is on sale/discounted enter the original higher price. It allows you to show the old, crossed-out price alongside the new one. If not on sale, leave the Original Price field blank.
- Choose the product’s position in the selling list to feature popular items higher.
- Toggle Promote to add the item to a deals section.
- Select which category the product belongs in.
- Write a description with all the product details.
- Set a location if needed for pickup/delivery.
- Add tags to help fans search (ex: size, color, brand).
- Customize the buy button, just like in the general marketplace settings.
- Add Related Users. Enter a title (ex: Suggested Sellers) and choose the necessary users from the list.
- Check Send Push to notify members about this new product listing.
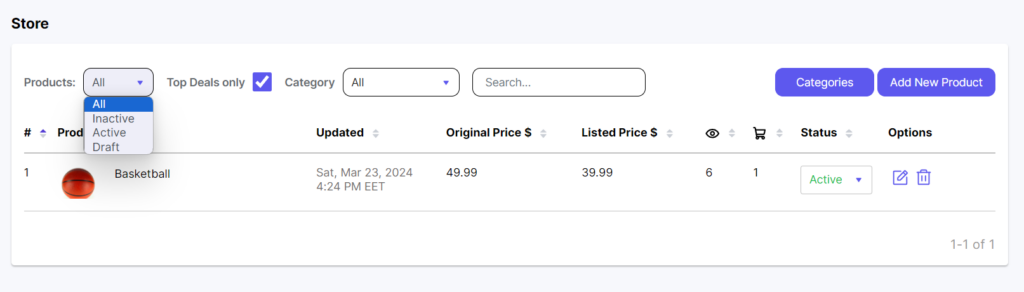
Managing Listed Products
Once you have products listed, there are several ways to keep things organized:
- Toggle items between Active and Inactive status. Inactive products remain saved but won’t be visible.
- Easily edit product details or completely delete the product.
- See how many times the Buy button was clicked for each item.
- Check the total number of views per product.
These management options give you full control over your marketplace, and help you keep products up-to-date and analyze which ones are popular.
Social Links & Tickets (Custom Screen)
The Custom Screen allows you to build custom layouts and designs for your fan club app using a simple drag-and-drop page builder. It gives you the freedom to implement unique ideas. In the right sidebar under the Content tab, you’ll find various elements you can add to your custom screen, such as images, text, buttons, and more.
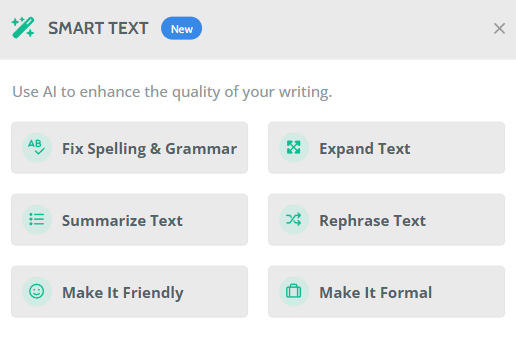
For some elements like text boxes, you’ll see an AI-assisted mark. It allows you to change the text tone (ex: formal), fix grammar and spelling, and much more.
Image
Drag and drop the Image element onto the page, and select the image element.
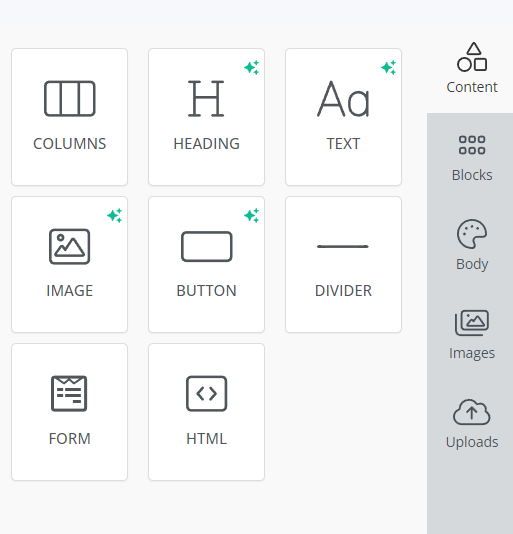
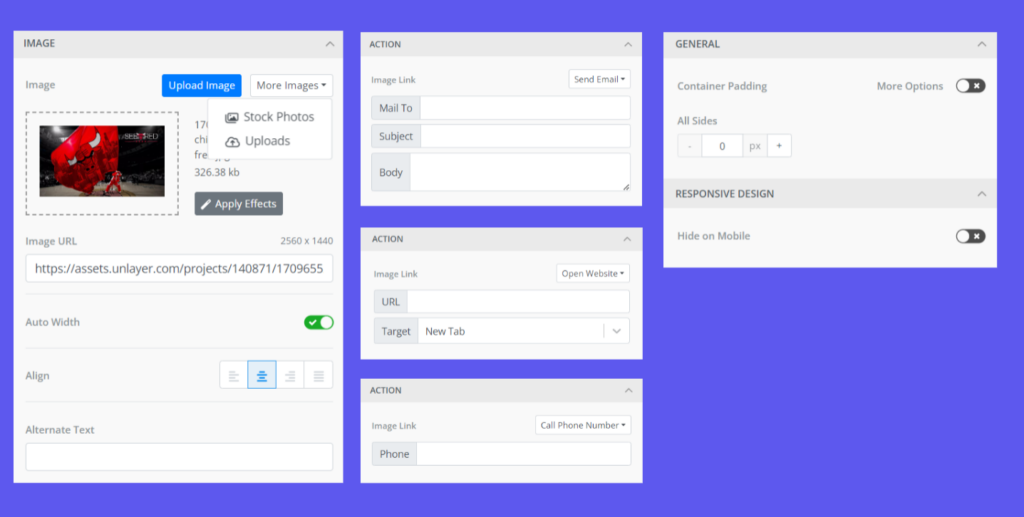
In the settings, you can:
- Upload your own photo or choose from free stock images.
- Align the image (left, center, right).
- Add alternative text describing the image.
- Set the image action (open website, send email, call number).
- Container Padding: This adds space between the image and its container edges
- Hide on Mobile: You can choose to hide certain elements when viewing on a mobile device
Heading
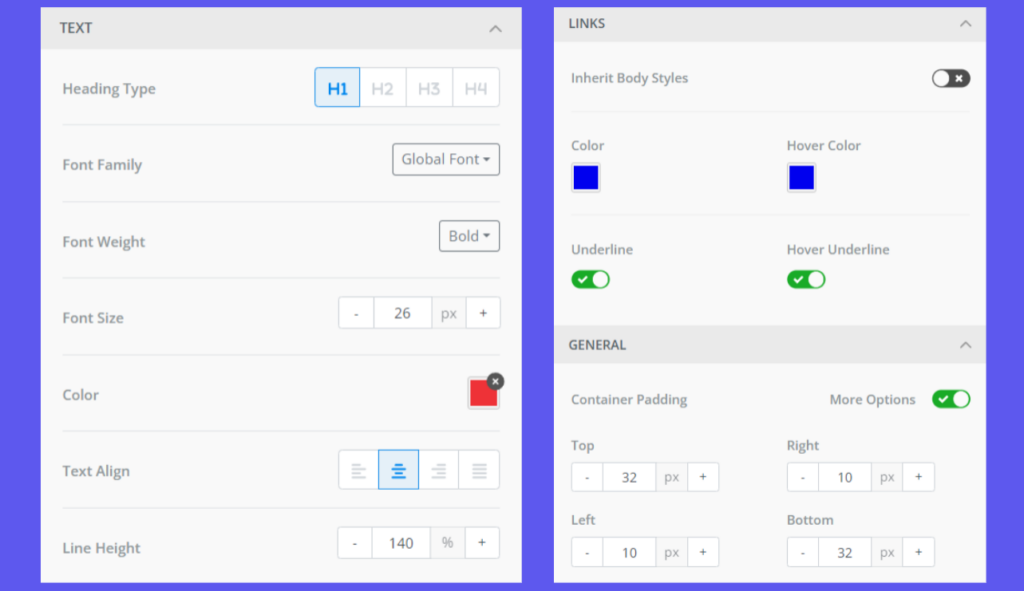
From the Content sidebar, choose the Heading element and drag it onto the page. Select the heading to access its settings:
- Heading Type: Choose between H1, H2, H3, or H4 heading sizes.
- Font: Set the font family, weight (regular or bold), size, and color.
- Text Align: Position the text to the left, center, or right.
- Line Height: This determines the spacing between lines of text.
- If your heading contains links, you can style them differently.
- Container Padding: This adds space between the heading and its container. If you click the More Options button you can adjust the padding on each side (top, right, bottom, left).
- Hide on Mobile: You can choose to hide the heading when viewed on smartphones.
Button
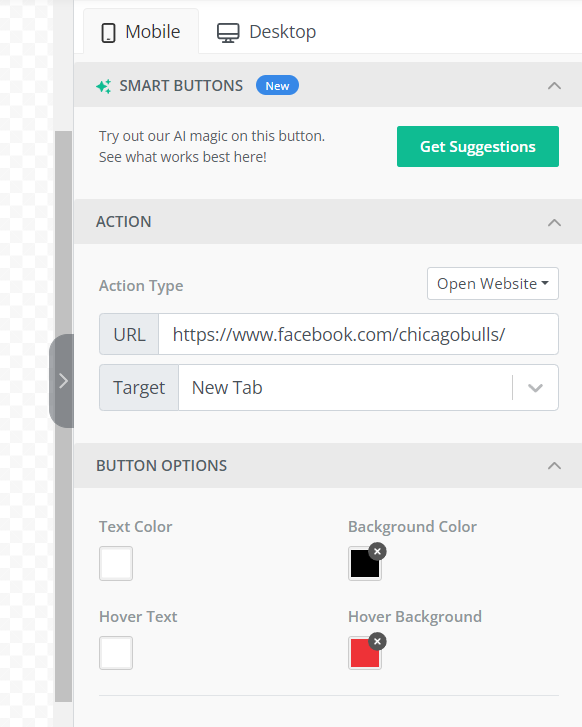
Here are the instructions for customizing buttons, like for social media links or ticket sellers:
- Drag and drop the button onto the page and select the button to access its settings:
- Choose the action type: Open Website (paste the URL link), Send Email (enter the recipient, subject line, and body text), or Call Phone Number (provide the phone number).
- Text & Background Colors: Pick colors for the text and button background. Customize how the button looks when hovered over (only for desktop).
- Set the button’s width.
- Choose the font family, weight (regular/bold), size, and text alignment. Adjust the line height (spacing between lines of text).
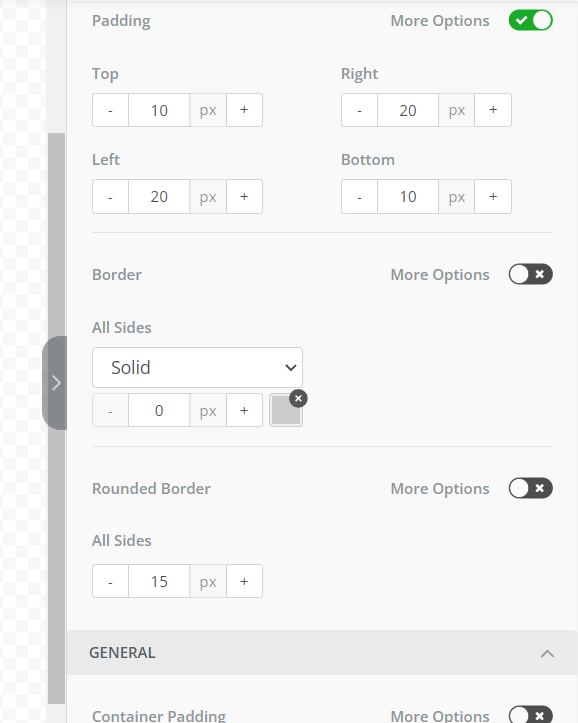
- Padding: Add space between the text and button edges.
- Border: Choose solid, dotted, dashed border styles and rounded corners.
- Container Padding: Add space between the button and its container.
- Hide on Mobile: Option to hide the button on smartphone screens.
With full customization over actions, colors, text, sizing, and spacing, you can style buttons to match your brand.
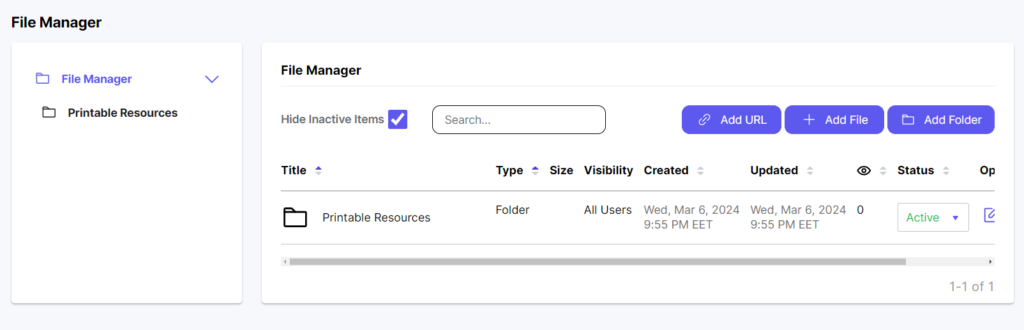
File Manager
The File Manager allows you to securely store and organize all files related to your fan club app. It is crucial for:
- Sharing important documents, media, and other materials with members.
- Keeping all the resources available for users anytime and anywhere.
- Storing/backing up files instead of losing them on individual devices.
With the File Manager, you can easily:
- Upload any files like PDF documents, images, videos, audio files, and more.
- Add URL to the necessary resources.
- Organize files into separate folders for easy navigation.
- Make specific folders visible only to certain groups.
Also, you can manage existing files:
- Change a file’s status to Active or Inactive.
- Move files between folders to stay organized.
- Copy sharable links for specific files.
- Delete files you don’t need anymore.
Wrapping Up
Sports fans today are always looking for new ways to connect with their communities. With Taptiq, creating apps has never been easier. Customize your app’s design, connect with other fans, and unleash your creativity to take your passion for your team to new heights! Don’t let technical challenges hold you back – start building your fan app today and watch your community grow stronger. The sky’s the limit!