Social media platforms have become essential tools for attracting new members and advertising your community. However, while these platforms are great for reaching a wider audience, they often struggle to create a real connection among your members. That’s why having your own community app is crucial. It provides a centralized place for your members to interact, share experiences, and build long-lasting relationships.
If you’re ready to take your community to the next level, you’re in the right place. By the end of this tutorial, you’ll understand the benefits of having a dedicated app, learn how to define the necessary features for your community, and successfully build an app that brings your members together.
6 Benefits of a Community App
- Improve communication and collaboration: Members and managers can cooperate more effectively on a centralized platform. They can post updates, chat privately, participate in discussions, or organize meetups. All of these foster a strong sense of belonging and unity.
- Increase engagement: The app makes it easier for community members to stay informed about community news, events, and activities. Push notifications and personalized feeds keep members updated and encourage them to participate more actively. It leads to greater involvement and engagement.
- Encourage social bonds: The app helps find and connect people with similar locations, professions, or interests. Members can build long-lasting relationships like friendships or collaborative partnerships.
- Personalize user experience: With the help of analytics data, get insights into what content, features, and activities members enjoy most. Use it to adjust the app to users’ preferences and make it more engaging and valuable.
- Enable resource sharing: The app can be a centralized hub for sharing valuable resources, such as documents, guides, and links. It makes it easier for members to access the information they need and contributes to the community’s collective knowledge.
- Encourage members to create content: The app allows them to share their posts, like blogs or news. This content keeps the app fresh and engaging. It also shows the community’s diverse thoughts and experiences.
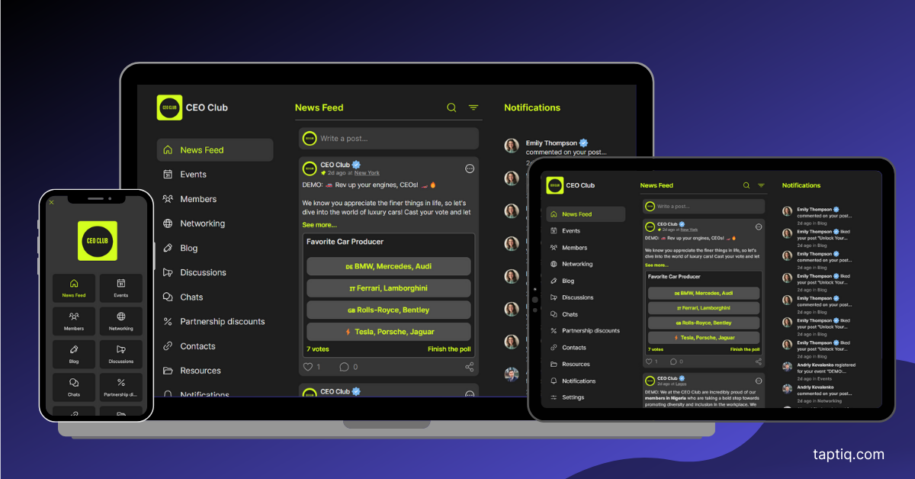
Building Your Community App: A Step-by-Step Guide
Now that you understand the benefits of having a dedicated community app, it’s time to start building one. In the following sections, we’ll explore its essential parts and settings. However, remember that every community is unique, and you should feel free to experiment, modify, and add features based on your specific needs.
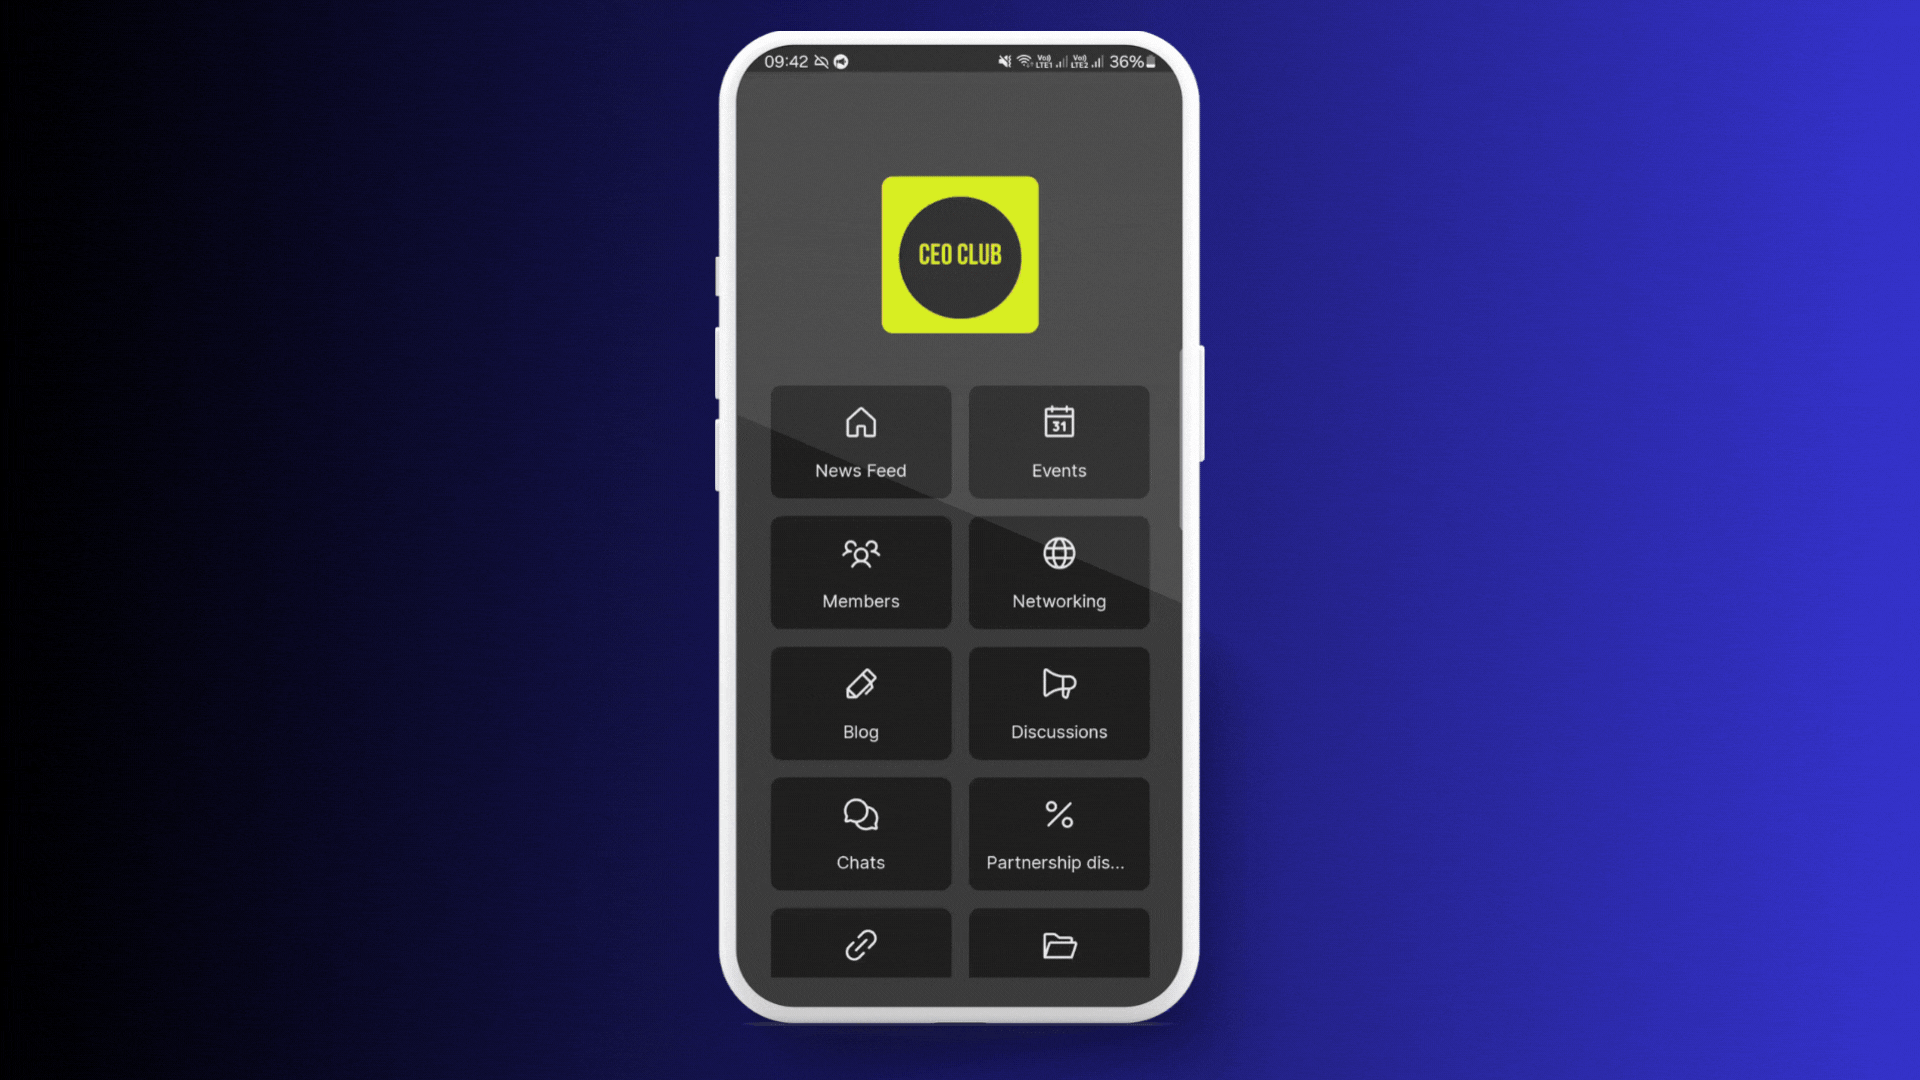
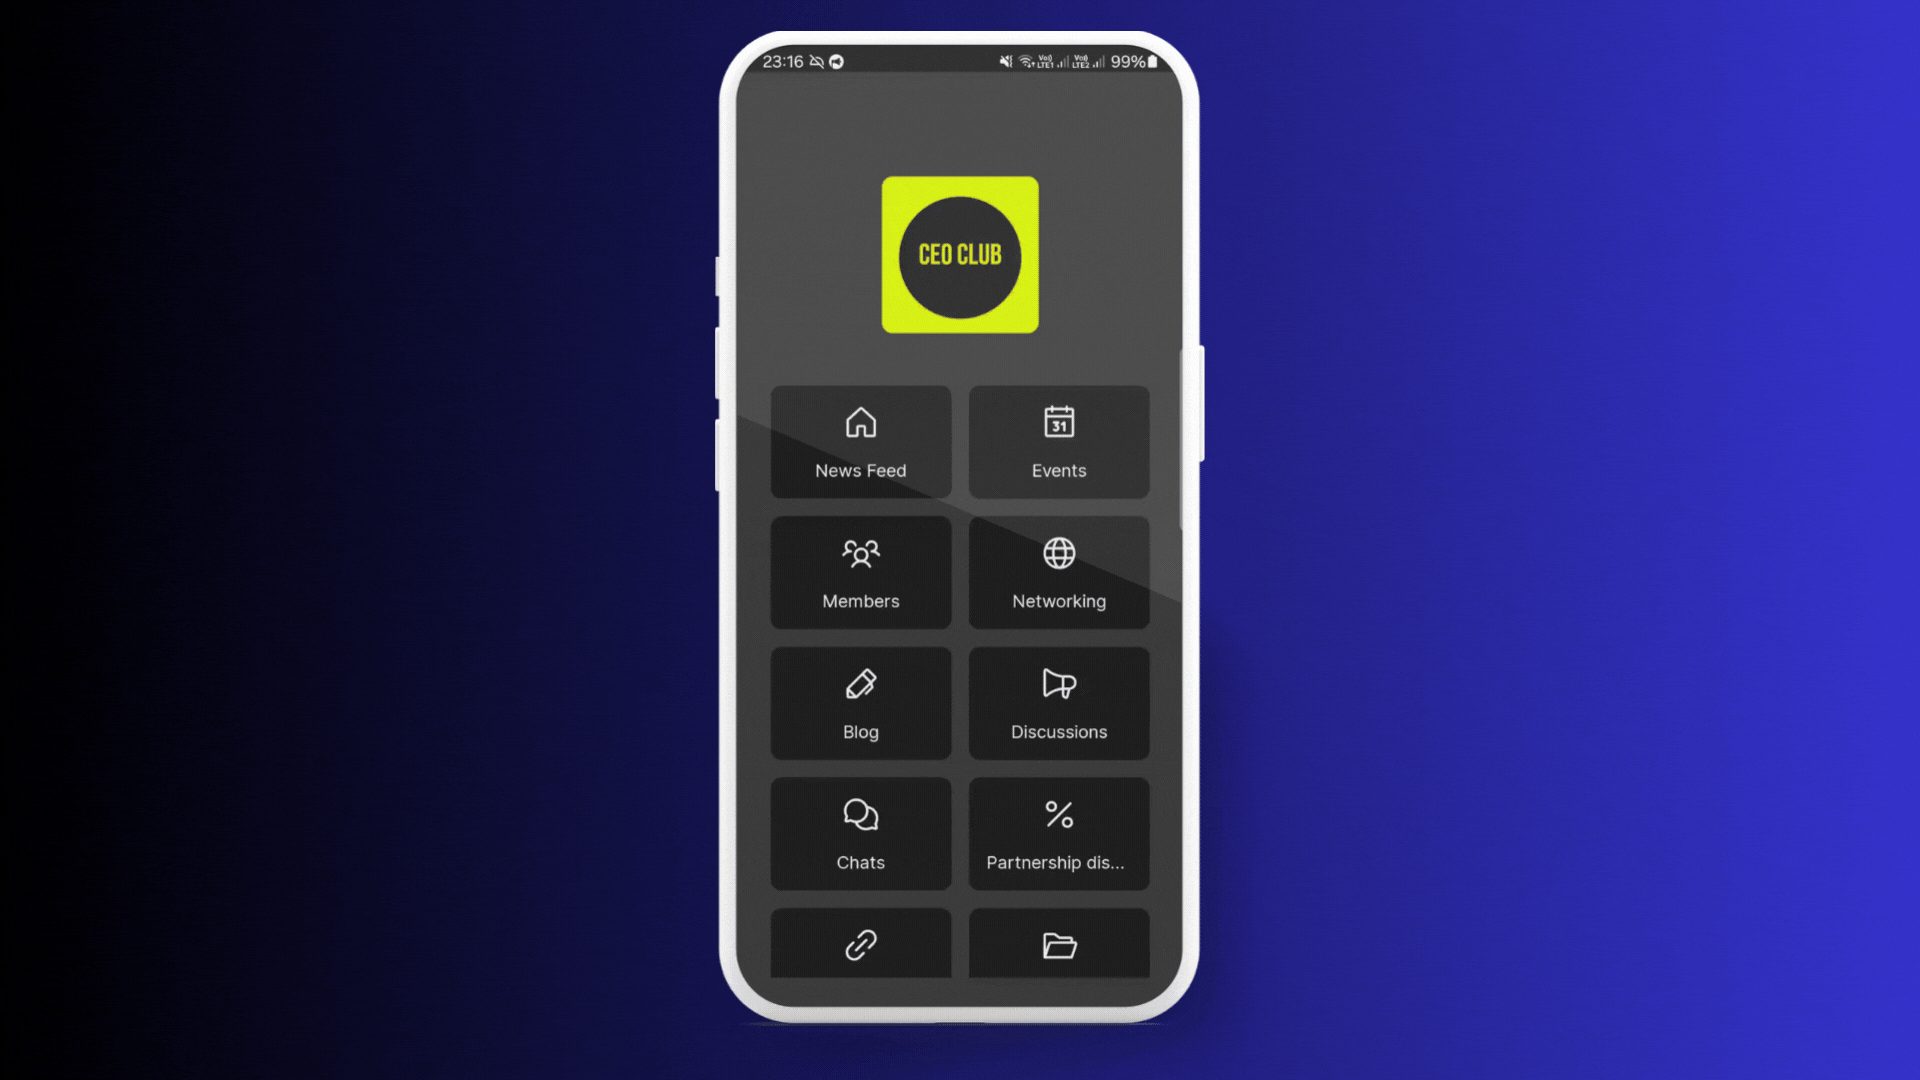
Core Features
The table below shows the essential features your app needs and how they benefit your community:
| Feature | Benefit |
|---|---|
| News Feed | Keeps members informed about the latest updates or announcements. |
| Events | Allows members to easily find and join community activities, helping them stay engaged and connected. |
| Members (Members List) | Allows users to explore the community, connect with others who share similar interests, and discover potential collaborators or partners. |
| Networking (News Feed) | Provides a space for members to exchange information, share their expertise, and connect with others, encouraging member-generated content and collaboration. |
| Blog | Offers a space for members and administrators to share in-depth articles, insights, and experiences with the community. |
| Discussions | Encourages members to engage in meaningful conversations, ask questions, and exchange ideas on various topics. |
| Chats (Messages) | Allows members to communicate with each other directly, making it easy to ask questions, share ideas, and build relationships. |
| Partnership Discounts (Catalog) | Gives members access to exclusive discounts, promotions, and special offers from community partners. |
| Contacts (Custom Screen) | Provides easy access to the community’s contact information and social media links, making it simple to connect on other platforms. |
| Resources (File Manager) | Serves as a centralized hub for members to access valuable files, media and other materials. |
Menu and Navigation
Before adding content, it’s important to set up how your app looks and feels to create a visually appealing and user-friendly experience. In the App Design section, you can choose your app’s accent color and features, select a light or dark theme, and customize the menu style to suit your community’s needs.
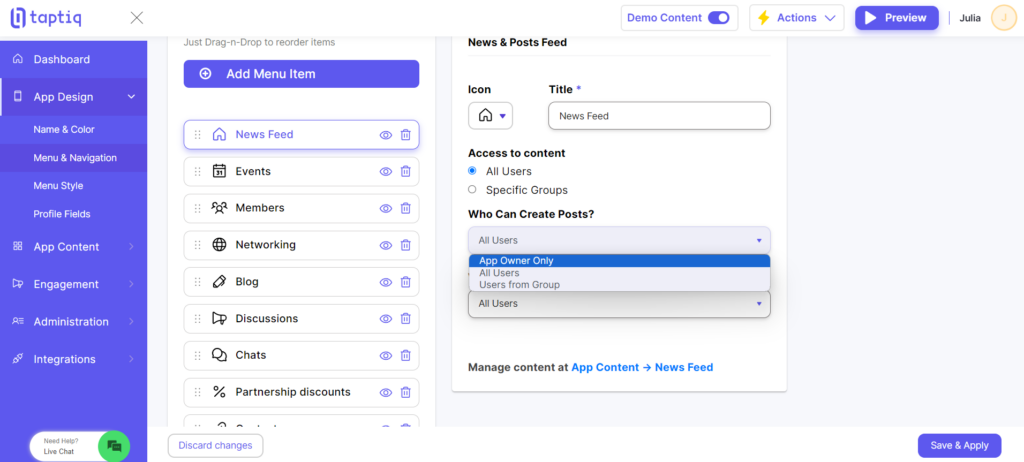
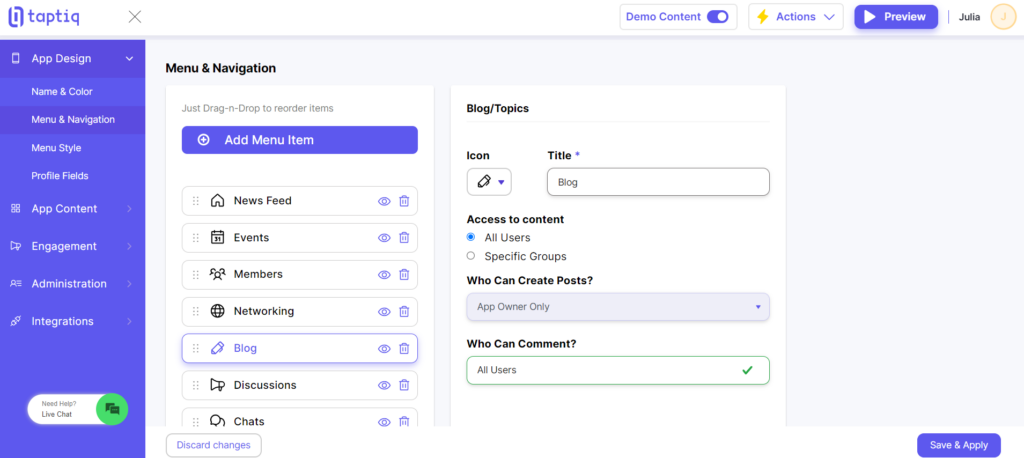
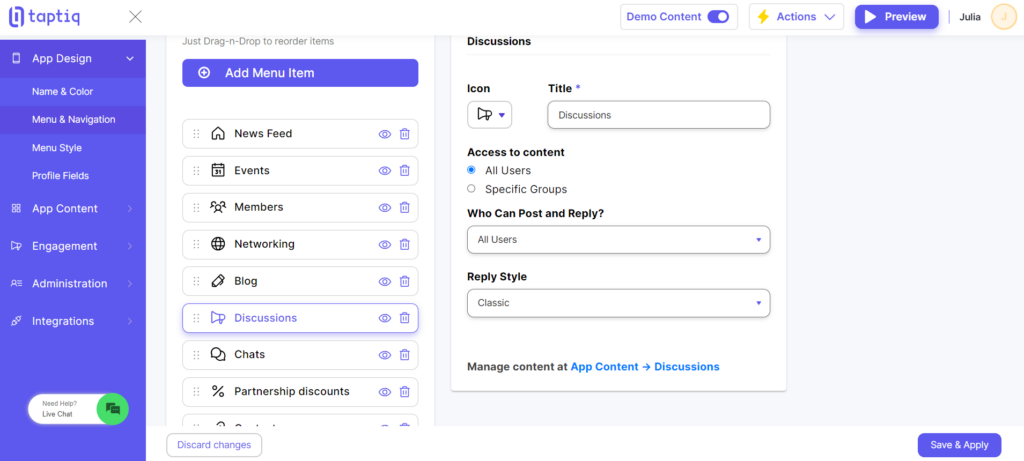
For now, we’re going to focus on the Menu & Navigation settings (found in App Design -> Menu & Navigation). It is where you can set up menu items (modules) your app has. We’ll cover the most important settings, but we highly recommend reading our in-depth guide on App Design, which covers all the available options in detail, including the Menu & Navigation section.
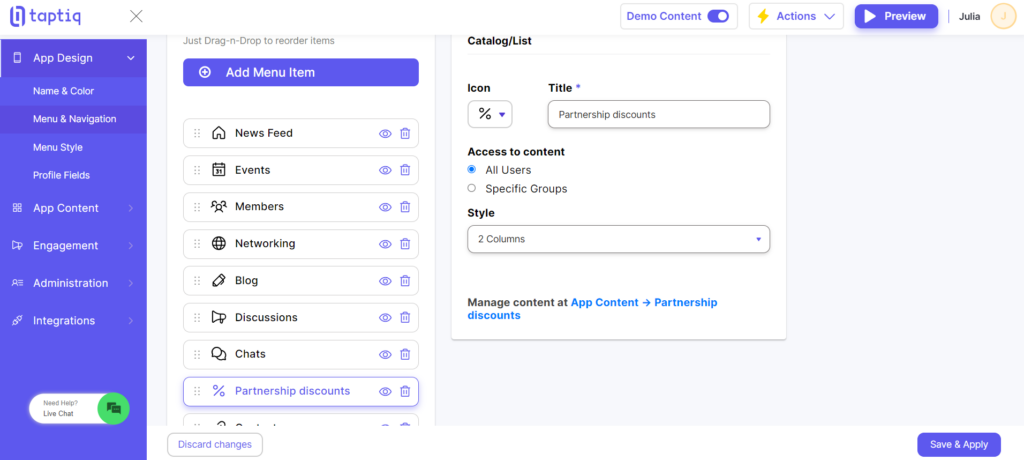
Here are the settings you need to adjust in Menu & Navigation:
- News Feed and Networking: Decide who can create posts. For the News Feed module, choose App Owner Only or, if you have managers or admins, create a group for them, then select Users from Group and choose it from the list to grant them posting permissions. For Networking, set Who Can Create Posts to All Users.
- (Optional) Blog: Set Who Can Create Posts to App Owner Only or choose the group where you add all managers/admins.
- Discussions: Set Who Can Post and Reply to All Users to encourage engagement and participation.
- (Optional) Partnership Discounts: Set the Style to 2 columns or choose the layout that best suits your needs and preferences.
💡 Useful Tip: Don’t forget to publish your app so you can install it and test it on your phone or other devices. Publishing also allows other users to start using your app. To publish your app, click on Actions -> Publish.
News Feed
It’s the first thing users see when they open the app, so it plays a key role in making members feel connected and encouraging them to participate regularly.
A well-maintained News Feed:
- Promotes upcoming events and activities.
- Highlights member achievements.
- Shares relevant industry news and trends.
- Emphasizes your community’s purpose and values.
Here are the steps to create a new post in the News Feed:
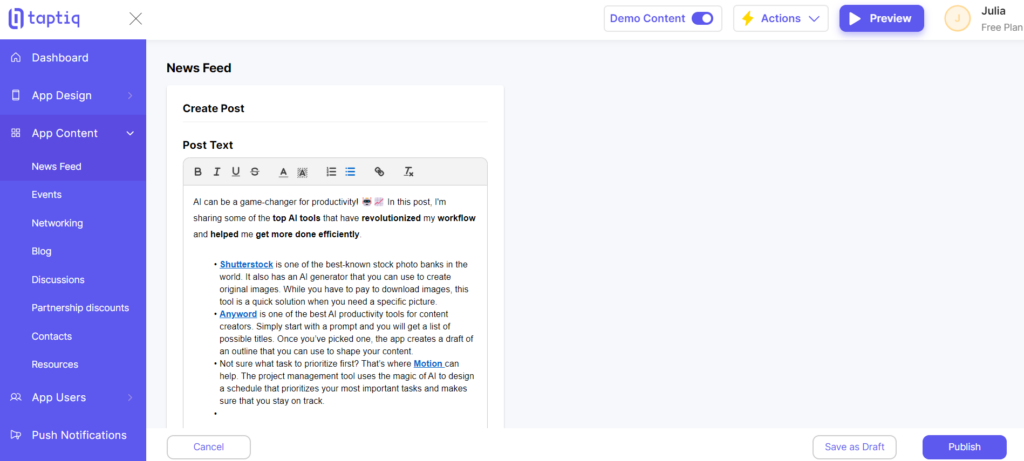
- Go to the App Content -> News Feed and click the Add New Post.
- In the post editor, add and format the text content for your post. You can use common formatting options like bold, italics, etc.
- Optionally, you can provide a location for the post.
- Add media (up to 10 images), polls, or link previews to make your post more engaging and visually appealing.
- When you’re ready, click Publish to make the post visible to users immediately, or Save as Draft to post it later.
You can publish posts to the News Feed either from the app builder or directly from the app on your phone, allowing you to create and share content on the go.
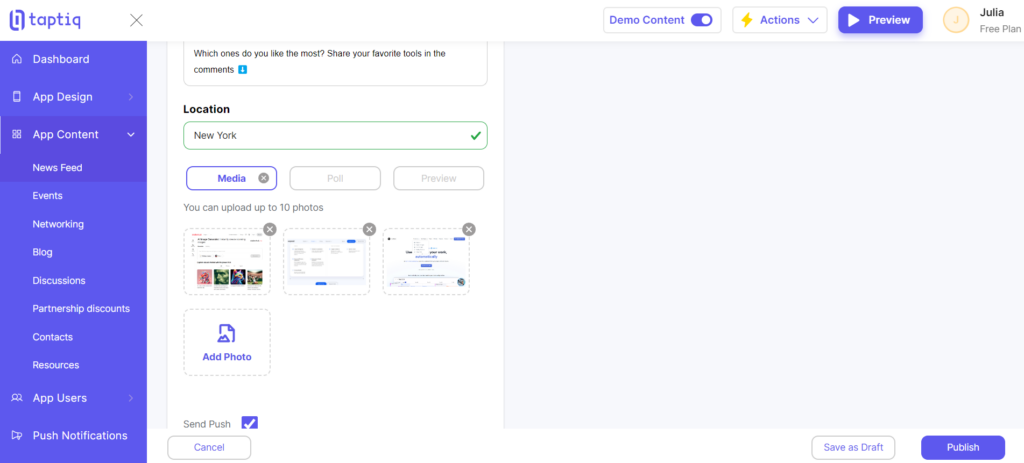
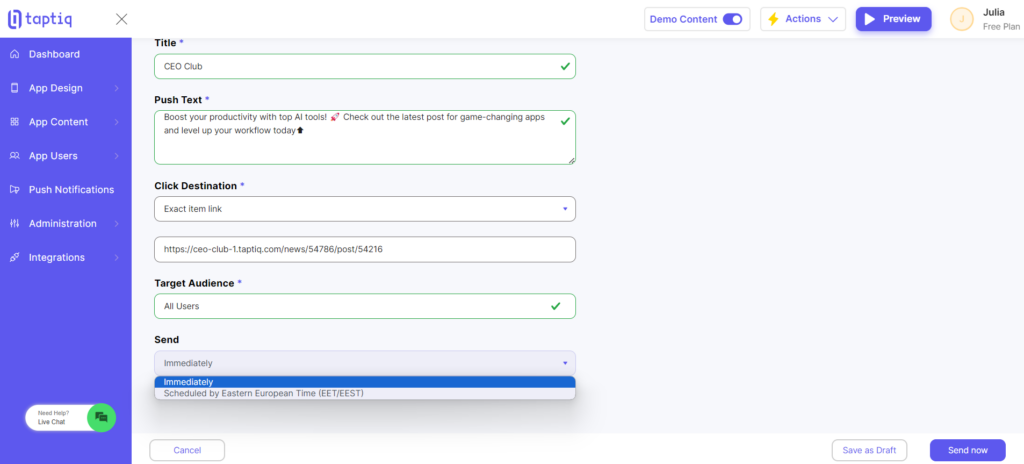
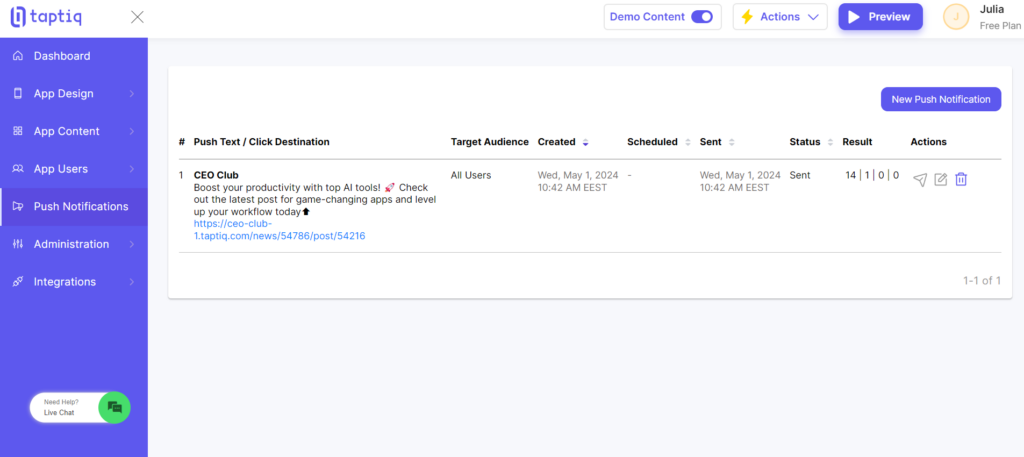
If you tick the Send Push option, you can notify users about the new post. After you publish or save as a draft, you’ll go to a page where you can add a title, message, destination (the page or screen the user will be taken to if they click on the notification), choose which users to notify, and either send the push notification immediately, schedule it for a later time, or save it as a draft.
🔗Learn more about Push Notifications
Events
An Events module engages and connects members. It lets them easily find and join activities. Well-organized events offer many benefits:
- Help members meet and build relationships in person.
- Share knowledge through workshops, talks, and discussions.
- Provide opportunities for networking to make new connections.
- Increase member loyalty and commitment to the community
Follow these steps to create a new event:
- Go to App Content -> Events.
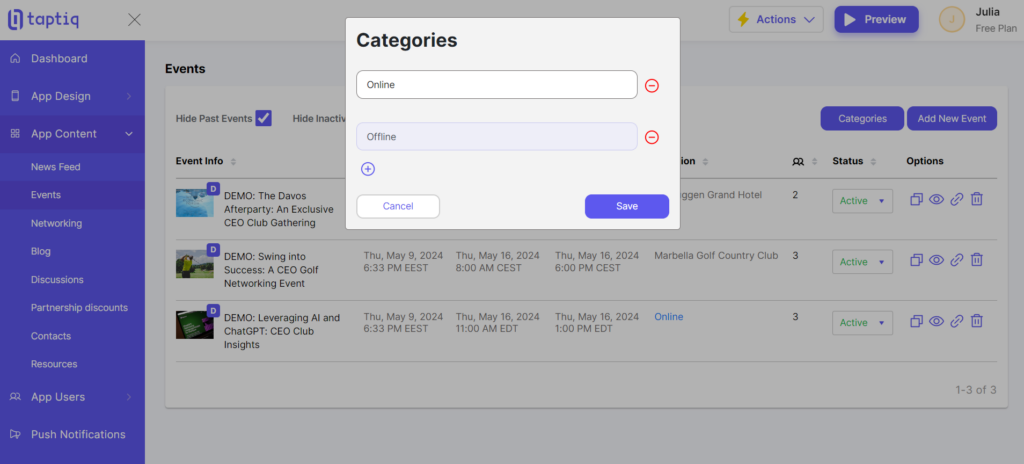
- Click Categories to add and manage them (e.g. Online/Offline for filtering).
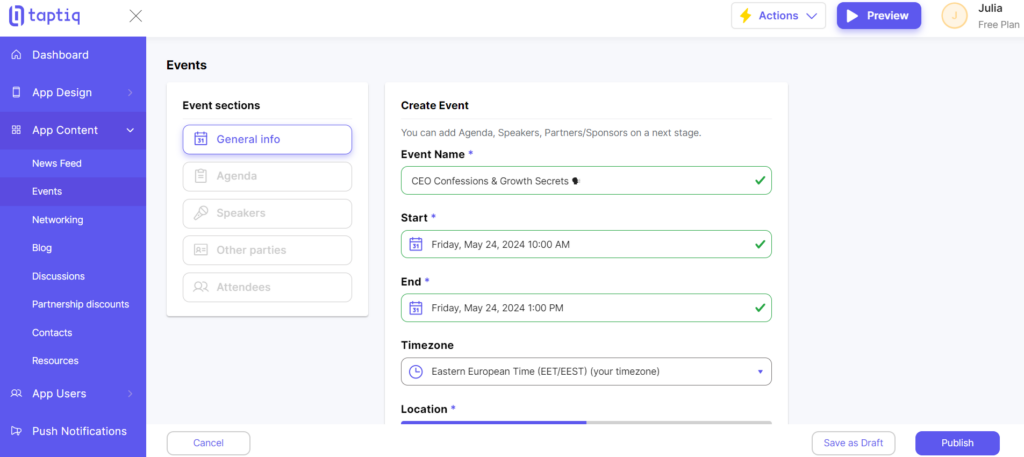
- Click Add New Event.
- Provide event details (Event Name, Start/End dates, location, etc.).
- Choose registration type: Internal (inside the app), External (from other websites/platforms, provide link), or Disabled.
- (Optional) Add related users (e.g. Organizers section, choose users from the list).
- (Optional) Tick Send Push to notify users, you can send immediately or schedule for later.
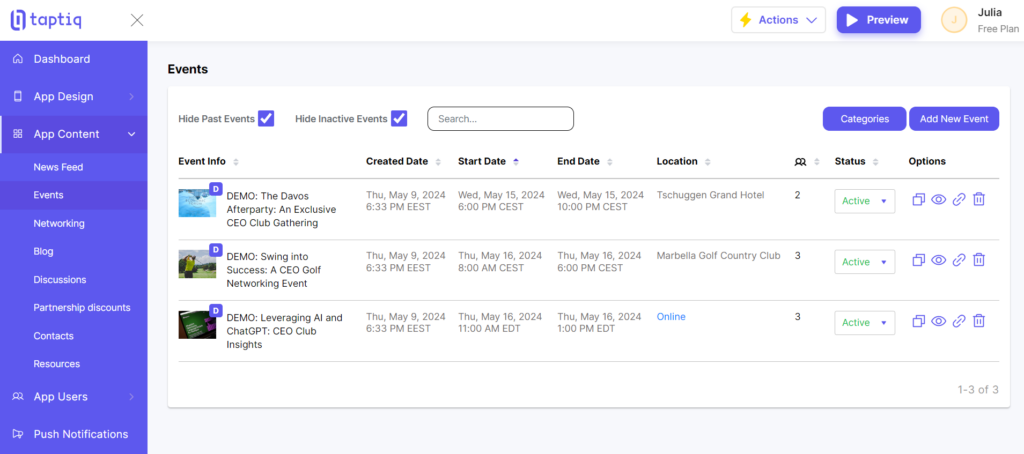
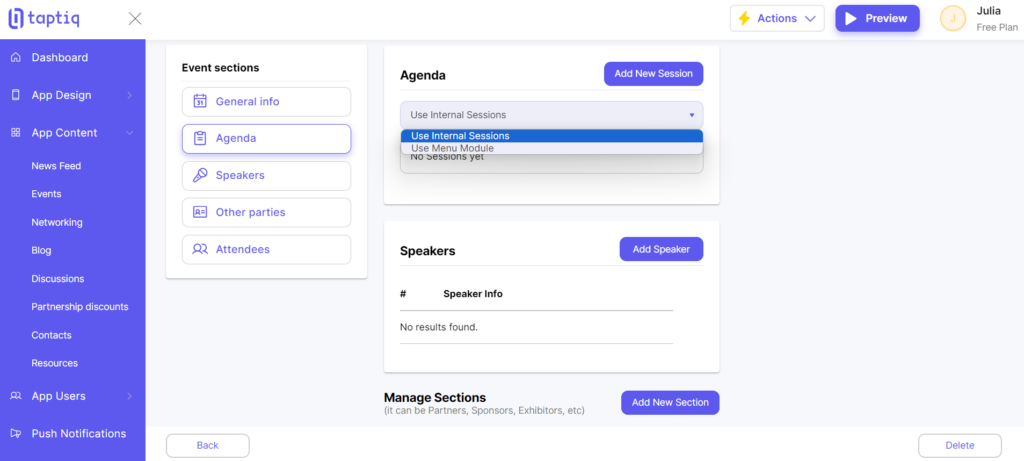
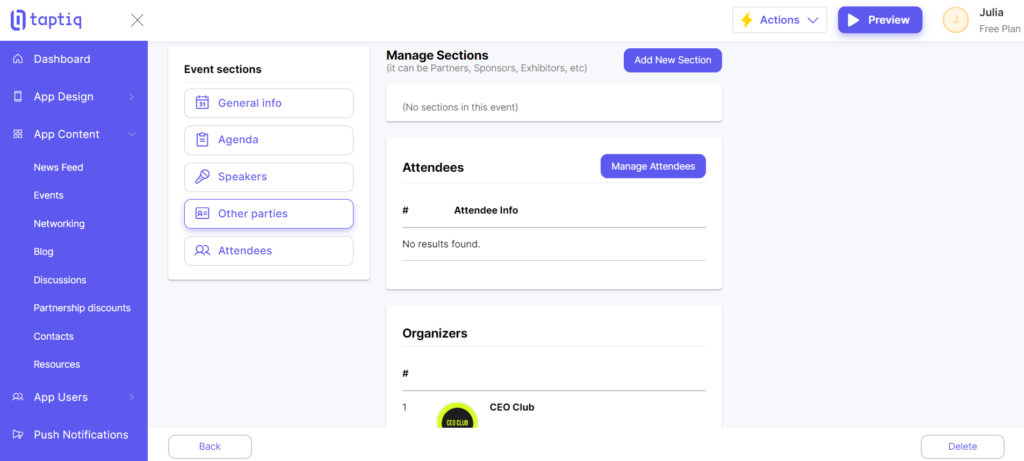
After publishing or saving the event as a draft, you can add more details like the Agenda (add internal sessions here for an event or use the Agenda module in Menu & Navigation for tracks/categories), Speakers, or information about sponsors/partners.

Members
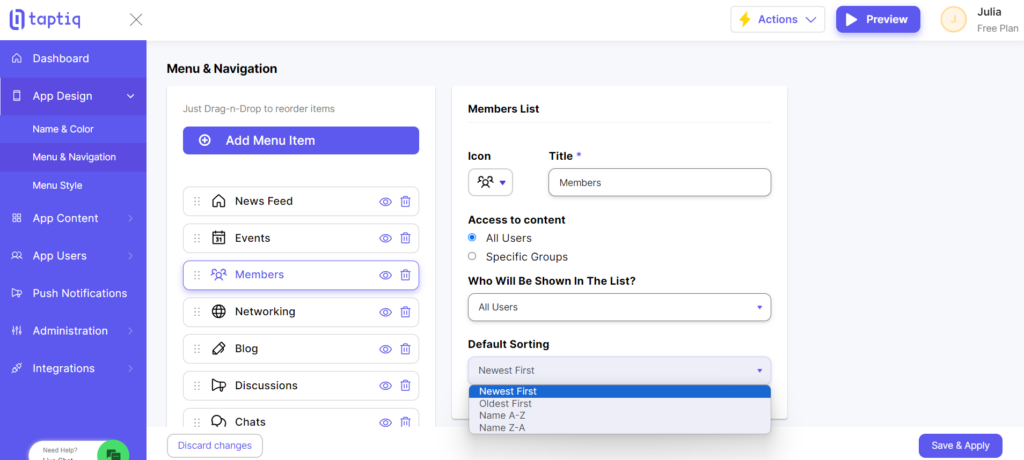
The Members List allows members to see others in the community and connect with people who have similar interests or goals. This encourages networking and relationship-building. You can manage the main settings in App Design -> Menu & Navigation -> Members. Here’s what you can set up:
- Access to Content: Choose who can see the Members List – All Users or just Specific Groups you create.
- Who Will Be Shown In The List?: Decide if you want to show all users in your app or only users from a certain group you pick. This lets you control who is displayed.
- Default Sorting: Pick how the member list should be ordered by default (Newest First, Oldest First, Name A-Z, or Name Z-A). This setting makes it easy to browse.
After choosing these settings, click Save & Apply.
🔗Learn how to manage users in your app
In the Members List, users can sort profiles by occupation, location, and more. It helps easily find members with specific backgrounds or from certain areas. Users can even add members they want to connect with to Favorites for quick access to key contacts.
Networking
In addition to the News Feed, it’s a good idea to have a space for community members to network and interact with one another. The Networking feature provides a platform for members to exchange information, share their expertise, and connect with others with similar interests or goals.
The functionality of Networking is similar to the News Feed. It is built on top of the News Feed module. However, the key difference is that all users are allowed to create posts and share content in Networking. It helps:
- Encourage member-generated content and collaboration.
- Promote active participation and engagement.
- Foster a sense of community ownership.
- Facilitate knowledge sharing and seeking advice.
- Members to showcase their expertise.
- Enable valuable connections and potential collaborations.
Blog
Having a Blog in your community app is a great idea for several reasons:
- Show expertise: Experts can share knowledge through blog posts, making the community a trusted source.
- Get members involved: Members can write posts to share their views and stories, keeping them engaged.
- Help learning: The blog lets people share useful information, tips, and talk about interesting topics.
- Bring the community together: Posts can highlight community values, achievements, and make members feel connected.
- Attract new members: Good quality blog content can attract new people interested in what’s discussed.
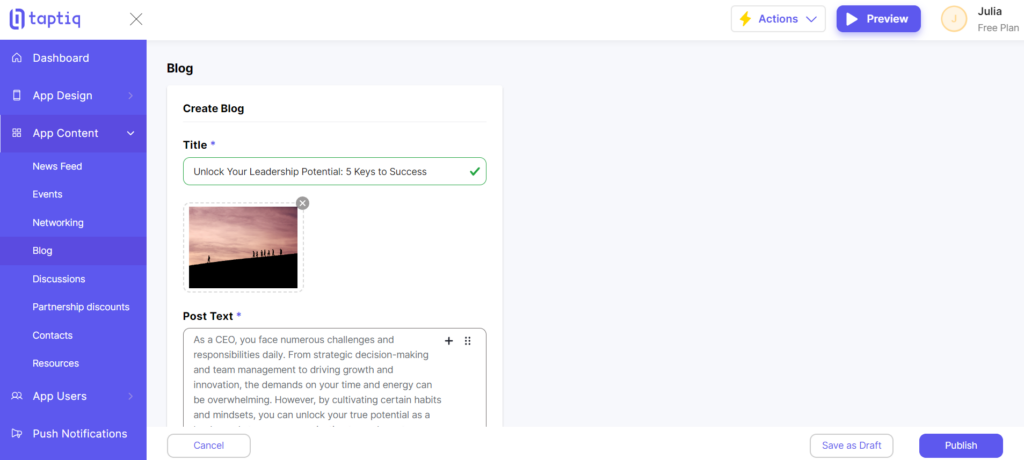
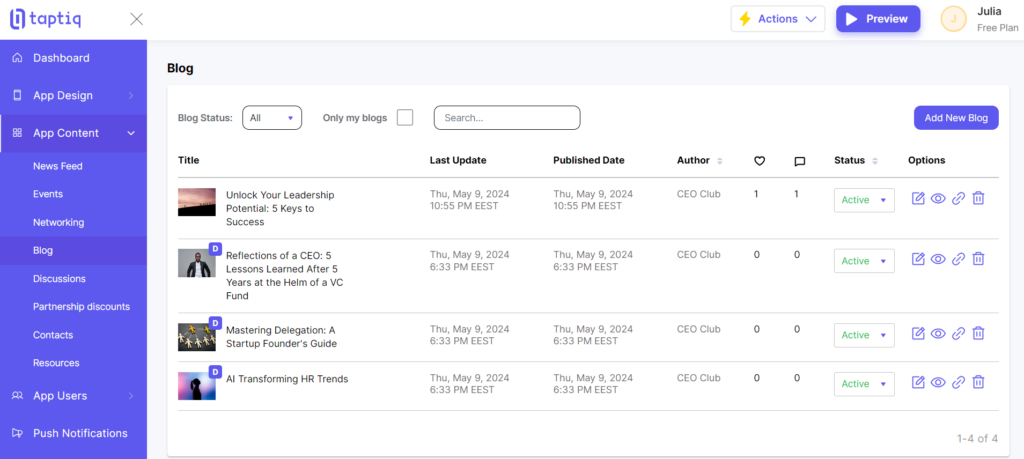
To make a new blog post, go to App Content -> Blog and click “Add New Blog Post”. When writing your post, you can:
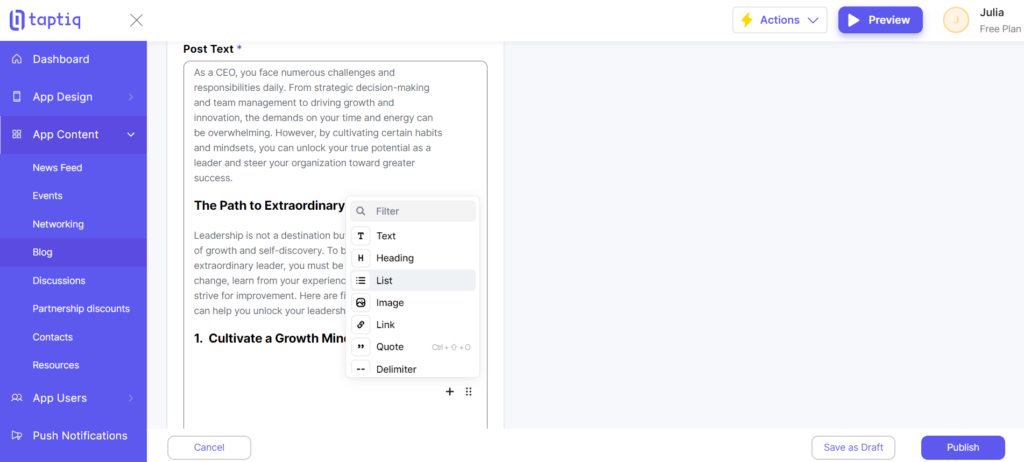
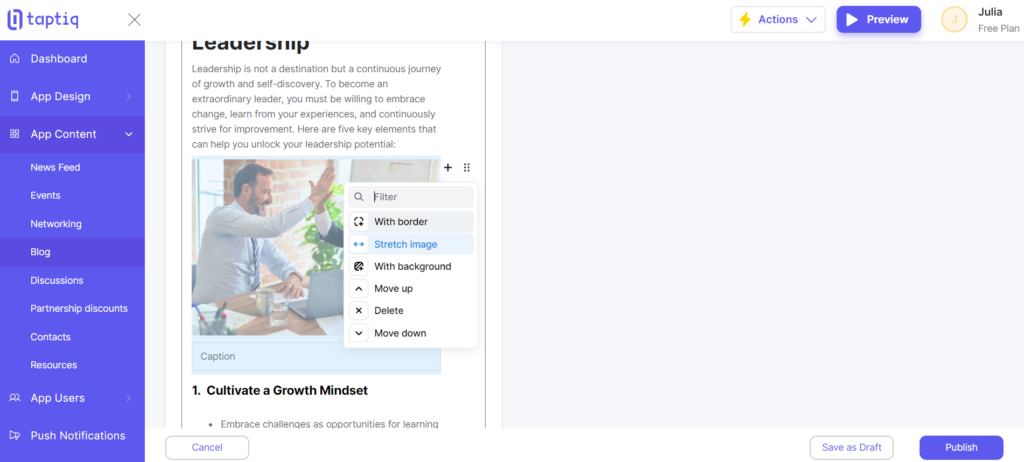
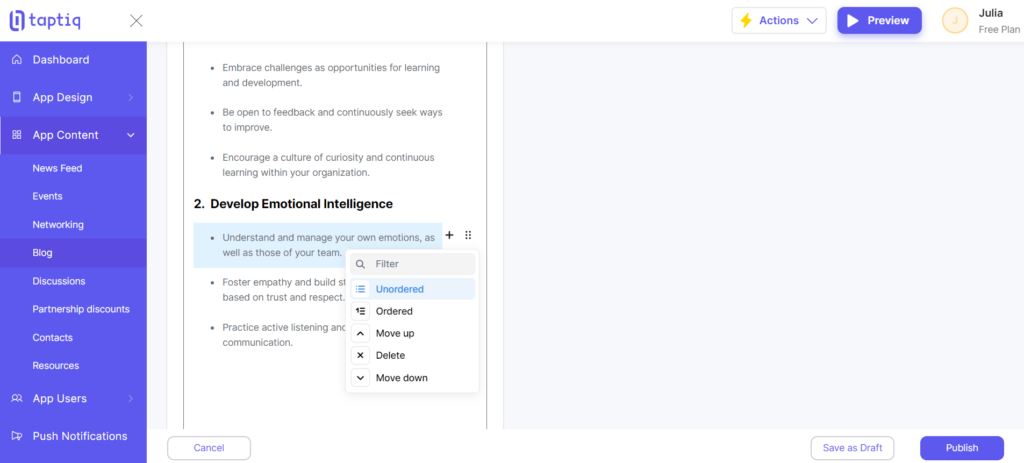
- Add text, headings, lists (numbered or bulleted), quotes, pictures, and more.
- Change how each part looks, like heading styles or switching between numbered and bulleted lists.
The editor lets you create good-looking and informative blog posts to share useful information with the community. An active blog helps people learn from each other and feel connected.
For existing posts, you can:
- See details like when it was posted, last updated, and who wrote it.
- See how many interactions (likes and comments) it got from users.
- Switch status between Active (visible to all) or Inactive (hidden).
- Edit the post content, view it, copy the link to share, or delete the post.
Discussions
Discussions are powerful tools for boosting engagement and encouraging knowledge-sharing in your community app. It’s a dedicated space for members to ask questions, exchange ideas, get advice, and engage in meaningful conversations.
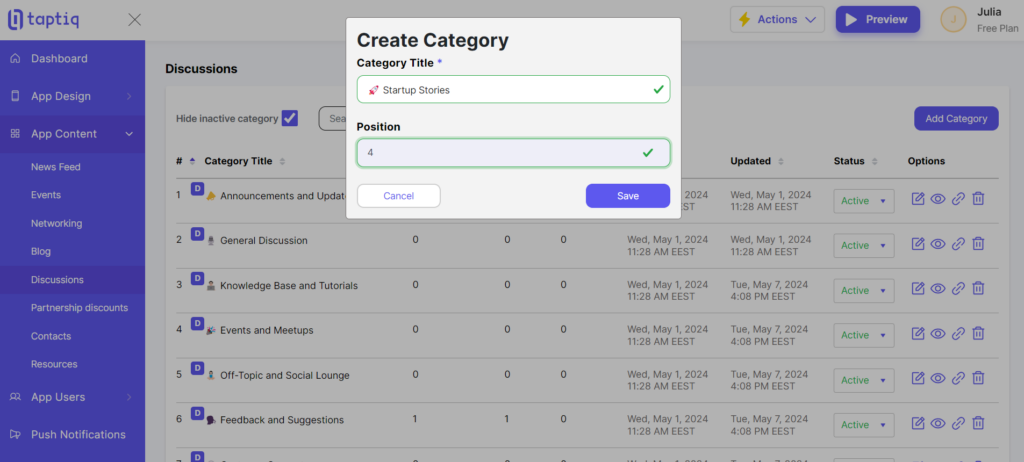
In the app builder, you can create and manage existing categories for Discussions:
- Go to App Content -> Discussions.
- Click Add Category.
- Give it a relevant title (e.g. Industry Trends, Success Stories, etc.).
- Choose the position you want for this category in the list order.
Once categories are ready, both you and community members can start new discussions within any of them directly from the app. Also, you can add polls, locations, or images to make them more engaging.
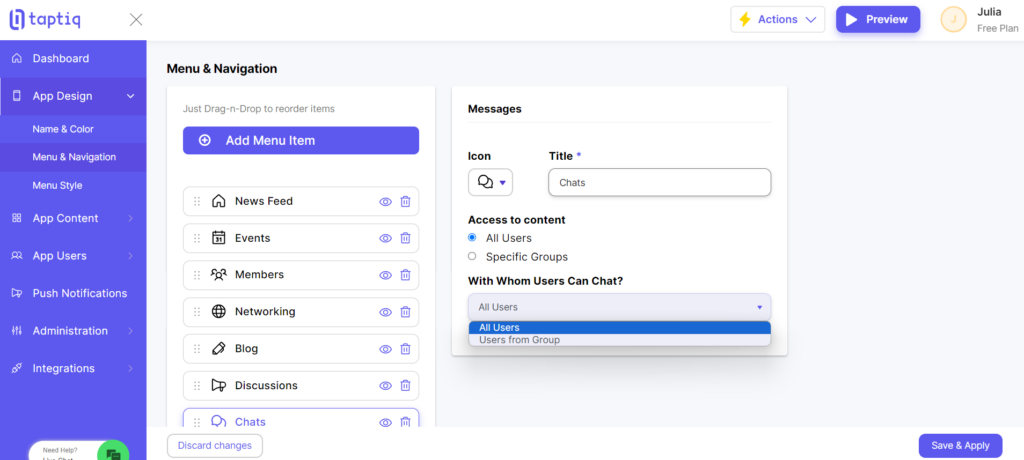
Chats
To configure the chat settings, go to App Design -> Menu & Navigation -> Chats. Here’s what you can set up:
- Access to Content: Decide who can access the chat module – All Users or restrict it to a Specific Group.
- With Whom Users Can Chat: Choose whether users can chat with All Users in your app or only Users from Group that you choose.
💡Useful Tip: You can create a separate private chat space just for managers and admins. Simply add another Chat module, make it visible only to a specific Managers/Admins group you create, and set With Whom Users Can Chat to that group.
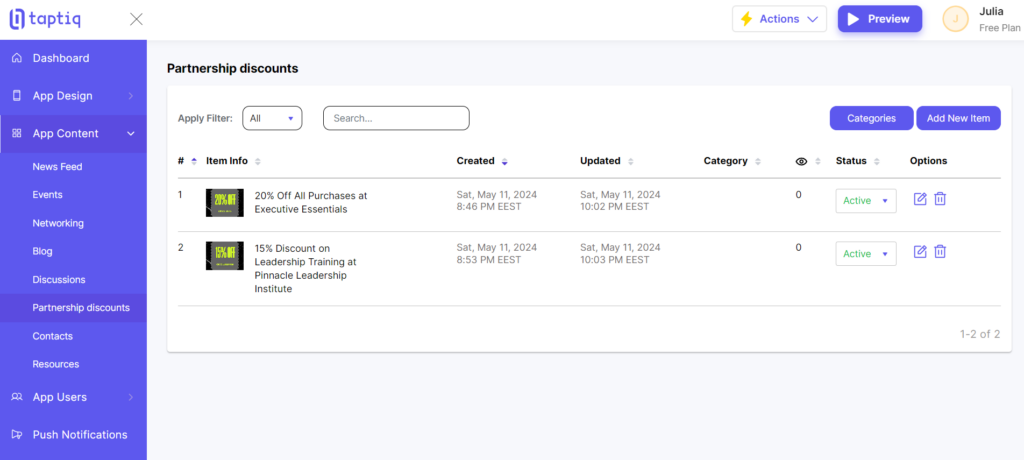
Partnership Discounts
This module lets you give your community members special discounts and deals from partner businesses. It’s great to:
- Provide extra value for members by giving them access to exclusive deals.
- Allow you to collaborate with companies that want to reach your community and get more sponsors.
- Encourage members to stay active in the app to find the latest discounts.
- Potentially earn money for your community through partnerships.
Offering discounts from quality partners makes the membership more valuable. It benefits both your community and the partner businesses.
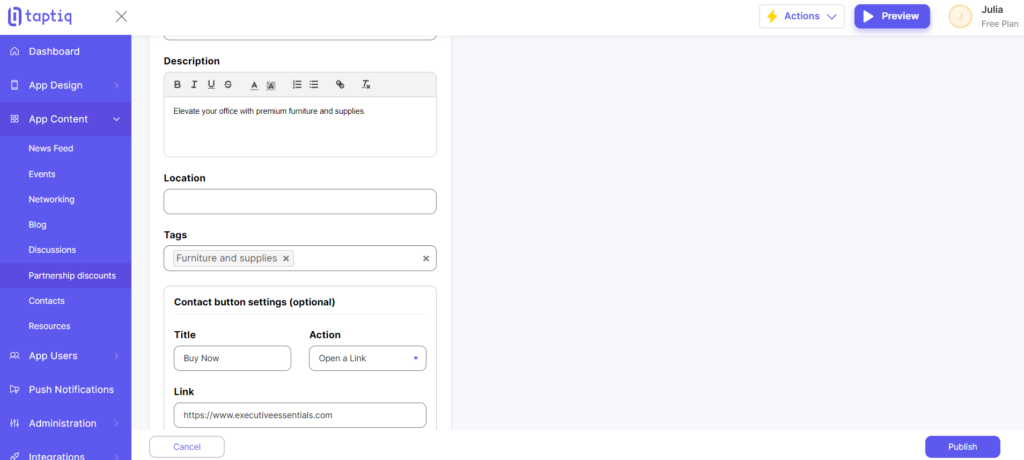
To create a new discount item, follow these steps:
- Go to App Content -> Partnership Discounts, and click Add New Item.
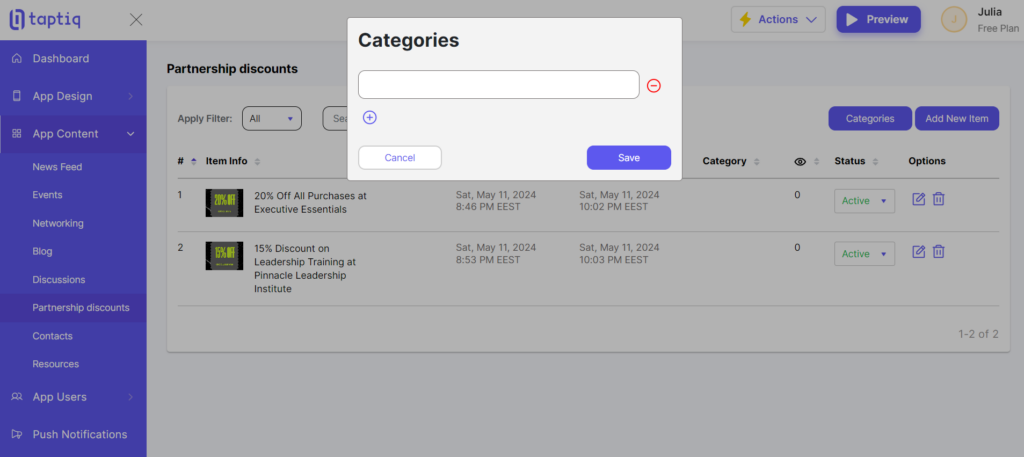
- Optionally, you can create categories to organize the discounts (but we won’t cover that in this tutorial).
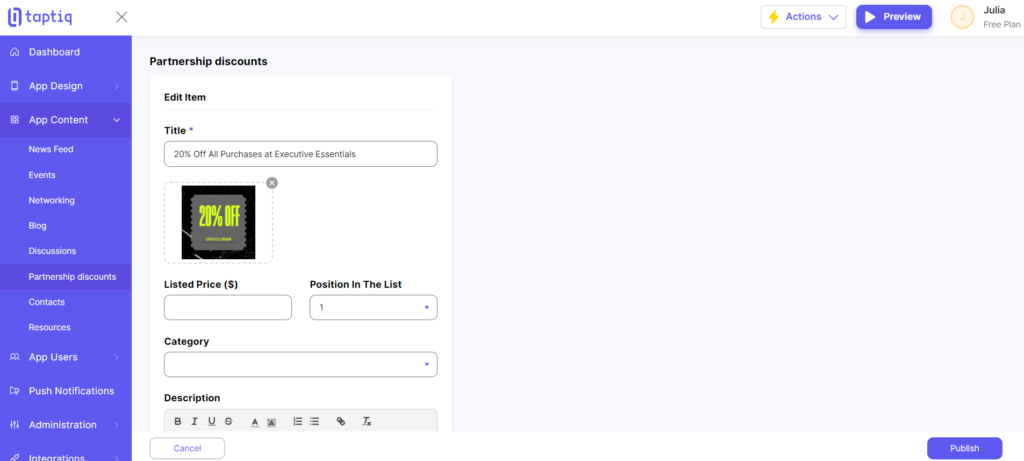
- Give it a title.
- Upload an image showing the discount percentage, promo code, etc.
- Add a description of the offer. Includ any rules or expiration dates.
- Add tags, if you want, to help users find discounts easily.
- Set up a contact button to send users to the partner’s website. Provide a button title, set the action to Open a Link, and add the partner’s website URL where members can use the discount.
Contacts
Your community exists across multiple platforms, so it’s helpful to provide links to your other social media pages right inside the app. The Contacts module lets you:
- Make it easy for members to connect with your community on Facebook, Instagram, Twitter, etc. from one place.
- Keep members updated on where else they can find and engage with your community online.
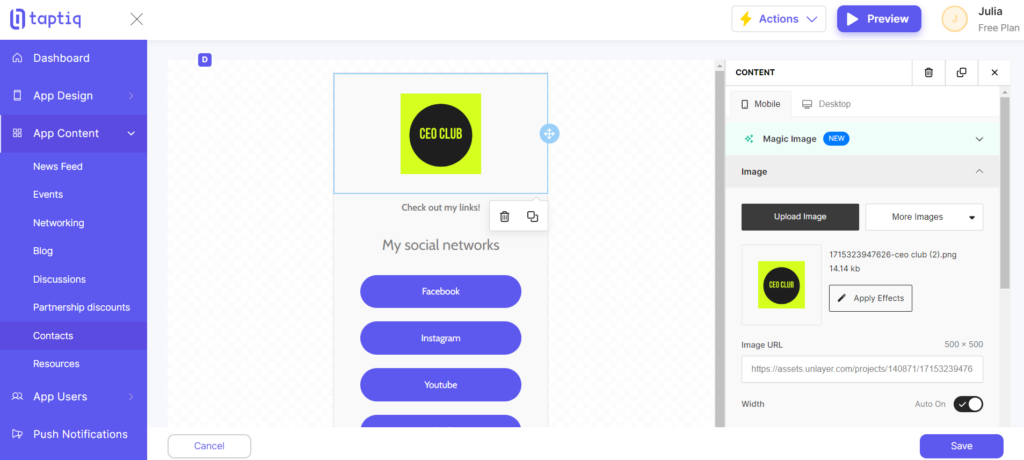
Having quick access to all the places your community is present builds better connections between members, no matter where they prefer to interact. For this tutorial, we’ll use demo content to create a simple Contacts screen with necessary links, but you can experiment and implement any design you want.
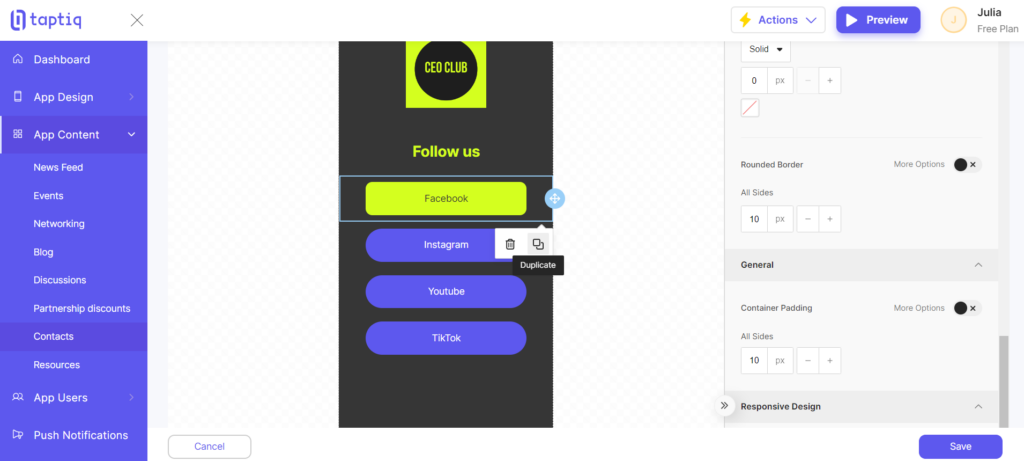
First, we’ll replace the demo image on the page with your app’s logo.
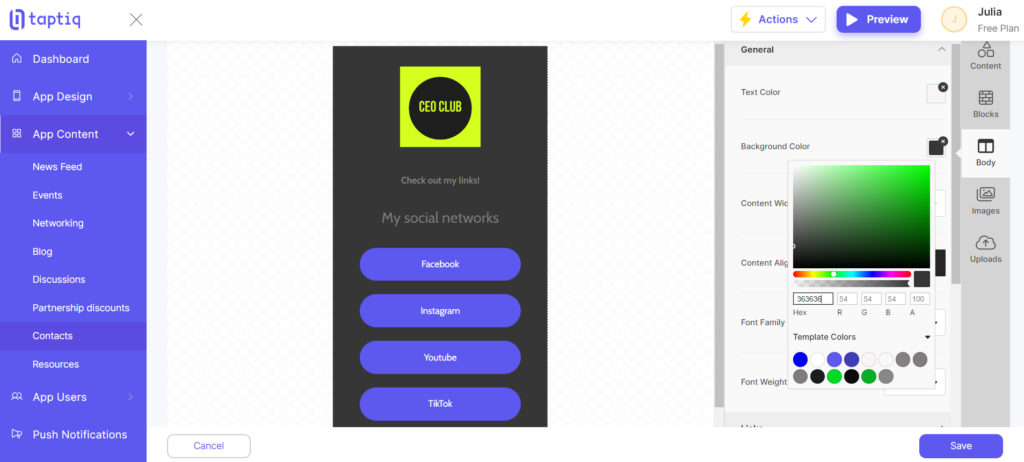
Then, we’re going to change the background color to match the dark theme of the app. To do this, go to Body -> General -> Background color (we used #363636). CopyRetr
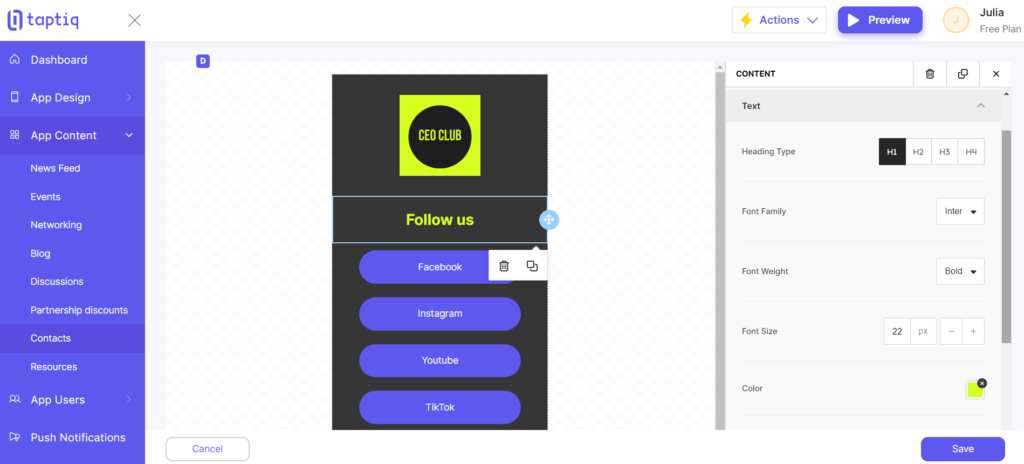
Next, let’s set up the heading. Select it on the screen, go to Text: Font Family (Inter), Font Weight (Bold), Color (choose the one that you use as an accent for your app).
Don’t forget to remove any elements we don’t need for our design.
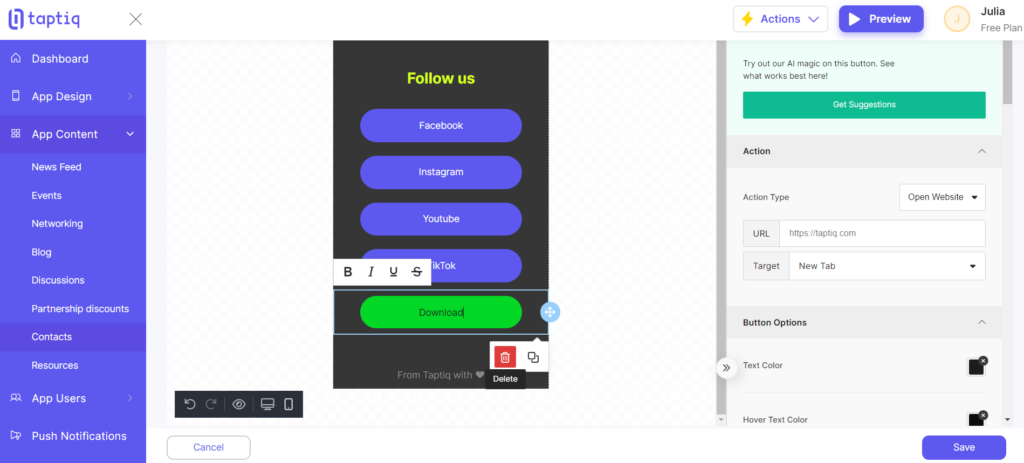
Now let’s adjust the button:
- In Action, set Action Type to Open Website and provide the link to your page on Facebook, Instagram, etc.
- In Button Options, set Text Color/Hover Text Color to the same color and Background Color/Hover Background Color to your accent color.
- In Spacing, set the Rounded Border to 10px on all sides.


To avoid additional manual work, just duplicate the button that is ready, rename it, and provide the necessary URL.
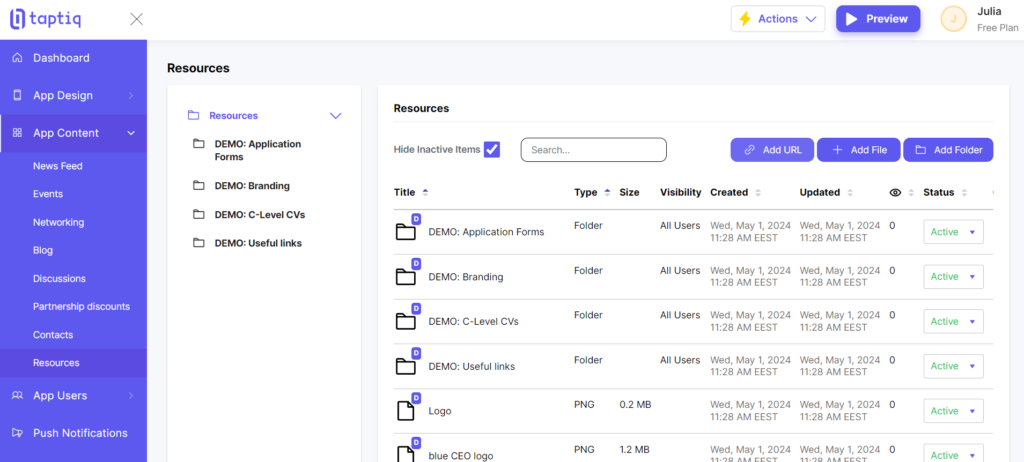
Resources
The File Manager allows you to provide valuable resources like documents, guides, media files, and more to your members. Here are some great reasons to include it in your app:
- Share Helpful Information: Upload how-to guides, tutorials, presentations, or other educational content to help your members learn and grow.
- Document Storage: Keep things like meeting notes, event recordings, newsletters, and other important community files in one organized place that members can easily access.
- Industry Resources: Build a library of resources specific to your community’s interests like research papers, case studies, or best practices. It makes your app a go-to source of information.
- Multimedia: Share different types of media with your members, such as images, videos, and audio files to make the app more engaging.
- Privacy Control: Since only you, as the owner, can upload, you have full control over what gets shared, allowing you to keep any sensitive information private if needed.
🔗Learn how to manage and upload files
Build Your Custom Community App
This tutorial provides an example of how to build a community app with essential features like news feed, events, member directory, blog, discussions, chat, partner discounts, contacts, and resources. Following the steps will help you create a centralized app where your members can communicate, engage, make connections, and access valuable information. However, remember that this is just an example – you should feel free to experiment, customize the app to fit your unique community needs, and try implementing beautiful designs using custom screens. Build your custom community app by following this tutorial as a starting point, then make it your own!